
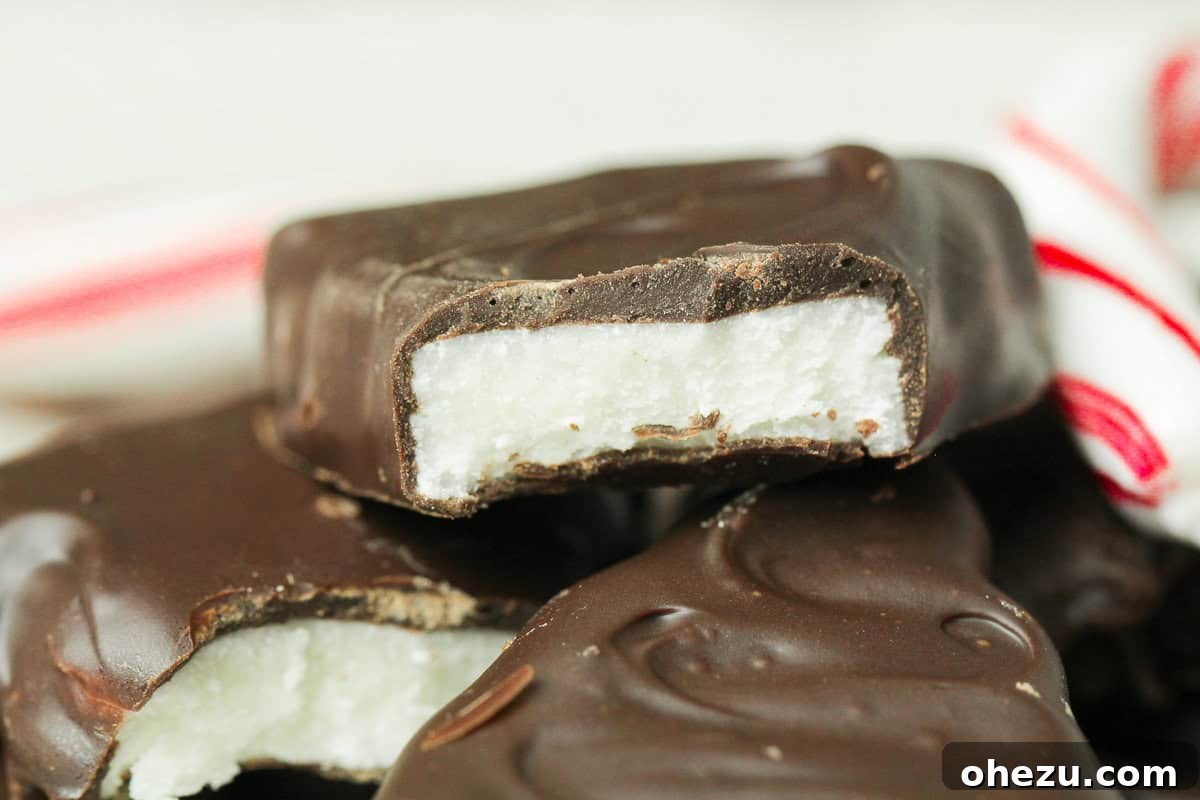
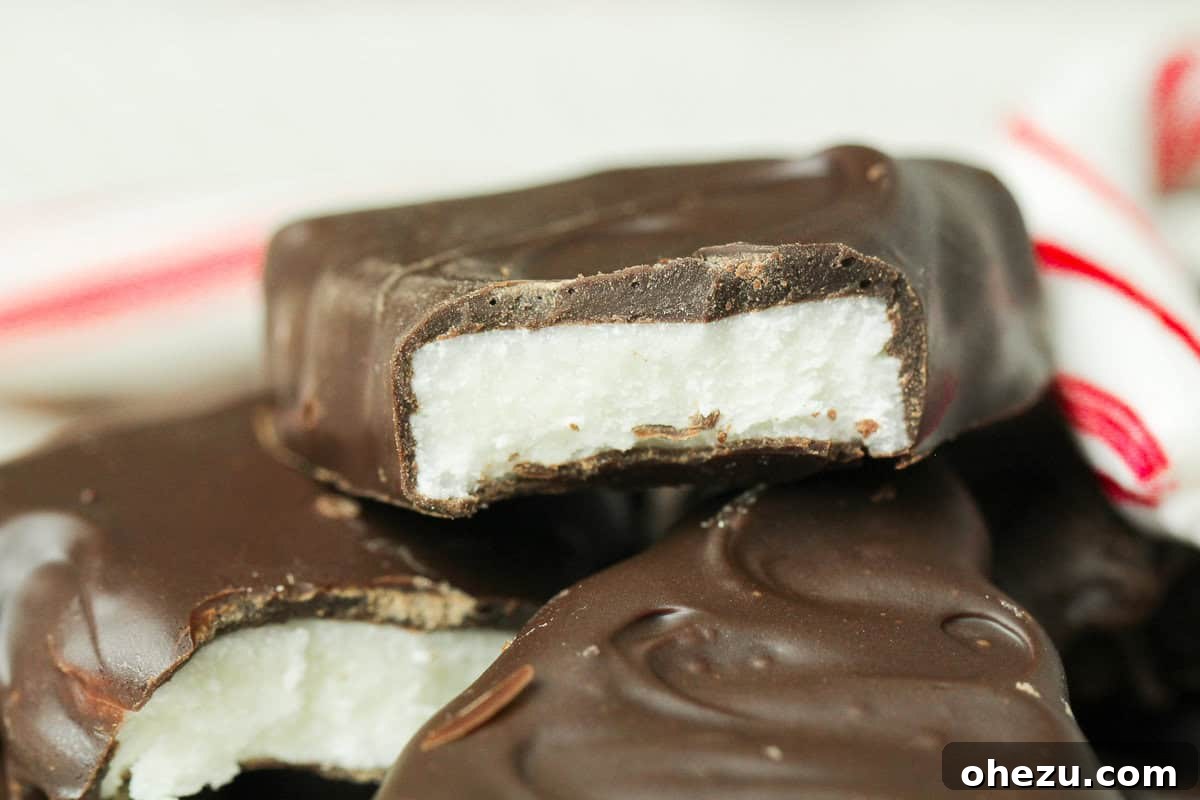
Craving that signature cool mint and rich dark chocolate combination? Look no further! This spectacular York Peppermint Patty Copycat Recipe is so incredibly close to the original, it gives the store-bought version a serious run for its money. With just five simple ingredients and less than an hour of hands-on time, you can be enjoying these delectable treats in no time. Prepare to impress yourself and everyone lucky enough to taste them!
While the holiday season is a fantastic excuse to whip up a batch, shaping them into festive Christmas designs, this versatile recipe isn’t limited to just one time of year. Imagine spooky ghost patties for Halloween, cute hearts for Valentine’s Day, or simply opt for the traditional circle shape to replicate the classic York Peppermint Patty look. These homemade delights are perfect for gifting, parties, or simply satisfying your own sweet tooth whenever the craving strikes. They offer a refreshing burst of peppermint encased in a perfectly crisp chocolate shell, creating a truly irresistible experience.

The Secret to Perfection: Understanding Tempered Chocolate
For these peppermint patties, we’re going beyond simply melting chocolate. We’re going to delve into the art of tempering chocolate, a technique that might sound intimidating but is surprisingly easy, especially with our microwave method. Tempering is the crucial step that elevates your homemade candies from good to absolutely extraordinary, ensuring your chocolate coating sets beautifully with a satisfying “snap” rather than melting instantly upon touch.
What is Tempered Chocolate and Why It Matters?
Tempered chocolate boasts a truly superior quality. It presents a flawless, glossy, and inviting appearance, free from any dullness or unsightly white streaks. When you bite into it, you’ll experience a distinct, firm snap, followed by a smooth, luxurious melt in your mouth that allows the full depth of the chocolate flavor to shine through. This ideal texture and aesthetic are achieved by carefully controlling the crystallization of cocoa butter within the chocolate.
Conversely, untempered chocolate lacks this refined quality. It often appears dull, streaky, or even mottled with white or gray patches (known as “bloom”). Its texture can be rough, tacky, or even waxy, lacking that desirable snap. Moreover, untempered chocolate is far more susceptible to changes in temperature and humidity, meaning it melts more easily, can be messy to handle, and has a shorter shelf life. While some very simple candy recipes might forgo tempering, treats like truffles, dipped confections (like our peppermint patties!), and artisanal chocolate bars absolutely require proper tempering to achieve their signature professional appearance, delightful taste, and perfect texture.

Mastering Microwave Tempering: An Easy Approach
Forget the fuss of a double boiler! For this recipe, we’re embracing the simplest and most accessible method for tempering chocolate: the microwave. Our goal is to keep this recipe as straightforward as possible, allowing you to achieve professional results without unnecessary complexity. So, kick back, relax, and let’s get tempering the easy way!
Step-by-Step Microwave Tempering Guide
- Initial Melt: Place approximately 2⁄3 of your chosen chocolate chips into a microwave-safe bowl. Heat for 1 minute, but break this into 20-second intervals. After each 20-second burst, remove the bowl and stir the chocolate thoroughly. This prevents scorching and ensures even melting. Continue until the chocolate is nearly, but not completely, melted. You should still see a few small lumps.
- Achieve Target Temperature: Remove the bowl from the microwave and stir continuously. The chocolate’s temperature should ideally fall between 100-110°F (38-43°C). If it hasn’t reached this range, reheat for additional 10-second intervals, stirring vigorously after each, until the desired temperature is achieved. Use a reliable food thermometer for accuracy.
- The Seeding Process: Now, add the remaining 1⁄3 of your chocolate chips to the warm, melted chocolate in small amounts. This technique, known as “seeding,” is critical. Continuously stir the chocolate as you add the new pieces, ensuring each addition is completely melted before adding more. The cooler, solid chocolate “seeds” the melted chocolate, encouraging the formation of stable cocoa butter crystals.
- Reaching Working Temperature: As you continue to stir and seed, you’ll notice the chocolate beginning to thicken and develop a beautiful cool, shiny, and smooth consistency. Keep stirring until the chocolate reaches a working temperature range of 84-91°F (29-33°C). At this point, your chocolate is perfectly tempered and ready for dipping! The transformation from a simple melt to a glossy, workable temper is truly satisfying.

How to Confirm Your Chocolate is Perfectly Tempered
There’s a simple and effective test to confirm your chocolate is perfectly tempered. Dip the tip of a clean utensil (like a knife or spoon) into the chocolate, then set it aside in a cool room temperature environment (ideally 65° to 70°F or 18-21°C). If your chocolate is truly in temper, it will harden remarkably quickly—usually within 3 to 5 minutes—becoming firm and beautifully shiny. When you gently touch it, your finger should come away completely clean, without any trace of melted chocolate. This rapid setting and glossy finish are the hallmarks of successful tempering.
How to Keep Chocolate in Temper While You Work
Once your chocolate has been successfully tempered, it’s essential to use it before it cools down too much and sets. The ideal working temperature range is generally between 84°F and 86°F (29-30°C). If your chocolate starts to cool and become too thick to work with, but is still fairly liquid, it can often be gently reheated back to a usable consistency. Heat it in the microwave for very short bursts, just 5 to 10 seconds at a time, stirring thoroughly and checking the temperature after each interval. Never overheat it! By diligently keeping your chocolate within this optimal temperature range, it will remain in temper and liquid enough for smooth, consistent dipping, allowing you to coat all your peppermint patties beautifully.

Crafting Your Homemade Peppermint Patties: From Dough to Delight
Making the minty centers for your peppermint patties is surprisingly straightforward and incredibly fun. The key is to achieve a dough-like consistency that is firm enough to hold its shape after cutting, ensuring your finished patties look as good as they taste.
Preparing the Minty Center
In a spacious mixing bowl, begin by combining the sweetened condensed milk with both the peppermint and vanilla extracts. Using a hand mixer (or a stand mixer if you prefer), mix these ingredients together until the extracts are thoroughly incorporated, creating a fragrant, creamy base. Gradually add the powdered sugar, a portion at a time, mixing until a pliable, thick “dough” consistency is achieved. You might need to adjust the amount of powdered sugar slightly – the goal is a dough that is firm enough to handle without sticking excessively, yet still soft enough to roll out.
Shaping and Chilling Your Patties
Prepare your workspace by laying down sheets of cling wrap on your counter and dusting them liberally with extra powdered sugar. This prevents sticking and makes cleanup a breeze. Turn your peppermint dough out onto this prepared surface. Gently knead the dough, adding small dashes of powdered sugar if it feels too soft or “melty.” The dough should be firm and cooperative, able to hold a clean shape. Coat your rolling pin with powdered sugar and roll the dough evenly to about 1/4 inch thickness. Use a cookie cutter of your choice – classic circles, festive stars, or charming hearts – to cut out your patties. Carefully transfer the cutout shapes to a baking sheet lined with parchment or wax paper. If any pieces lose their shape, simply rework the dough with a bit more powdered sugar and re-cut. Once all your patties are on the baking sheet, place them in the freezer for about 20 minutes. This chilling step is vital, as it hardens the shapes, making them much easier to dip in chocolate without falling apart.
Dipping and Finishing Your Masterpieces
Once your peppermint centers are perfectly chilled and firm, it’s time for the chocolate coating. Using a fork, gently drop each patty into your prepared tempered chocolate. Ensure it’s fully submerged and coated. Lift the patty with the fork, gently tapping the edge of the bowl to allow any excess chocolate to drip off. This creates a thin, even coating. Carefully place the chocolate-dipped patty back onto the lined baking sheet. Repeat this process for all your patties. The beauty of tempered chocolate is that it should harden successfully at room temperature, but for instant gratification, you can pop the baking sheet into the fridge or freezer for a few minutes. Once completely hardened, your homemade York Peppermint Patties are ready!
Elevating Your Peppermint Patties: Presentation and Gifting
The joy of homemade treats extends beyond just the delicious taste – it’s also about the presentation. These peppermint patties, with their fresh minty flavor and crisp chocolate shell, make fantastic gifts for any occasion, or simply a delightful indulgence for yourself.
Creating That Iconic York Peppermint Patty Look
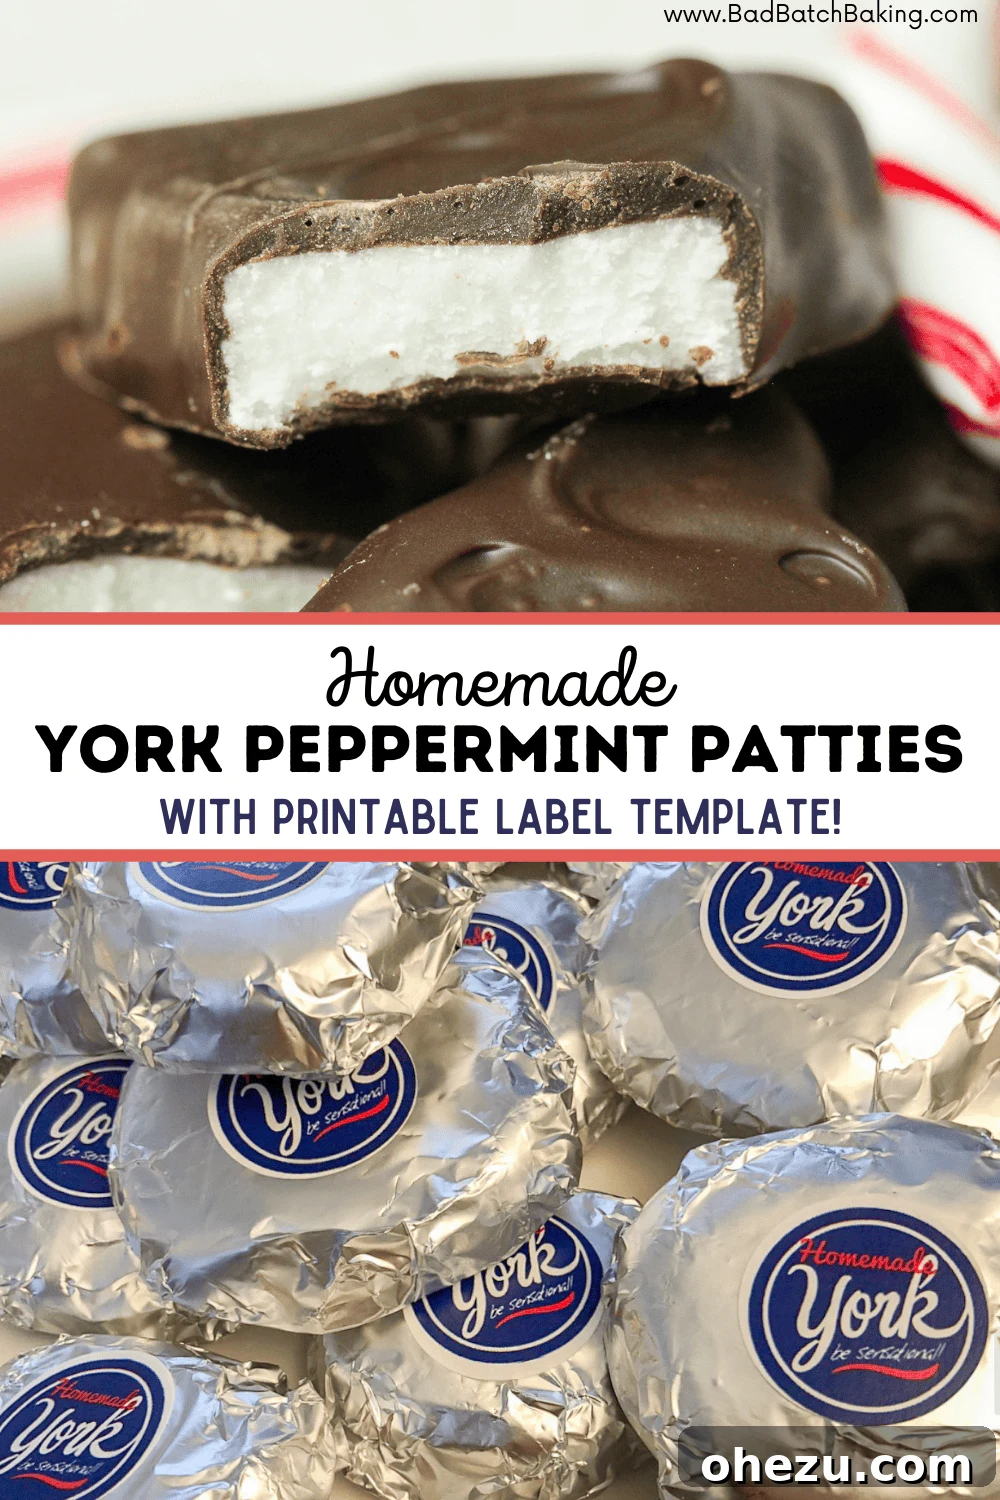
To truly achieve the iconic, store-bought look, wrap each hardened peppermint patty individually in small pieces of foil. This not only protects them but also adds a professional touch that echoes the classic York Peppermint Patty packaging. To take your presentation a step further and personalize them, I designed custom labels. Avery 6450 – 1″ round printable stickers proved to be the absolute perfect size for this purpose. I found them readily available at my local Office Depot, but they are also conveniently accessible online through retailers like Amazon. These little details transform your homemade treats into something truly special and gift-worthy.
I’ve made my personalized labels available to help you save time and effort. You can easily download them and print them yourself. Alternatively, if you’re feeling creative, Avery’s free Design Center allows you to craft your own unique labels to perfectly match your theme or personal branding. See below for download instructions and to get started on your customized packaging!
Get My Homemade Peppermint Patty Printable Labels!
Ready to put the finishing touch on your delightful homemade peppermint patties? I’ve made my custom-designed labels available just for you. Click HERE to download my customized Homemade York Peppermint Patty labels. For these labels to fit perfectly, you will need the corresponding Avery 6450 Round Labels. You can easily purchase them on Amazon here:
Avery Multiuse Removable Round Labels with Sure Feed, 1″, 945 White Labels (6450) (06450)
Frequently Asked Questions (FAQ)
Can I use different types of chocolate?
Absolutely! While dark chocolate provides the classic contrast for peppermint, feel free to experiment. Milk chocolate will yield a sweeter, creamier patty, while semi-sweet chocolate offers a good balance. White chocolate can also be used, but it’s typically more challenging to temper and may require a different tempering temperature range. Always ensure you’re using high-quality chocolate chips or baking chocolate for the best results.
How long do homemade peppermint patties last?
When stored in an airtight container, either at room temperature or in the refrigerator, homemade peppermint patties will stay fresh for up to 2-3 weeks. Keeping them in the fridge can help maintain their firm texture and extend their shelf life, especially in warmer climates. They can also be frozen for longer storage, up to 2-3 months. Just be sure to thaw them in the refrigerator before serving.
Can I adjust the mint flavor?
Certainly! Peppermint extract can vary in strength, and personal preference plays a big role. Start with the recommended amount, then taste a small piece of the raw peppermint dough. If you desire a stronger minty kick, add a few more drops of extract, mixing well, until you reach your perfect flavor intensity. Be careful not to add too much, as it can quickly become overwhelming.
What if my chocolate doesn’t temper properly?
Don’t worry, tempering takes practice! If your chocolate doesn’t set quickly, looks dull, or has streaks, it means it’s out of temper. The good news is, you can usually re-temper it. Simply reheat the chocolate gently, stirring constantly, until it reaches the initial melting temperature (100-110°F), then repeat the seeding process carefully. Patience and a good thermometer are your best friends here!
Explore More Copycat Creations!
Loved creating these classic treats? If you enjoy replicating your favorite store-bought delights at home, be sure to check out these other fantastic copycat recipes:
- Hostess Suzy Q’s Copycat Recipe
- Cheesecake Factory Orange Chicken Copycat Recipe
- Chicken Alfredo Pizza Fritta Olive Garden Copycat Recipe
- Popeye’s Famous Chicken Sandwich Copycat Recipe
- Girl Scout Cookies Tagalong Copycat Recipe
- Entenmann’s Devil’s Food Cake Donut Copycat Recipe
York Peppermint Patty Copycat Recipe

Ingredients
- 3/4 cup sweetened condensed milk (a little more than half a can, you can eyeball it)
- 2 teaspoons peppermint extract
- 1/2 teaspoon vanilla extract
- 4 cups powdered sugar (plus extra for rolling out)
- 1 cup semi-sweet (60%) chocolate chips
Instructions
Prepare Work Station
-
Create a sanitized workspace, such as by layering sheets of cling wrap onto your counters, and dust it liberally with powdered sugar. This prevents sticking.
-
Prepare a landing area for your patties by lining a baking sheet with parchment or wax paper. This is where you will place your cutout patties.
Peppermint Patties
-
In a large mixing bowl, combine the sweetened condensed milk with both the peppermint and vanilla extracts. Use a hand mixer (or stand mixer) to mix thoroughly until the extracts are well incorporated.
-
Gradually add the powdered sugar in portions, mixing until you reach a thick, pliable “dough” consistency. You may need to add a little extra powdered sugar to achieve the desired firmness.
-
Turn the dough out onto your prepared, powdered sugar-dusted workspace. Knead the dough gently, adding small dashes of powdered sugar as needed if the dough becomes sticky or too soft. You want a consistency that will hold a firm shape when cut.
-
Coat a rolling pin in powdered sugar and roll out the dough to an even 1/4 inch thick. Using your chosen cookie cutter, cut out individual patties and carefully place them onto the prepared baking sheet. If any pieces lose shape, gather the scraps, rework with more powdered sugar, and re-cut.
-
Place the baking sheet with the cutout patties into the freezer for approximately 20 minutes to chill and harden them. This step is crucial for easy dipping.
Tempered Chocolate Coating
-
Place 2⁄3 of the chocolate chips into a microwave-safe bowl. Melt for one minute, in 20-second intervals, stirring thoroughly between each interval. Continue until the chocolate is nearly completely melted.
-
Remove from the microwave and stir. The temperature should be between 100-110°F (38-43°C). If necessary, reheat in 10-second intervals, stirring after each, until the correct temperature is reached.
-
Add the remaining chocolate chips to the bowl in small amounts, stirring continuously. Ensure that each addition of chocolate is completely melted before adding more.
-
The chocolate will begin to thicken and become cool, shiny, and smooth as you continue stirring and “seeding” it. Once it has reached the ideal working temperature range of 84-91°F (29-33°C), the chocolate will be tempered and ready for dipping.
-
Using a fork, carefully drop each chilled peppermint patty into the tempered chocolate, ensuring it’s fully coated. Lift the patty out with the fork and gently tap the edge of the bowl to remove any excess chocolate. Place the coated patty back onto the lined baking sheet. Repeat until all patties are dipped. They should harden successfully at room temperature, but you can place them in the fridge or freezer for a few minutes for a quicker set.
-
Once completely hardened, wrap each peppermint patty individually in foil to achieve that classic York look. Store them at room temperature or in the fridge in an airtight container for optimal freshness.
I genuinely hope you enjoy making and savoring this homemade York Peppermint Patty Recipe. These treats are a labor of love that truly pay off with every minty, chocolatey bite. Please feel free to share your comments below; I’d love to hear about your creations! And don’t forget to tag me in your photos on social media @BadBatchBaking and be sure to use #BadBatchBaking. ENJOY!!