
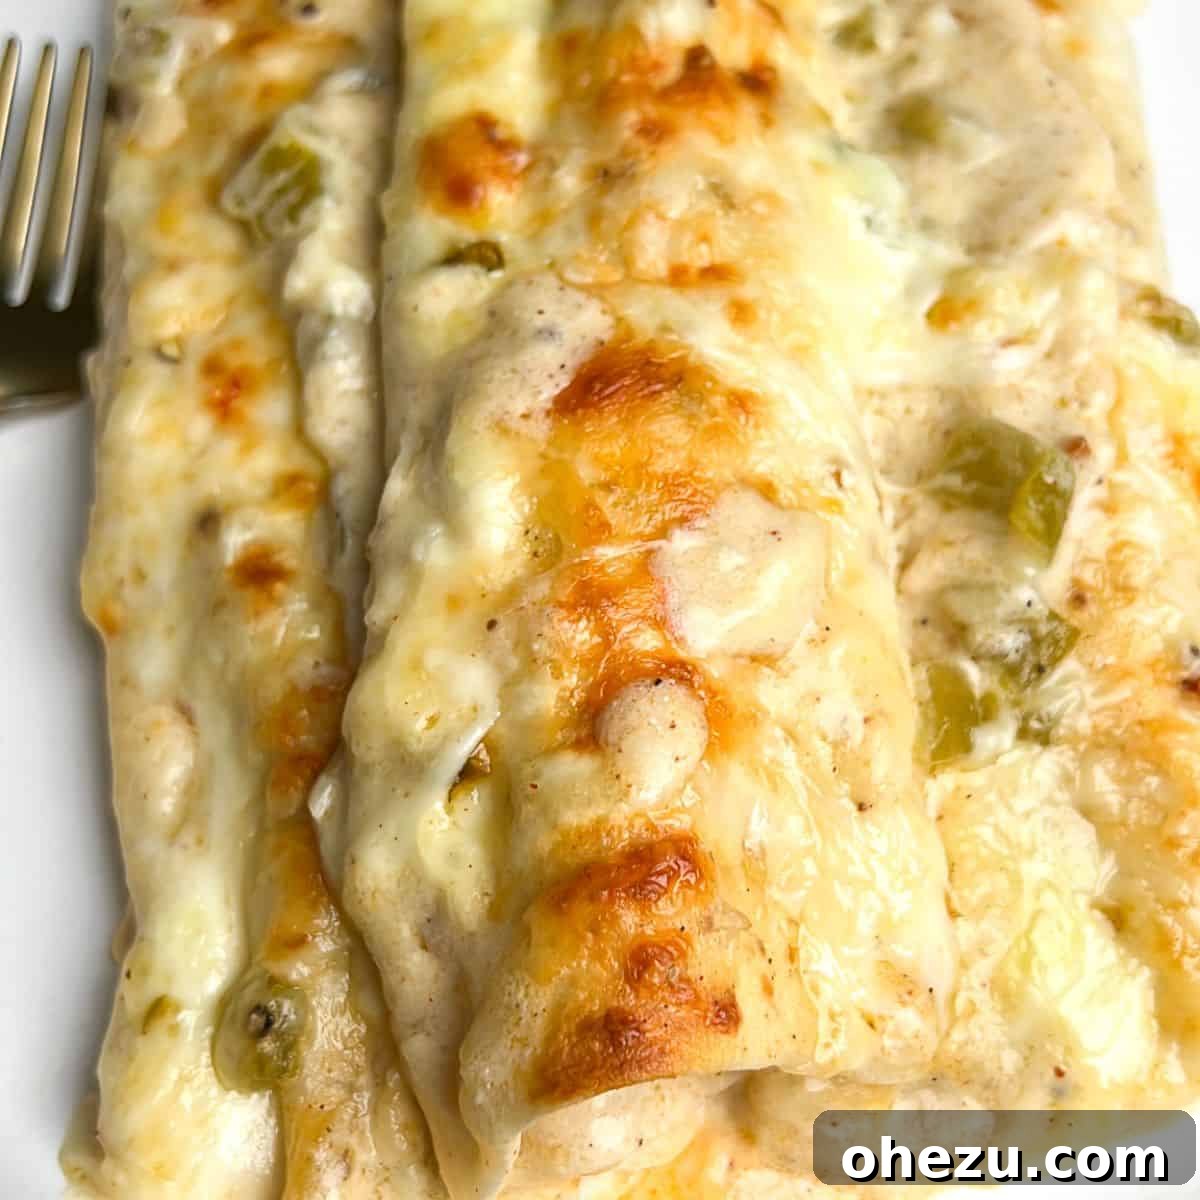
Indulge in the rich, comforting flavors of these incredible Green Chile Chicken Enchiladas. This recipe delivers a truly unforgettable experience, combining succulent rotisserie chicken with a luxurious, homemade green chile sour cream sauce and a generous blanket of melted cheese, all tucked inside soft flour tortillas. It’s a dish so robust in flavor and satisfying in texture, it promises to elevate your weeknight dinner into a restaurant-quality feast.
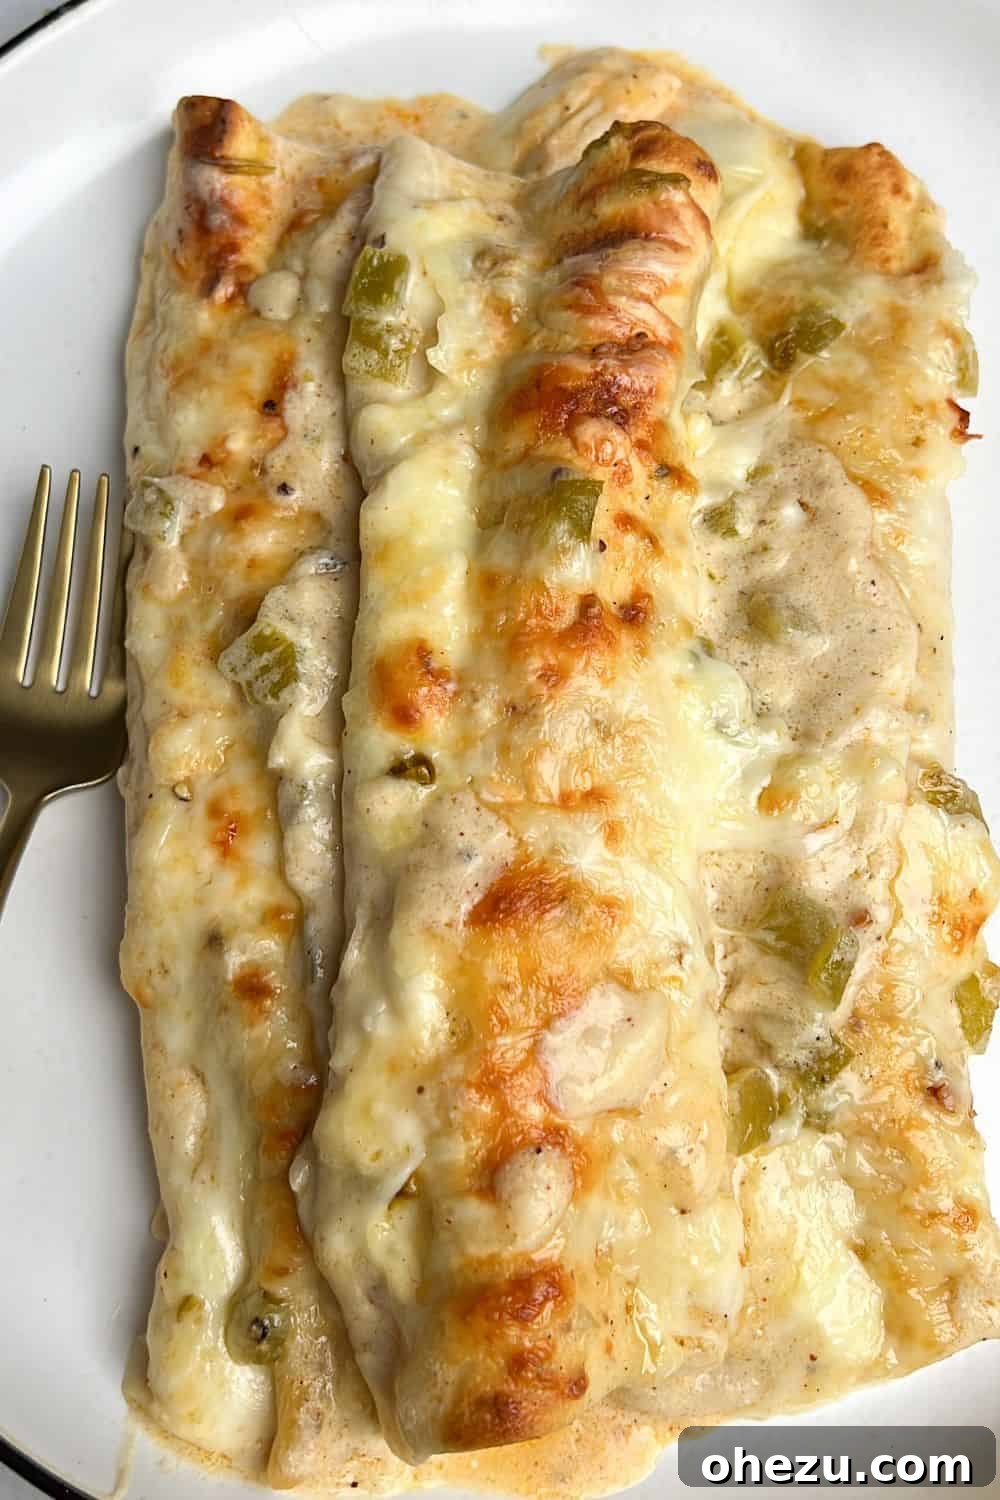
No Mexican-inspired meal is complete without the perfect accompaniment, and these white chicken enchiladas truly shine when paired with complementary sides. To create a well-rounded and exciting spread, I highly recommend serving them alongside my vibrant The Best Street Corn Salad, which offers a fresh, zesty, and tangy contrast to the rich enchiladas. For a creamy and flavorful appetizer, our Chili Lime Corn Dip is an absolute must-try, perfect for dipping tortilla chips while dinner bakes. If you’re a fan of restaurant-style sauces, our The Best Chuy’s Creamy Jalapeno Copycat Recipe makes an excellent drizzling sauce or an additional dip that will impress. For a warm and easy option, consider my Slow Cooker Mexican Street Corn Dip. And for those nights when you want an epic feast, these enchiladas are a fantastic pairing with my hearty Birria Taco Recipe (Instant Pot, Slow Cooker, or Dutch Oven), creating a truly memorable dining experience.
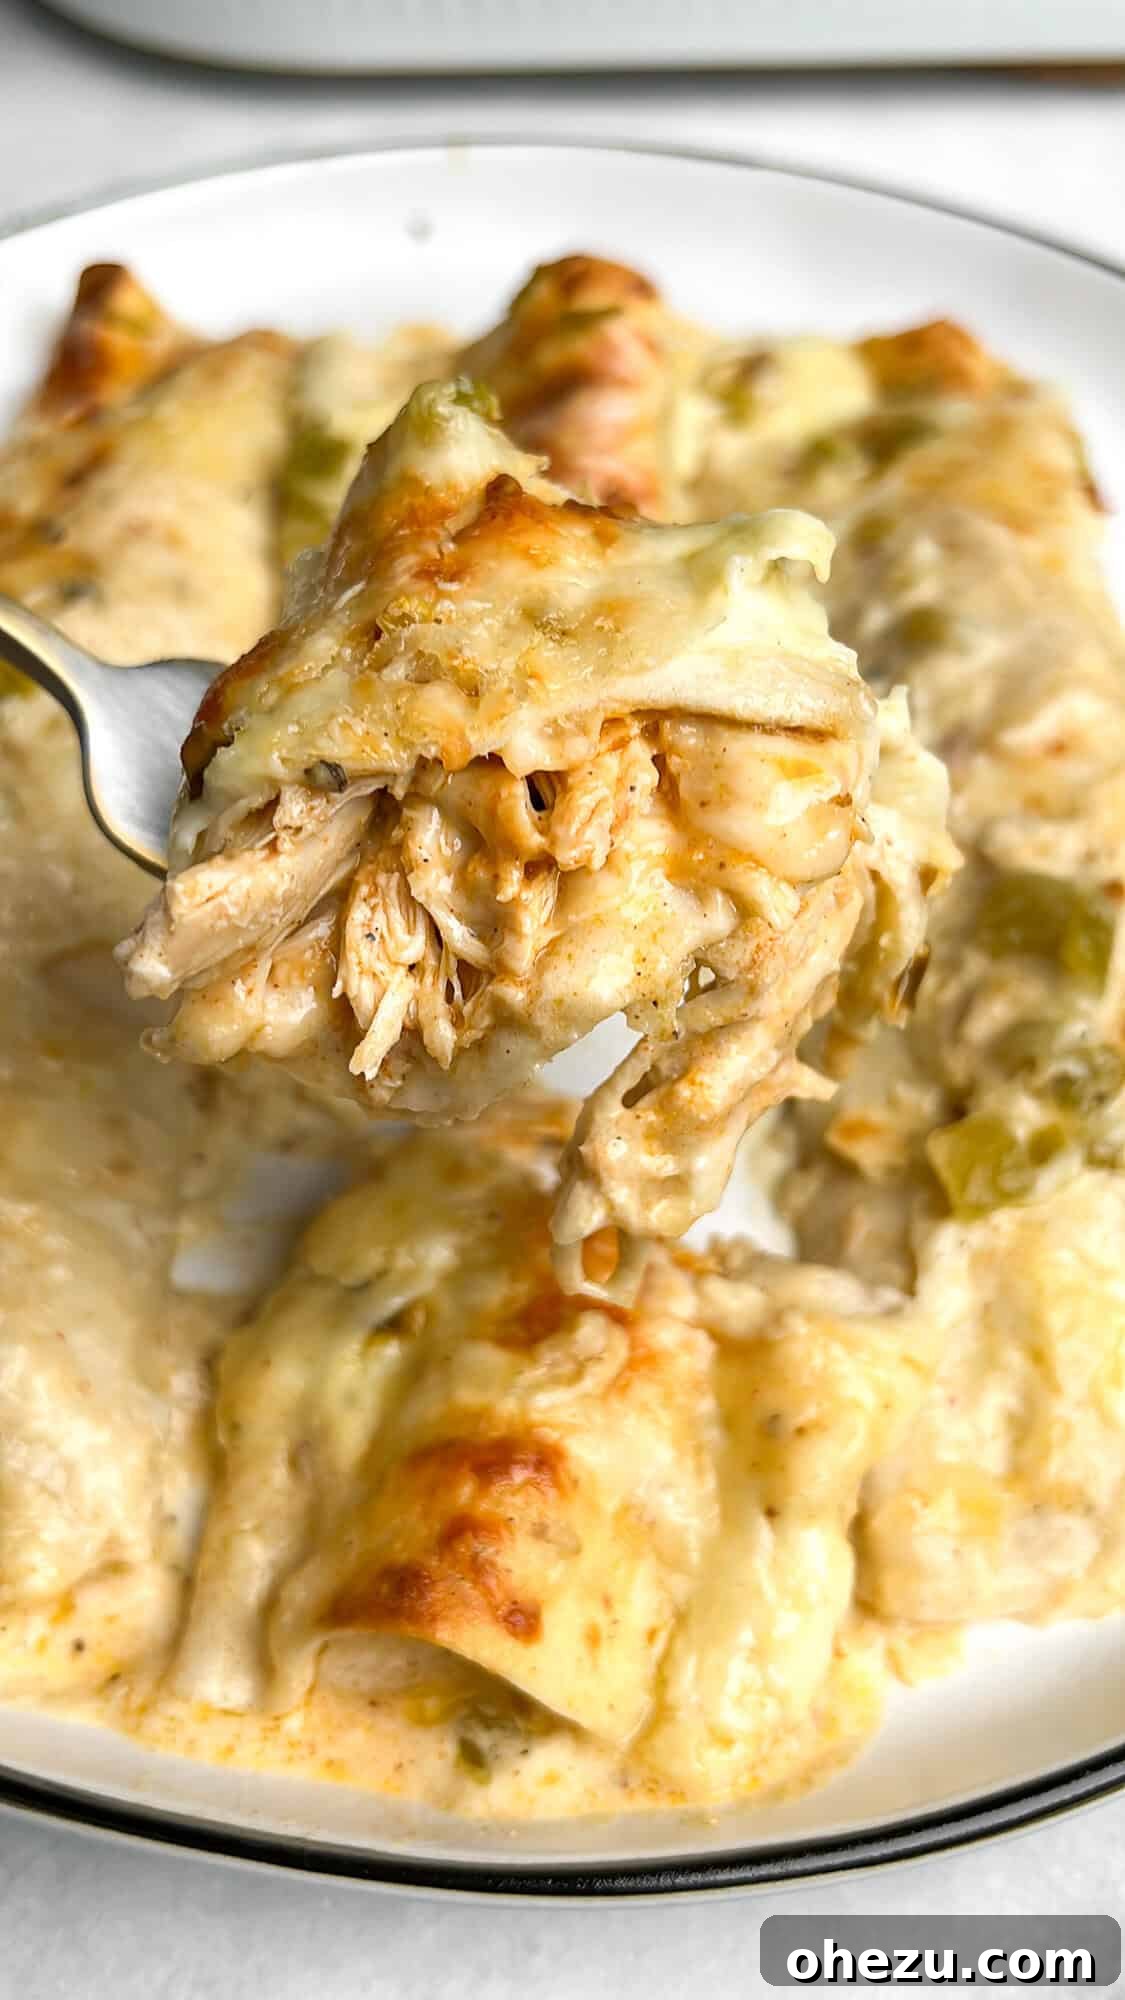
Elevating the Classic: Why These Green Chile Chicken Enchiladas Stand Out
Forget everything you thought you knew about traditional white chicken enchiladas. Often, they can fall short, lacking the vibrant punch of flavor and the satisfying depth that makes a dish truly memorable. My family and I understood this common dilemma, which spurred us on a culinary journey to transform a basic recipe into something extraordinary. The result? These Green Chile Chicken Enchiladas, a truly restaurant-worthy creation that promises to become a staple in your home.
What sets this recipe apart is our meticulous attention to flavor, particularly within the star of the show: the decadent white enchilada sauce. Unlike many bland versions, ours is a masterpiece of culinary craftsmanship, featuring a robust homemade spice blend, fragrant fresh garlic, rich butter, the distinct earthiness of green chiles, the creamy tang of sour cream, and a generous amount of freshly shredded cheese. Each ingredient is thoughtfully selected and combined to create a sauce that is not just creamy, but incredibly flavorful, complex, and utterly mouthwatering. This is not a “plain Jane” enchilada; it’s an experience that will redefine your expectations, making you never want to go back to ordinary white enchiladas again.
The Secret Behind Our Superior Sauce
The foundation of any great enchilada is its sauce, and ours is engineered for maximum flavor. We begin with a traditional roux of butter and flour, carefully cooked to create a nutty base. Fresh minced garlic is introduced to infuse an aromatic depth, followed by chicken stock to build a smooth, luscious consistency. The magic truly happens with the addition of our unique spice blend—featuring cumin, chili powder, paprika, adobo, onion, and garlic powder—which provides warmth and complexity. Finally, the undrained diced green chiles and a generous swirl of sour cream are folded in, creating that signature creamy texture and a delightful tangy finish. The melting cheese in the sauce adds an extra layer of richness and helps bind all the flavors together, ensuring every bite is perfectly balanced and profoundly satisfying.
Essential Ingredients for Truly Flavorful Enchiladas
Success in making these incredible green chile chicken enchiladas hinges on understanding the role of each key ingredient. Here’s a breakdown of what you’ll need and why it matters:
- Chicken: For unparalleled convenience and consistent tenderness, rotisserie chicken is our top recommendation. It’s already cooked, seasoned, and moist, drastically cutting down on prep time. Simply shred it, and it’s ready to absorb the vibrant flavors of the filling. If you prefer to cook your own chicken, boneless, skinless chicken breasts or tenderloins can be poached or baked until tender, then shredded.
- Seasonings, Hot Sauce & Lime: This combination creates the dynamic flavor profile of the chicken filling. Our homemade blend includes essential Tex-Mex spices: cumin, chili powder, paprika, adobo all-purpose seasoning, onion powder, and garlic powder. These ground spices infuse the chicken with savory depth. A touch of hot sauce (such as Valentina or your preferred brand) adds a welcome kick of heat, while fresh lime juice brightens the entire mixture, adding a crucial layer of zest that cuts through the richness.
- Flour Tortillas: We specifically recommend 8-inch taco-sized flour tortillas for this recipe. Their soft, pliable texture makes them incredibly easy to roll without tearing and ensures a tender, melt-in-your-mouth bite once baked. They also absorb the creamy sauce beautifully, becoming wonderfully flavorful. While corn tortillas can be used for a more traditional approach, specific preparation steps are needed to prevent cracking (see below for more details).
- Diced Green Chiles: These are non-negotiable for “green chile” enchiladas! Canned diced green chiles, ideally Hatch chiles for their authentic flavor, impart a mild, earthy heat and a distinct savory note to the sauce. You can choose between mild or hot, depending on your spice preference. Remember to include the liquid from the can, as it adds depth and moisture to the sauce.
- Cheese: A balanced blend of Monterey Jack and Pepper Jack cheese is key. Monterey Jack offers superior meltability and a creamy texture, while Pepper Jack introduces a subtle, spicy warmth that complements the green chiles perfectly. For the absolute best melt and texture, always shred cheese fresh off the block. Pre-shredded cheeses often contain anti-caking agents that can hinder smooth melting.
- Butter, Garlic, & Flour: These ingredients form the essential roux that thickens our luscious white sauce. Unsalted butter provides a rich base, fresh minced garlic adds a pungent, aromatic flavor, and all-purpose flour creates the velvety consistency, ensuring the sauce coats every enchilada perfectly.
- Chicken Stock: Gradual incorporation of chicken stock into the roux is crucial for creating a smooth, lump-free sauce. Using a good quality stock (or broth) enhances the overall savory profile, making the sauce incredibly rich and flavorful.
- Sour Cream: Added at the end, off the heat, sour cream is what gives the sauce its signature tang and luxurious creaminess. It mellows the flavors and adds a delightful richness that is quintessential to white enchilada sauces. Ensure your sour cream is at room temperature before adding to prevent it from splitting.
Mastering the Recipe: How to Make Green Chile Chicken Enchiladas
Creating these sensational green chile chicken enchiladas is a rewarding process. Follow these detailed steps to ensure every bite is perfect, from the flavorful chicken filling to the creamy, rich sauce.
Step 1: Prep Work – Setting the Stage for Success
- Preheat and Prepare Dish: Begin by preheating your oven to a steady 350°F (175°C). Next, lightly coat a 9×13-inch casserole dish with nonstick cooking spray. This small step ensures your delicious enchiladas won’t stick and makes for easier cleanup.
- Combine Your Spice Blend: In a small bowl, meticulously combine your homemade spice blend: this includes 1 teaspoon each of ground cumin, chili powder, paprika, onion powder, and garlic powder, along with 1/2 teaspoon of adobo all-purpose seasoning. Mix these spices thoroughly until well-integrated, then set this aromatic blend aside; it’s vital for both the chicken and the sauce.
- Shred the Cheese: Take your blocks of Monterey Jack and Pepper Jack cheese and shred them fresh. Combine the shredded cheeses in a separate bowl. Freshly shredded cheese melts much more smoothly and tastes better than pre-shredded varieties, which often contain anti-caking agents. Divide this mixture: you’ll use some for the chicken filling, some for the sauce, and the rest for topping the enchiladas.
Step 2: Crafting the Irresistible Chicken Filling
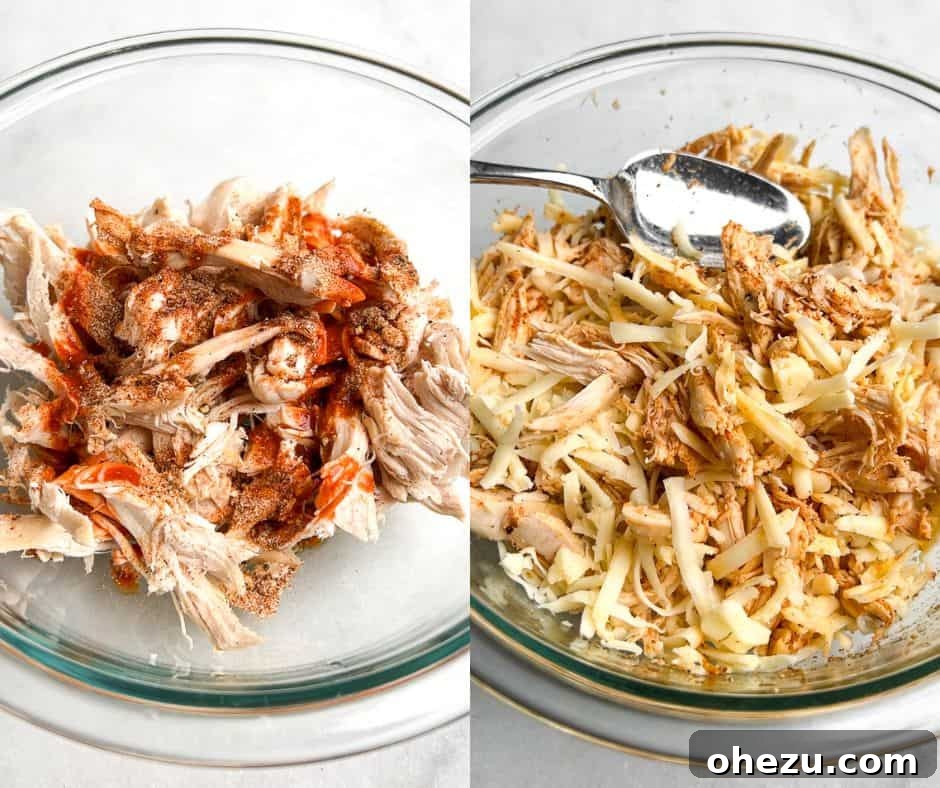
- Season the Chicken: In a medium-sized mixing bowl, combine the finely shredded rotisserie chicken. Add the fresh lime juice, a few dashes of hot sauce (to your taste preference), and precisely half of the spice blend you prepared earlier. Mix all these components together thoroughly, ensuring every strand of chicken is coated evenly. This infuses the chicken with a burst of zesty, spicy, and savory flavor.
- Integrate the Cheese: Now, fold in one cup of your combined shredded Monterey Jack and Pepper Jack cheese into the seasoned chicken mixture. Gently toss everything together. The cheese not only adds another layer of flavor but also helps bind the chicken filling, ensuring it stays moist and delicious inside the tortillas.
Step 3: Preparing the Decadent Green Chile Sour Cream Sauce
- Start the Roux: In a large, heavy-bottomed saucepan, melt the three tablespoons of unsalted butter over medium-low heat. Once the butter has completely melted and is shimmering, add the four cloves of freshly minced garlic. Sauté the garlic for approximately 1 minute, stirring continuously, until it becomes wonderfully fragrant but takes care not to brown it, which can make it bitter.
- Whisk in Flour: Gradually sprinkle in the two tablespoons of all-purpose flour into the melted butter and garlic. Whisk continuously for about 2 minutes. This step is crucial for cooking out the raw flour taste and creating a smooth, golden-brown roux, which forms the thickening base of your sauce.
- Add Chicken Broth: Slowly pour in the 1 1/2 cups of chicken stock, whisking vigorously and constantly as you pour. This ensures that the roux fully incorporates the liquid without forming any lumps, resulting in a perfectly smooth sauce. Continue to whisk as the sauce gently heats and begins to thicken.
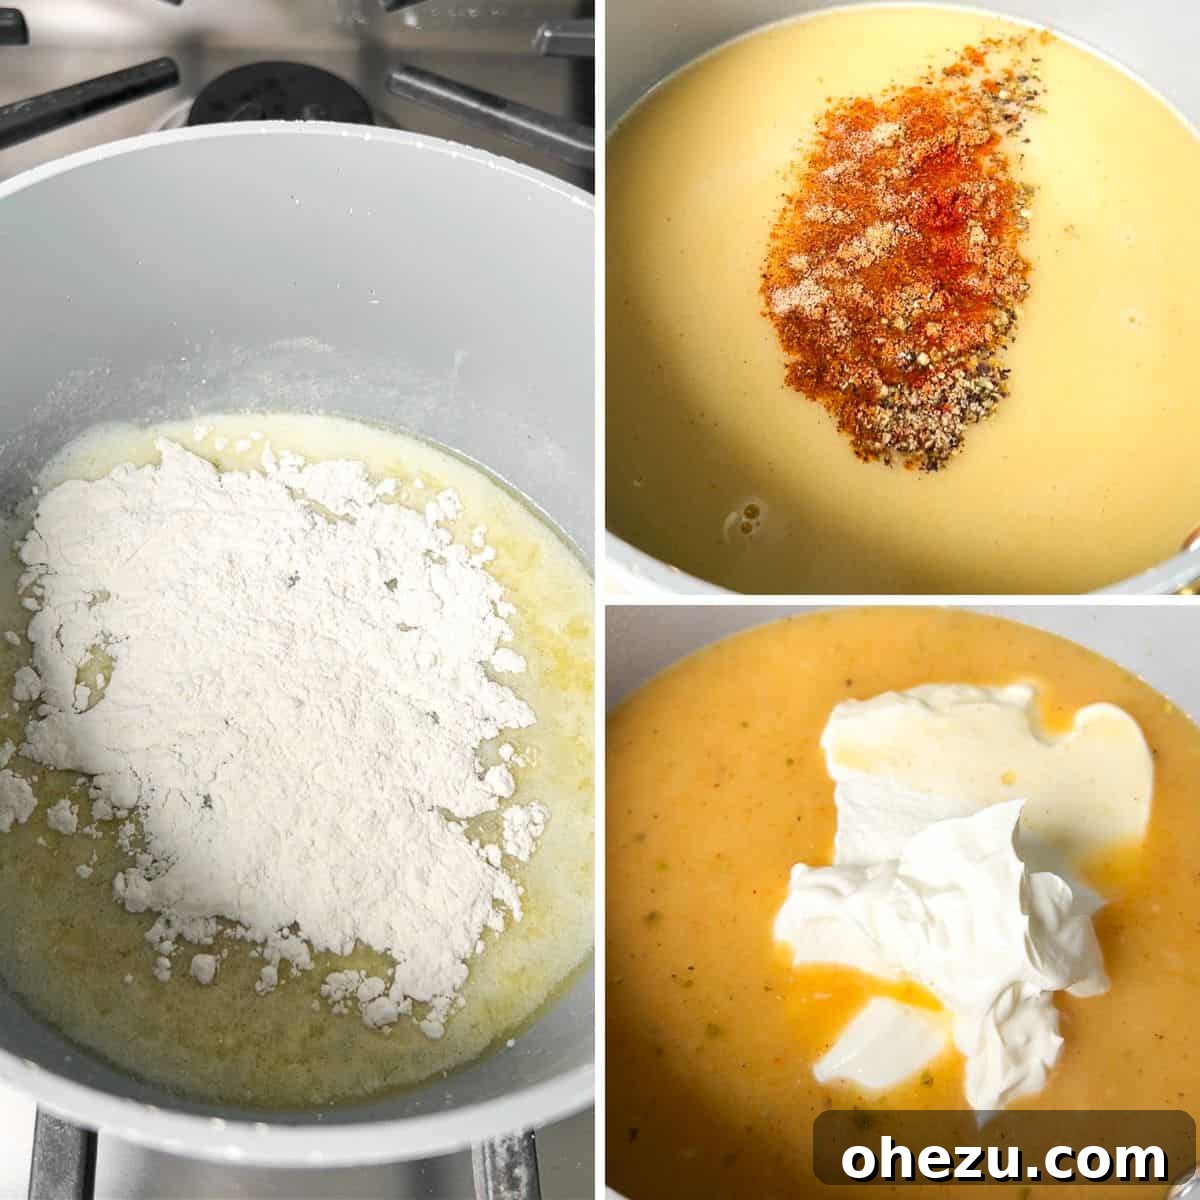
- Infuse with Chiles & Spices: Bring the sauce to a gentle simmer. At this point, stir in the remaining half of your prepared seasoning blend and the entire 4 oz. can of diced green chiles (liquid and all, as the liquid contributes essential flavor and moisture). Allow the sauce to simmer gently for a few minutes, stirring occasionally, until it reaches a desired, thick consistency.
- Fold in Sour Cream and Cheese: Remove the saucepan from the heat. This is important to prevent the sour cream from curdling. Stir in the 3/4 cup of room-temperature sour cream until it is thoroughly combined and the sauce is smooth and creamy. Next, add half of the remaining shredded cheese mixture (reserving the other half for topping the enchiladas). Stir continuously until the cheese has completely melted into the sauce, creating a rich, velvety, and deeply flavorful green chile sour cream sauce.
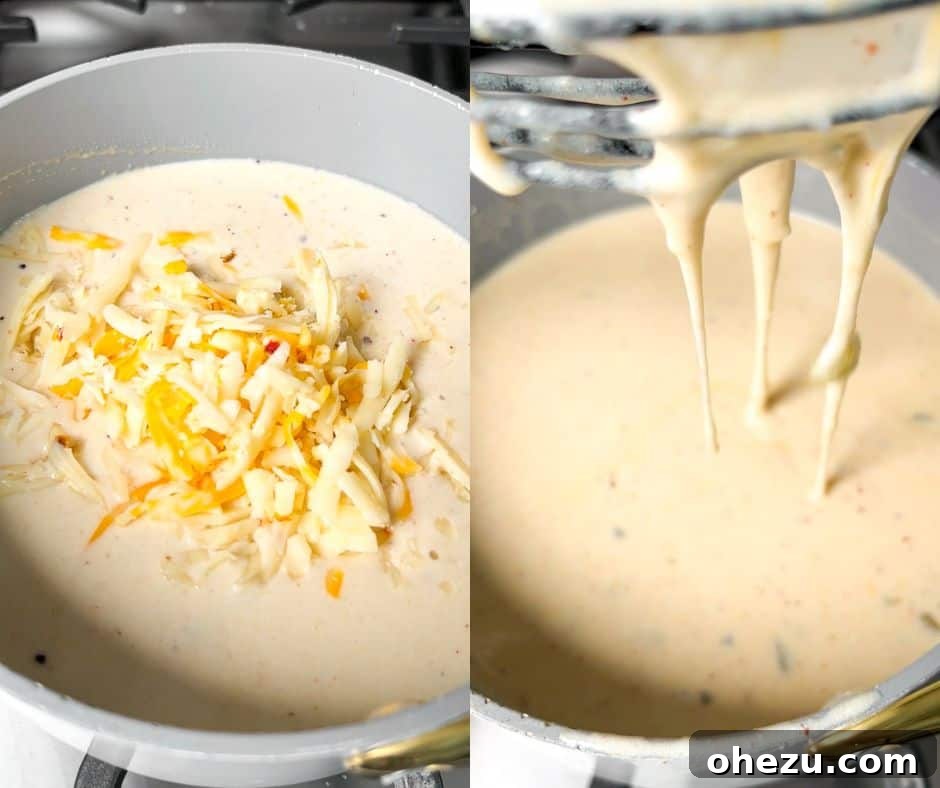
Step 4: Assembling and Baking for Perfection
- Sauce the Dish Base: Generously spread about 1/3 cup of your newly prepared green chile sour cream sauce evenly across the bottom of your greased 9×13-inch casserole dish. This layer is crucial; it helps prevent the tortillas from sticking to the bottom and infuses flavor from the very first bite.
- Fill and Roll the Enchiladas: Take one flour tortilla and lay it flat. Spoon approximately 1/3 cup of the flavorful chicken filling onto the lower half of the tortilla. Carefully roll the tortilla up tightly, creating a neat enchilada. Place the rolled enchilada seam-side down in your prepared casserole dish. Repeat this process methodically with all the remaining tortillas and chicken filling, arranging them snugly side-by-side in the dish.
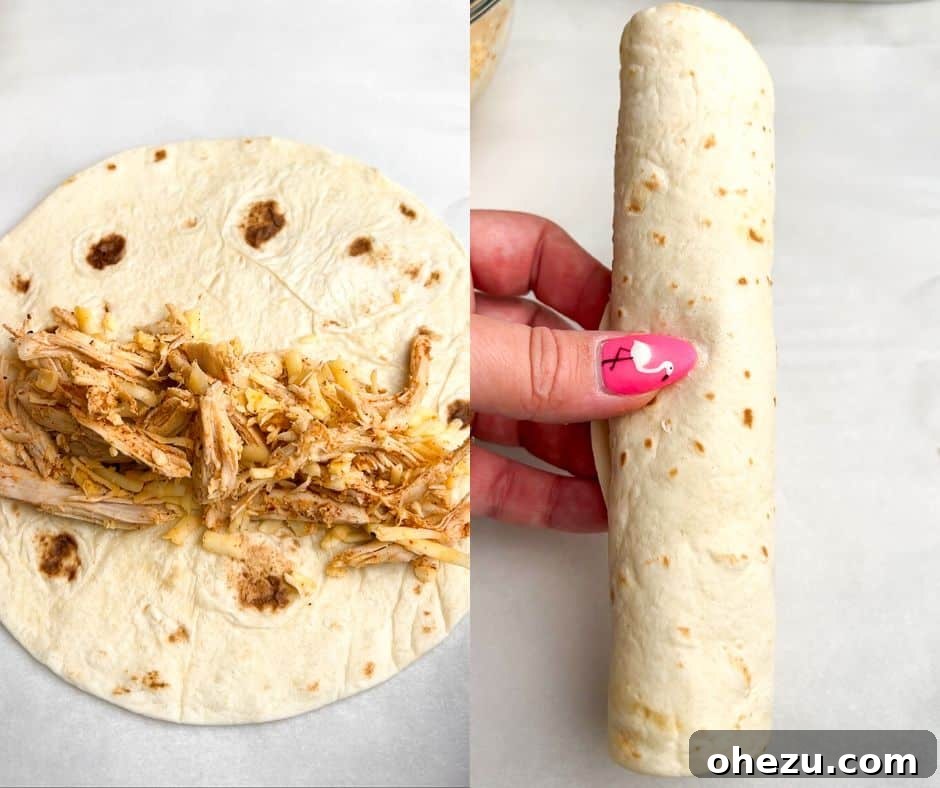
- Generously Cover with Sauce: Once all the enchiladas are neatly arranged in the pan, generously pour or spoon the remaining green chile sour cream sauce over the top. Ensure every enchilada is thoroughly coated. Don’t worry if it seems like a lot of sauce; the flour tortillas will absorb a significant amount as they bake, becoming incredibly tender and flavorful.
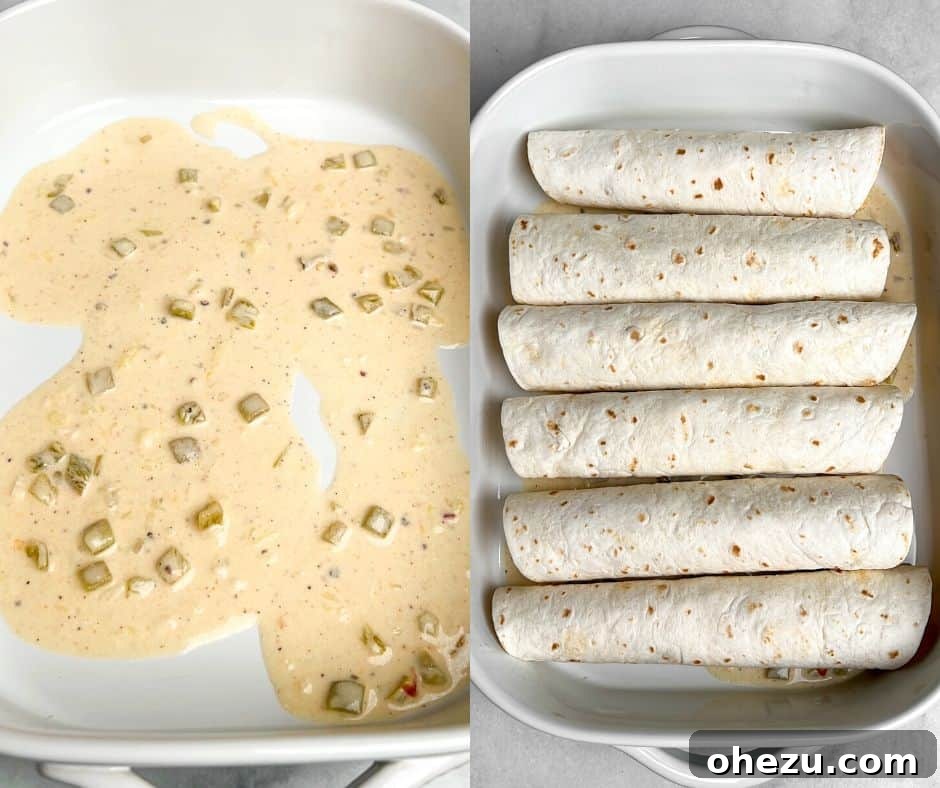
- Final Cheese Layer & Bake: Evenly sprinkle the remaining 1 cup of shredded cheese over the top of the sauced enchiladas. Place the casserole dish in your preheated oven and bake uncovered for a precise 20 minutes. You’re looking for a bubbly sauce and beautifully melted, golden cheese. For that irresistible golden-brown and slightly crispy cheese crust, you can optionally broil the enchiladas for an additional 3-5 minutes. Watch them very carefully during this stage to prevent burning, as broiler temperatures can vary significantly.
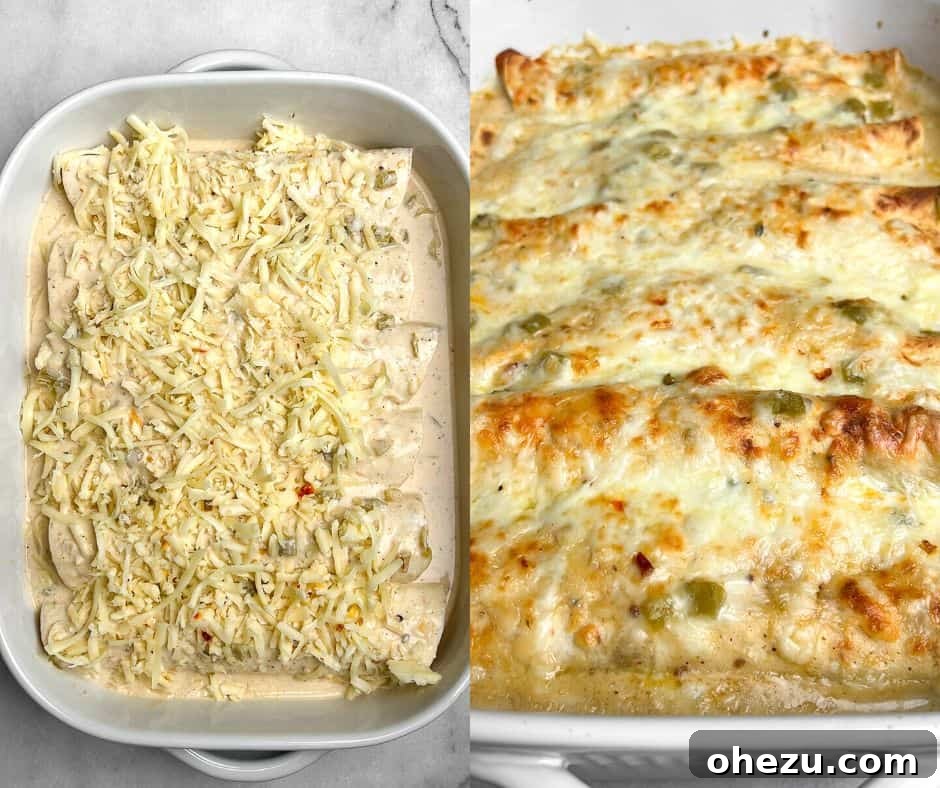
Serve your magnificent Green Chile Chicken Enchiladas immediately, perhaps with a sprinkle of fresh cilantro, and prepare for rave reviews!
Flour vs. Corn Tortillas: Your Enchilada Choice
The eternal debate among enchilada enthusiasts often revolves around the choice of tortilla. While this recipe specifically recommends flour tortillas for their soft, yielding texture and excellent sauce absorption, we understand that preferences vary greatly. Yes, absolutely, you can substitute corn tortillas in this recipe; both types yield delicious, albeit distinct, results.
The Case for Corn Tortillas
Many people have a deep affinity for corn tortillas, particularly for their authentic flavor profile and their ability to hold up well under sauce. They are generally less prone to becoming overly soggy and tend to maintain a firmer structure even after being baked. However, working with corn tortillas requires a crucial extra step: they must be warmed before rolling. Cold corn tortillas are brittle and will inevitably crack and tear, making assembly a frustrating ordeal. To warm them, you can briefly microwave a stack wrapped in a damp paper towel, quickly fry them in a lightly oiled skillet until pliable, or even give them a quick dip in hot oil (which also creates a slight barrier against sogginess, but adds richness).
The Appeal of Flour Tortillas
For this particular Green Chile Chicken Enchilada recipe, flour tortillas are our preferred choice. Their soft, delicate, and chewy texture creates a comforting contrast with the rich, creamy filling and sauce. They are incredibly pliable, making them exceptionally easy to fill and roll, even for novice cooks. Furthermore, flour tortillas wonderfully absorb the luscious green chile sour cream sauce, ensuring every bite is moist and flavorful. While concerns about sogginess are sometimes raised, our recipe’s sauce consistency and baking time are designed to minimize this, resulting in perfectly tender enchiladas.
Ultimately, the choice is yours! Feel free to use whichever tortilla shell you prefer or have on hand. Both options taste undeniably delicious with our savory chicken filling and creamy sauce. Just remember the crucial step of warming corn tortillas if you choose that route for a seamless cooking experience.
Choosing the Right Chicken for Your Enchiladas: Convenience Meets Flavor
The quality and preparation of the chicken are fundamental to the success of these Green Chile Chicken Enchiladas. While you have options, our top recommendation offers a perfect balance of convenience and flavor, making this recipe a joy to prepare.
Our Top Pick: Rotisserie Chicken
I wholeheartedly recommend using store-bought rotisserie chicken for this recipe, as well as for other quick-and-easy Mexican dishes like chicken taquitos. The benefits are simply unparalleled:
- Unbeatable Convenience: This is the ultimate time-saver! A rotisserie chicken is already perfectly cooked and seasoned, eliminating a significant step in your meal preparation. It means less time in the kitchen and more time enjoying your delicious creation.
- Consistent Tenderness and Moisture: Rotisserie chickens are expertly slow-roasted, ensuring the meat is consistently tender, moist, and incredibly flavorful. This inherent juiciness prevents your enchilada filling from drying out during baking and contributes a rich, savory depth that’s hard to replicate with plain cooked chicken.
- Added Flavor Profile: The seasonings already present on a good rotisserie chicken further enhance the complexity of your enchilada filling, adding an extra layer of deliciousness without any extra effort on your part.
Alternative: Cooking Your Own Chicken
If a rotisserie chicken isn’t available, or if you prefer to cook your chicken from scratch, you certainly can! The goal is to produce tender, shreddable chicken that will meld seamlessly with the other ingredients. I recommend two primary methods:
- Poaching Chicken: This is an excellent method for keeping chicken breasts or tenderloins moist and tender. Place boneless, skinless chicken breasts or tenderloins in a saucepan and cover them with water or, for added flavor, chicken broth. To enhance the taste even further, you can include aromatics like chopped onion, celery, a bay leaf, and a pinch of salt and pepper. Bring the liquid to a gentle simmer, then reduce the heat to low, cover the pan, and cook for 10-15 minutes (depending on the thickness of the chicken), or until the chicken is cooked through and reaches an internal temperature of 165°F (74°C). Avoid vigorous boiling, which can lead to tough chicken. Once cooked, allow the chicken to cool slightly before shredding it with two forks.
- Baking Chicken: Another straightforward method is to bake your chicken. Season boneless, skinless chicken breasts liberally with salt, black pepper, garlic powder, and paprika. Bake them at 375°F (190°C) for 20-25 minutes, or until they are cooked through. Once cooled enough to handle, shred the chicken into uniform pieces.
Regardless of your chosen method, aim for finely shredded chicken. This texture allows it to blend beautifully with the other filling ingredients and makes for easier rolling and a more satisfying bite in every enchilada.
Freezing and Reheating: Making Enchiladas Your Go-To Freezer Meal
These creamy white chicken enchiladas are incredibly freezer-friendly, making them an absolute lifesaver for busy households, meal prepping, or unexpected guests. They were one of the first recipes I perfected for freezing before my baby’s arrival, owing to their quick preparation and effortless reheating capabilities.
Two Convenient Freezing Methods:
You have flexibility when it comes to freezing these enchiladas, depending on whether you prefer to prep ahead or freeze leftovers:
- Freeze Before Baking (Pre-Assembly):
- Assemble: Prepare the chicken filling and roll the enchiladas in your flour tortillas. Arrange them snugly in a freezer-safe aluminum foil pan or a regular casserole dish that can be tightly covered with foil.
- Omit Sauce & Cheese: Crucially, do not add the green chile sour cream sauce or the cheese topping at this stage.
- Freeze: Cover the dish tightly with aluminum foil, ensuring it’s sealed to prevent freezer burn. Label with the date and freeze for up to 3 months.
- Baking Day: When you’re ready to enjoy them, thaw the enchiladas in the refrigerator overnight. On the day of baking, prepare the green chile sour cream sauce fresh, pour it over the thawed enchiladas, top with cheese, and bake according to the recipe instructions, potentially adding an extra 5-10 minutes to ensure they are heated through completely.
- Freeze After Baking (Cooked Leftovers):
- Bake & Cool: Bake the enchiladas completely according to the recipe. Allow them to cool down entirely to room temperature before freezing. This prevents ice crystals from forming and maintains texture.
- Portioning: You can freeze the entire casserole if baked in a freezer-safe dish, covered tightly. However, I often prefer using individual portion containers for freezing leftovers. This allows for convenient single-serving reheating and helps prevent “meal burnout” from eating the same large batch meal for several days.
- Freeze: Seal containers tightly and freeze for up to 2-3 months.
Simple Reheating Instructions:
- From Frozen (Pre-baked casserole): Transfer the frozen enchilada casserole to the refrigerator the day before to thaw. Once thawed, cover the dish with foil and bake at 375°F (190°C) for 15 minutes. Remove the foil and continue baking for another 10-15 minutes, or until the sauce is bubbly and the enchiladas are heated through and the cheese is golden.
- From Frozen (Individual portions): For individual portions, place the container in the fridge to thaw overnight. Reheat in a microwave until hot, or in a toaster oven at 350°F (175°C) for 15-20 minutes, covered, then uncovered for a few minutes to crisp the cheese.
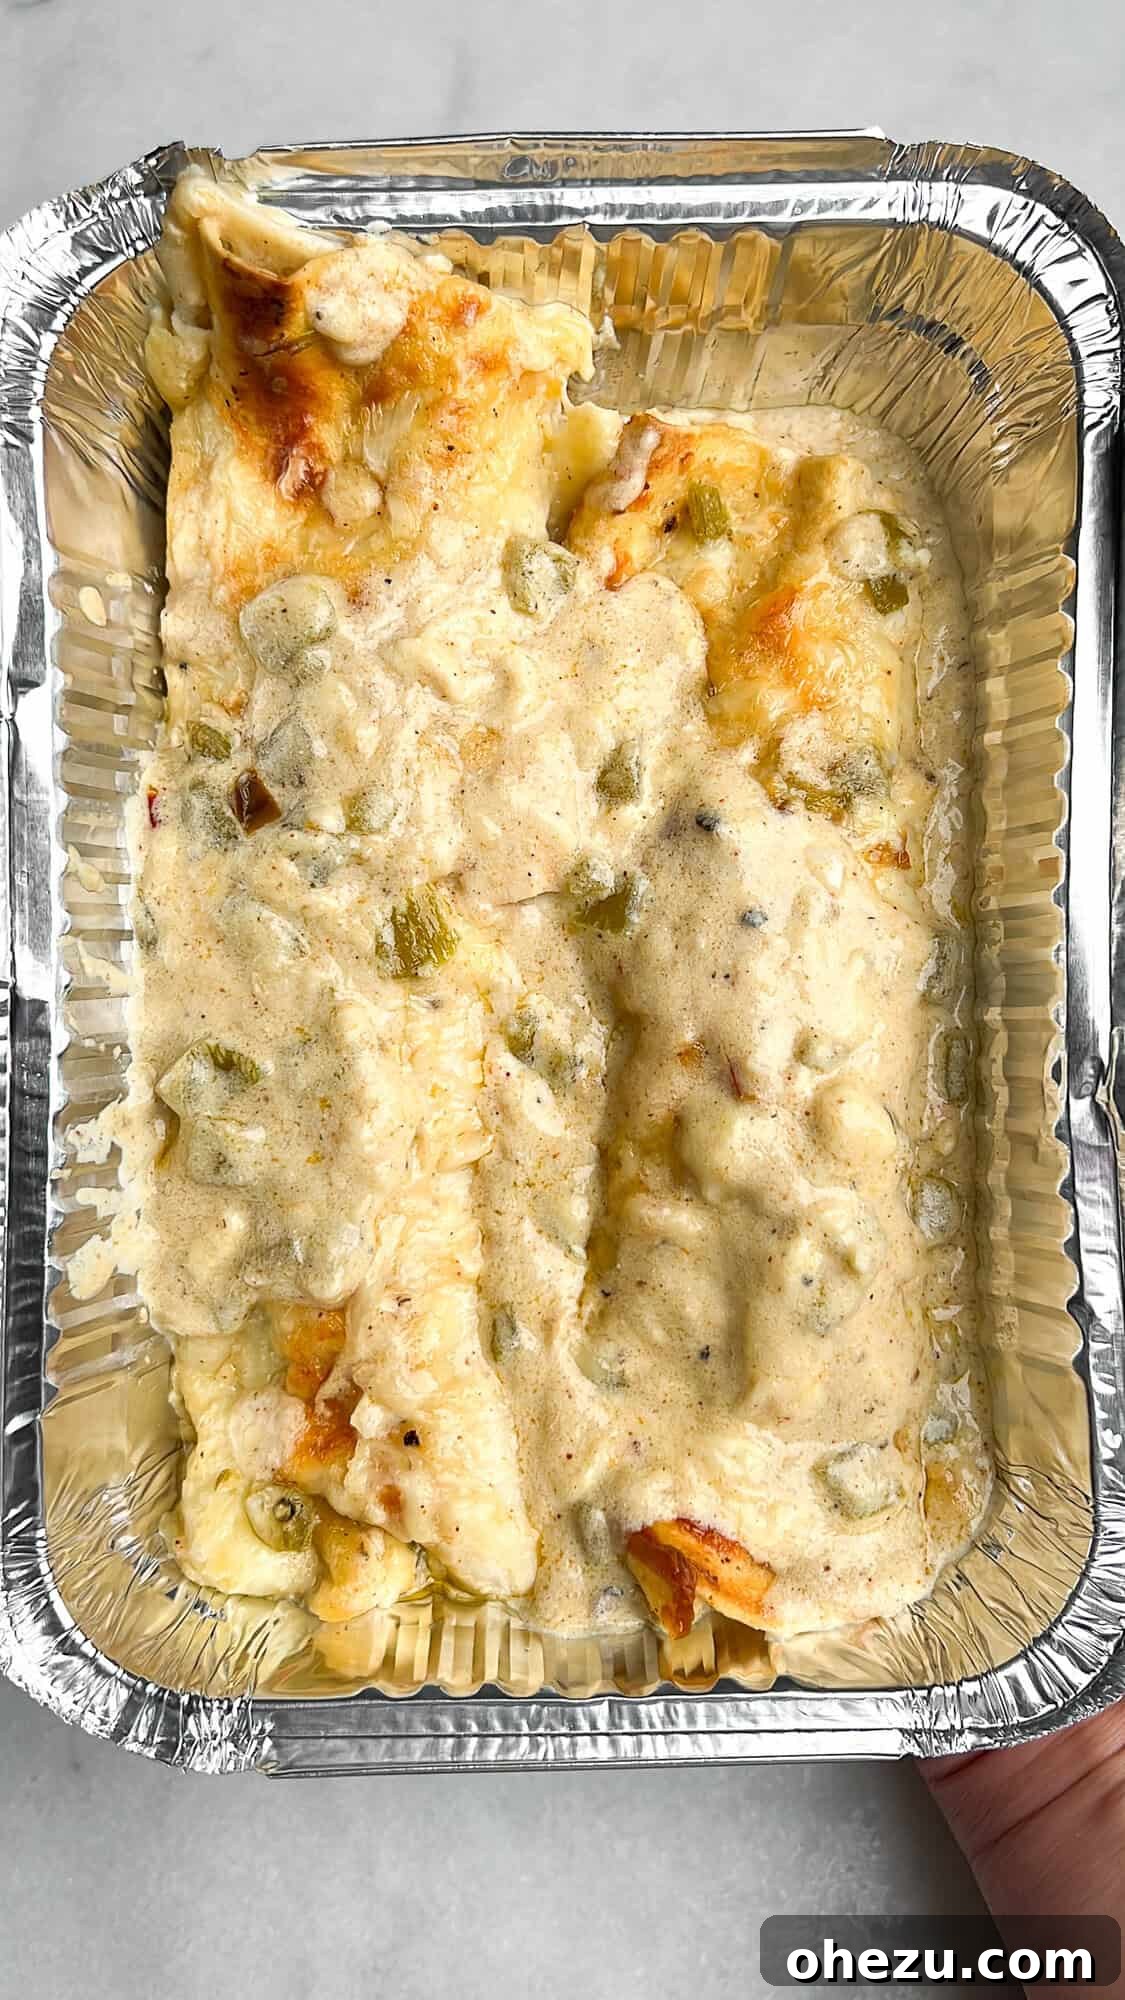
Having these delicious, homemade enchiladas readily available in your freezer is like having a secret weapon for quick, comforting, and hassle-free meals whenever the craving strikes!
Serving Suggestions & Delightful Toppings
While these Green Chile Chicken Enchiladas are incredibly flavorful and satisfying on their own, a few fresh toppings can elevate them even further, adding texture, color, and a burst of complementary flavors. Consider these delicious additions to make your meal truly extraordinary:
- Fresh Cilantro: A generous sprinkle of freshly chopped cilantro adds a vibrant, herbaceous note and a beautiful pop of green, enhancing the overall presentation and freshness.
- Diced Avocado or Guacamole: Creamy diced avocado or a dollop of homemade guacamole provides a cool, rich contrast to the warm, savory enchiladas, offering a luxurious texture and healthy fats.
- Salsa or Pico de Gallo: A spoonful of your favorite mild or medium salsa, or a scoop of fresh pico de gallo, can introduce an extra layer of zesty, tangy, and fresh flavor.
- Extra Sour Cream or Mexican Crema: For those who adore extra creaminess, a swirl of additional sour cream or a drizzle of authentic Mexican crema will undoubtedly be a welcome addition, mellowing any heat and adding a smooth finish.
- Sliced Jalapeños: If you’re a fan of extra heat, thinly sliced fresh or pickled jalapeños can provide a fiery kick and a satisfying crunch.
- Crumbled Cotija Cheese: A light sprinkle of salty, crumbly Cotija cheese offers a fantastic textural contrast and a distinct tangy flavor that pairs wonderfully with Mexican dishes.
Mix and match these toppings to create your perfect personalized enchilada experience!
Explore More Mexican-Inspired Recipes from Our Kitchen!
If you’ve fallen in love with the flavors of these Green Chile Chicken Enchiladas, you’re in for a culinary treat! Our collection is brimming with more delectable Mexican-inspired dishes that are perfect for any occasion – from quick weeknight dinners to festive gatherings. Dive into these other crowd-pleasing recipes and discover your next family favorite:
- The Best Street Corn Salad: A refreshing and zesty salad that captures the essence of elote.
- Fried Chicken Street Corn Tacos with Bacon and Jalapeno Lime Ranch: An innovative and incredibly flavorful fusion taco experience.
- Slow Cooker Mexican Street Corn Dip: A warm, creamy, and irresistible appetizer that’s perfect for sharing.
- Street Corn Chicken Bowls: A healthy and hearty meal solution packed with vibrant flavors.
- Birria Taco Recipe (Instant Pot, Slow Cooker, or Dutch Oven): Master the art of rich, savory birria for sensational tacos.
- Mini Crispy Garlic Buffalo Chicken Tacos: Small bites with a big flavor punch, ideal for appetizers or a fun meal.
- Braised Brisket Tacos with Street Corn and Jalapeño Lime Ranch: Tender, slow-braised brisket transformed into extraordinary tacos.
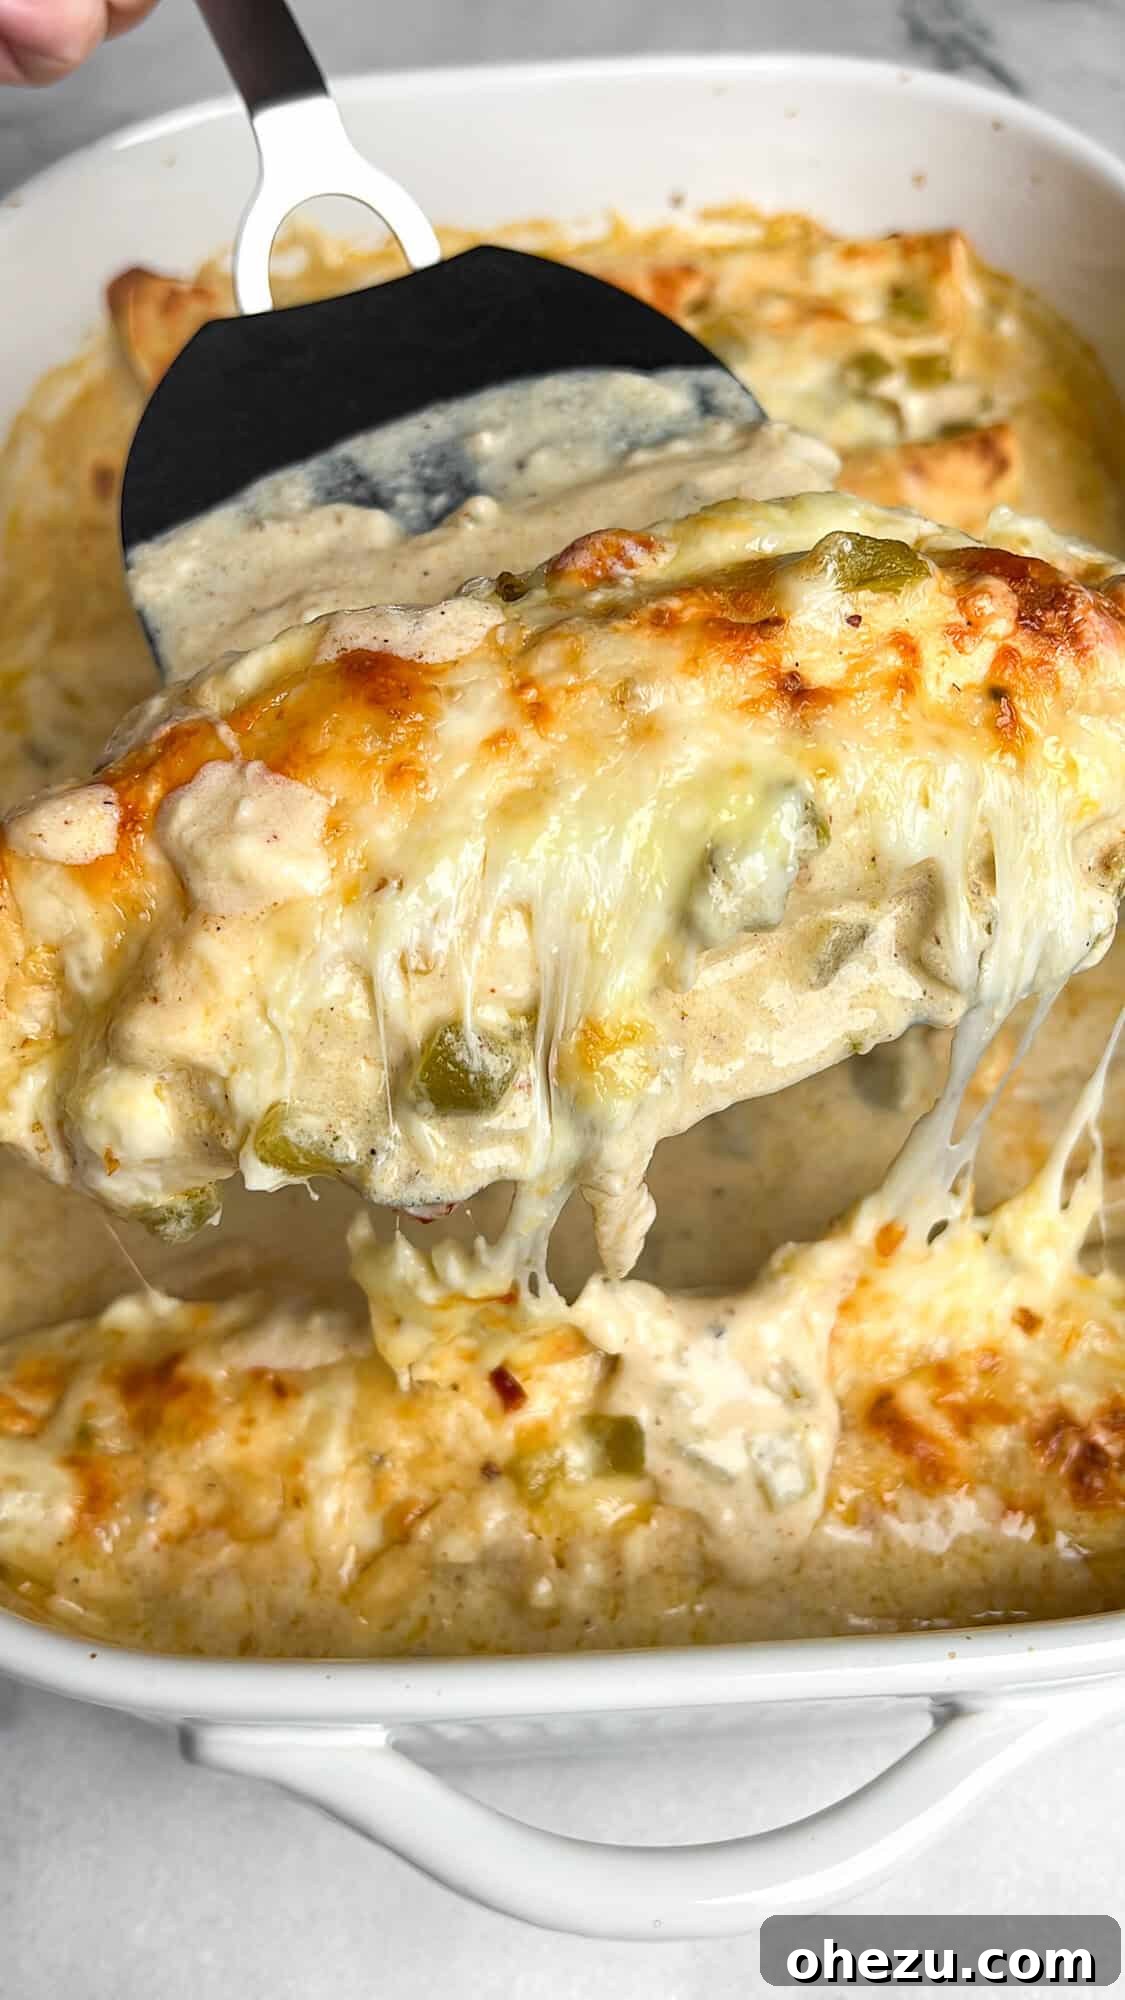
We sincerely hope you thoroughly enjoyed preparing and savoring this incredible Green Chile Chicken Enchiladas Recipe! Your thoughts and experiences are incredibly valuable to us, so please don’t hesitate to leave a comment below with any questions, helpful tips, or your personal feedback. We genuinely love hearing from our community!
And when you create your culinary masterpiece, don’t forget to tag us on Instagram with your beautiful photos! Find us at @BadBatchBaking and make sure to use the hashtag #BadBatchBaking to share your delicious results with our growing community of food lovers!
Green Chile Chicken Enchiladas
A comforting and incredibly flavorful dish featuring tender chicken, a creamy green chile sauce, and melted cheese, all wrapped in soft flour tortillas. Perfect for a family dinner!
By Mallory Austin
Prep Time: 20 mins
Cook Time: 30 mins
Total Time: 50 mins
Yields: 8 enchiladas (approximately 4 servings)

Ingredients
- 2 1/2 cups shredded rotisserie chicken
- 8 flour tortillas, taco-sized (8-inches)
- Seasoning Blend: 1 tsp each – cumin, chili powder, paprika, onion powder, garlic powder. 1/2 tsp – adobo all-purpose seasoning
- 2 teaspoons hot sauce (Valentina or similar, adjust to taste)
- Juice of 1/2 lime
- 1.5 cups Monterey Jack cheese, shredded (divided for filling, sauce, and topping)
- 1.5 cups Pepper Jack cheese, shredded (divided for filling, sauce, and topping)
- 3 tablespoons unsalted butter
- 4 cloves garlic, minced
- 2 tablespoons all-purpose flour
- 1 1/2 cups chicken stock (low sodium recommended)
- 4 oz. can diced green chiles, undrained
- 3/4 cup sour cream, at room temperature
Instructions
- Preheat your oven to 350°F (175°C). Lightly spray a 9×13-inch casserole dish with nonstick cooking spray.
- In a small bowl, combine all ingredients for the spice blend (cumin, chili powder, paprika, onion powder, garlic powder, and adobo). Mix well and set aside.
- Shred both Monterey Jack and Pepper Jack cheeses, combine them in a bowl, and set aside. You will divide this cheese mixture later.
- In a medium bowl, combine the shredded chicken, fresh lime juice, hot sauce, and exactly half of your prepared spice blend. Mix thoroughly until the chicken is evenly coated.
- Add 1 cup of the combined shredded cheese to the chicken mixture and toss gently to combine.
- For the sauce, melt the 3 tablespoons of butter in a large saucepan over medium-low heat.
- Add the 4 cloves of minced garlic to the melted butter and cook until fragrant, about 1 minute, being careful not to brown it.
- Whisk in the 2 tablespoons of flour. Continue stirring continuously for 2 minutes to cook out any raw flour taste, forming a smooth roux.
- Slowly pour in the 1 1/2 cups of chicken stock, whisking constantly to prevent lumps and ensure a smooth sauce. Continue whisking as it begins to thicken.
- Bring the sauce to a gentle simmer. Stir in the remaining half of your spice blend and the entire 4 oz. can of undrained diced green chiles. Let it simmer until it reaches your desired thickness.
- Remove the saucepan from the heat. Stir in the 3/4 cup of room-temperature sour cream until it is fully combined and smooth.
- Add half of the remaining shredded cheese (reserving the other half for the top of the enchiladas) to the sauce, stirring until it completely melts into the creamy mixture.
- Spread about 1/3 cup of the finished sauce evenly over the bottom of your prepared casserole dish.
- Assemble the enchiladas: Spoon approximately 1/3 cup of the chicken filling into the lower half of each flour tortilla. Roll each tortilla tightly and place it seam-side down in the casserole dish. Repeat with the remaining tortillas and filling.
- Generously pour or spoon the rest of the green chile sour cream sauce over all the assembled enchiladas in the pan. (Note that the tortillas will absorb a good amount of this sauce during baking).
- Evenly sprinkle the reserved 1 cup of shredded cheese over the top of the sauced enchiladas.
- Bake uncovered for 20 minutes, or until the sauce is bubbly and the cheese is beautifully melted and golden. If you desire a more browned and crispy cheese topping, you can carefully broil for an additional 3-5 minutes, watching very closely to prevent burning.
Notes
Avoid Overbaking: Flour tortillas can become soggy or develop a gummy texture if baked for too long. Stick to the recommended baking time to maintain their soft, delicate consistency. If broiling for extra crispness, keep a close eye on the enchiladas as ovens and broilers can vary significantly in heat intensity.