
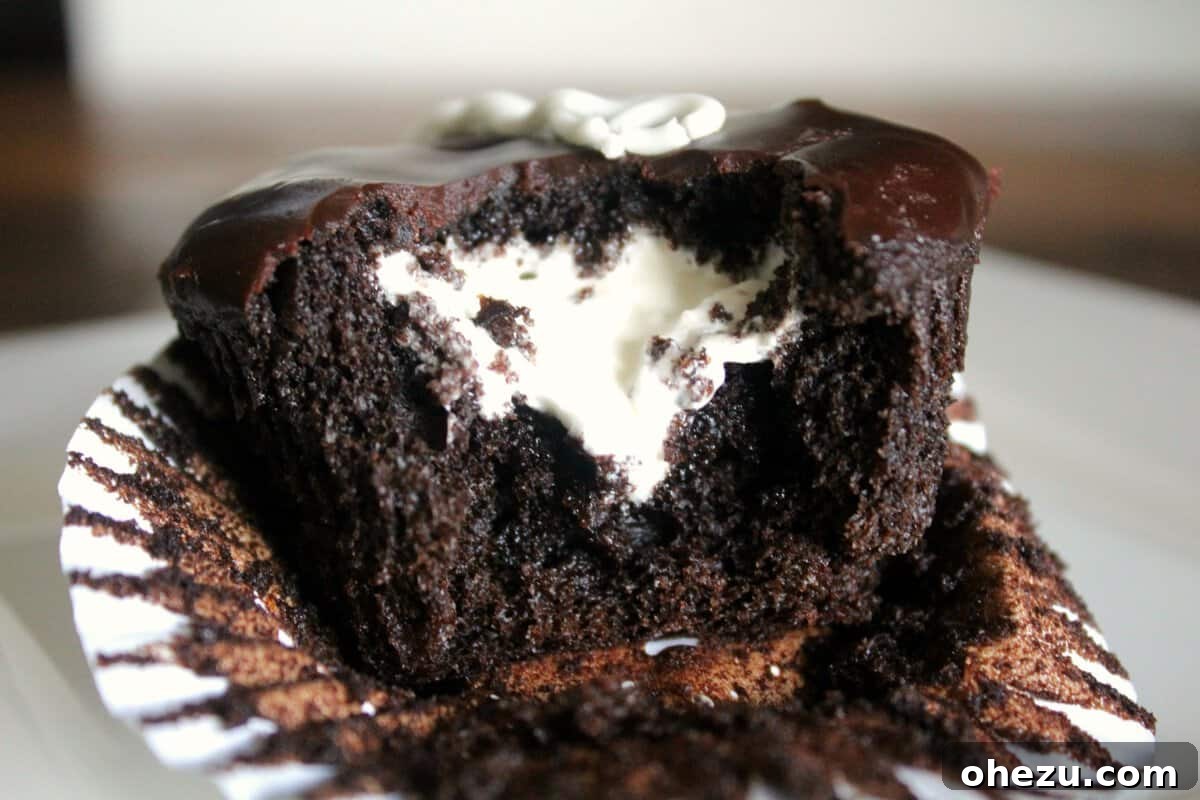
Reinventing the Classic: The Ultimate Homemade Hostess Cupcakes Recipe
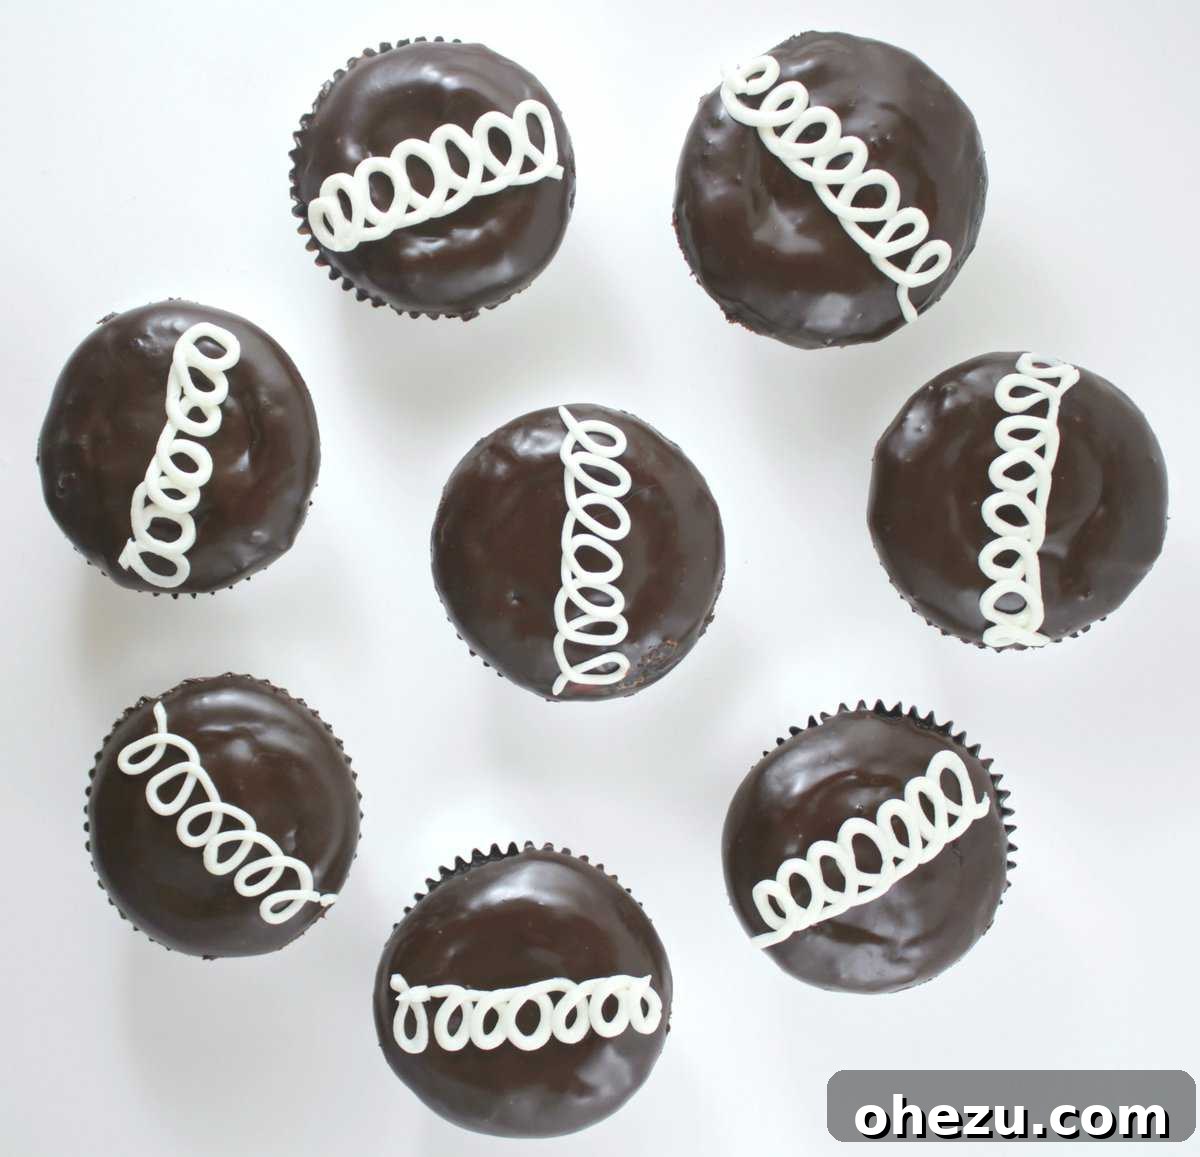
For many, the Hostess Cupcake represents a timeless piece of childhood nostalgia, a symbol of simple pleasures and chocolatey indulgence. Its iconic swirl, creamy filling, and rich chocolate coating have captivated generations. But what if you could recreate that magic at home, elevating the experience with fresh ingredients and a touch of artisanal flair? This comprehensive guide will walk you through reinventing the classic Hostess Cupcake, creating a treat that not only evokes cherished memories but also surpasses the original in flavor and quality.
Forget the store-bought versions laden with preservatives; our homemade rendition brings together a moist, intensely chocolatey cupcake base, a perfectly sweet and fluffy marshmallow-like filling, and a glossy, rich chocolate ganache, all crowned with that signature white squiggle. Prepare to embark on a delightful baking adventure that will impress your family and friends, offering a gourmet twist on a beloved American classic.
Why Bake Your Own Hostess Cupcakes?
There’s an undeniable satisfaction in crafting your favorite treats from scratch. Beyond the joy of baking, making your own Hostess Cupcakes offers several significant advantages:
- Superior Flavor and Texture: Fresh, high-quality ingredients translate into a richer chocolate flavor, a more tender crumb, and a creamier, more luxurious filling and ganache compared to mass-produced versions.
- Control Over Ingredients: You decide what goes into your cupcakes. Avoid artificial flavors, colors, and preservatives, opting for natural, wholesome components.
- Tailored to Your Taste: Adjust the sweetness, chocolate intensity, or even experiment with subtle flavor additions to customize your perfect cupcake.
- The Joy of Nostalgia: Recreating a childhood favorite is a truly rewarding experience, allowing you to relive cherished memories and create new ones with a delicious homemade twist.
The Anatomy of a Perfect Homemade Hostess Cupcake
To truly master this iconic dessert, it helps to understand its distinct components, each playing a crucial role in the overall experience:
- The Chocolate Cupcake Base: This needs to be incredibly moist, dark, and deeply chocolatey. We’ll achieve this with good quality cocoa powder and a strategic blend of wet ingredients.
- The Creamy White Filling: The signature “creme” filling is airy, sweet, and has a unique, slightly marshmallow-like texture. Our recipe aims for this iconic consistency.
- The Chocolate Ganache Glaze: A smooth, shiny, and decadent chocolate coating that sets firm but remains tender when bitten into, providing that satisfying crackle.
- The Iconic White Swirl: The final flourish, a simple yet instantly recognizable detail that makes a Hostess Cupcake truly complete.
Homemade Hostess Cupcakes Recipe
Ingredients
For the Rich Chocolate Cupcakes:
- 1 ¾ cups (210g) all-purpose flour
- ¾ cup (75g) unsweetened cocoa powder (Dutch-processed for a darker, richer color)
- 1 ¾ cups (350g) granulated sugar
- 1 ½ teaspoons baking soda
- 1 teaspoon baking powder
- 1 teaspoon salt
- 2 large eggs (room temperature)
- 1 cup (240ml) buttermilk (room temperature)
- ½ cup (120ml) vegetable oil (or other neutral-flavored oil)
- 1 teaspoon pure vanilla extract
- 1 cup (240ml) hot strong brewed coffee (or hot water)
For the Creamy Marshmallow-like Filling:
- ½ cup (113g) unsalted butter, softened
- 2 cups (240g) powdered sugar, sifted
- 3-4 tablespoons heavy cream or milk
- 1 teaspoon pure vanilla extract
- Pinch of salt
- Optional: 1-2 tablespoons marshmallow fluff for extra authentic texture
For the Decadent Chocolate Ganache Glaze:
- 1 cup (170g) good quality semi-sweet chocolate chips or finely chopped chocolate
- ½ cup (120ml) heavy cream
- 1 tablespoon light corn syrup (for shine, optional)
- 1 teaspoon pure vanilla extract
For the Signature White Swiggle:
- ½ cup (60g) powdered sugar
- 1-2 tablespoons milk or heavy cream
- ¼ teaspoon vanilla extract
- Pinch of salt
Equipment You’ll Need:
- 12-cup muffin tin
- Paper cupcake liners
- Mixing bowls (large and medium)
- Electric mixer (stand or hand-held)
- Whisk, spatula
- Small round piping tip (like Wilton 1A or a similar size for filling)
- Piping bags (disposable or reusable)
- Small round piping tip (like Wilton 3 or 4 for the squiggle)
- Cooling rack
- Melon baller or small knife for coring cupcakes
Instructions
- Prepare for Baking: Preheat your oven to 350°F (175°C). Line a 12-cup muffin tin with paper liners.
- Combine Dry Ingredients (Cupcakes): In a large mixing bowl, whisk together the flour, cocoa powder, granulated sugar, baking soda, baking powder, and salt. Ensure there are no lumps.
- Combine Wet Ingredients (Cupcakes): In a separate medium bowl, whisk together the eggs, buttermilk, vegetable oil, and vanilla extract until well combined.
- Combine Wet and Dry: Pour the wet ingredients into the dry ingredients. Mix on low speed with an electric mixer (or by hand) until just combined. Do not overmix.
- Add Hot Liquid: Carefully pour in the hot coffee (or hot water). The batter will be thin. Mix gently until smooth. This liquid helps activate the cocoa and baking soda, creating a moist, rich crumb.
- Fill and Bake Cupcakes: Divide the batter evenly among the 12 prepared cupcake liners, filling each about two-thirds full. Bake for 18-22 minutes, or until a wooden skewer inserted into the center comes out clean.
- Cool Cupcakes: Let the cupcakes cool in the muffin tin for 5 minutes before transferring them to a wire rack to cool completely. They must be entirely cool before filling and frosting.
- Prepare the Creamy Filling: In a medium bowl, beat the softened butter with an electric mixer until creamy (about 2 minutes). Gradually add the sifted powdered sugar, mixing on low speed until combined, then increase to medium and beat until fluffy. Add 3 tablespoons of heavy cream or milk, vanilla extract, and a pinch of salt. Beat until light and fluffy. If adding marshmallow fluff, fold it in gently. If the filling is too thick, add more cream a teaspoon at a time; if too thin, add more powdered sugar.
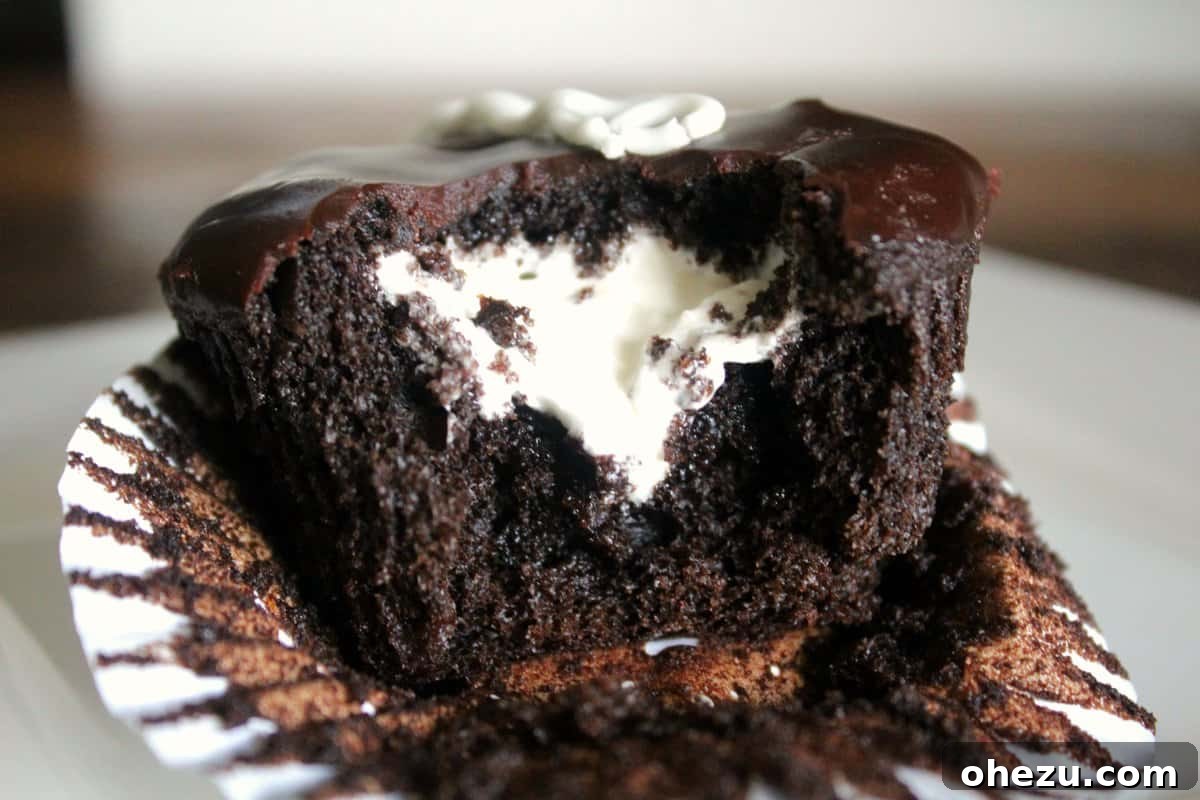
- Fill the Cupcakes: Once the cupcakes are completely cool, use a small knife or a melon baller to carefully scoop out a small cone-shaped core from the center of each cupcake, about half to two-thirds of the way down. Snip off the tip of a piping bag fitted with a small round tip (like Wilton 1A) and fill it with the creamy filling. Pipe the filling generously into each cored cupcake, creating a slightly domed top. You can place the removed cake piece back on top if you wish, or leave it exposed.
- Make the Chocolate Ganache Glaze: Place the chocolate chips (or chopped chocolate) in a heatproof bowl. In a small saucepan, heat the heavy cream and corn syrup (if using) over medium heat until it just begins to simmer around the edges (do not boil). Pour the hot cream over the chocolate. Let sit for 5 minutes to melt the chocolate, then stir gently with a whisk until smooth and glossy. Stir in the vanilla extract. Let the ganache cool at room temperature for about 15-20 minutes, stirring occasionally, until it thickens slightly to a pourable, glaze-like consistency.
- Glaze the Cupcakes: Once the ganache is ready, dip the top of each filled cupcake into the ganache, allowing any excess to drip off. Alternatively, you can spoon the ganache over the tops. Place the glazed cupcakes back on the wire rack and let the ganache set. This may take 30-60 minutes at room temperature, or you can speed it up by placing them in the refrigerator for 15-20 minutes.
- Create the Signature White Swiggle: In a small bowl, whisk together the powdered sugar, 1 tablespoon of milk or cream, vanilla extract, and salt until smooth. Add more milk/cream a tiny bit at a time until you reach a thick but pipeable consistency. Transfer this glaze to a small piping bag fitted with a very small round tip (like Wilton 3 or 4), or simply snip a tiny corner off the bag.
- Apply the Swiggle: Once the chocolate ganache is set, pipe the classic “S” shape or zigzag pattern across the top of each cupcake. Let the white squiggle set for a few minutes before serving.
Pro Tips for Hostess Cupcake Perfection
- Room Temperature Ingredients: Ensure eggs, buttermilk, and butter for the filling are at room temperature. This helps them emulsify properly, leading to a smoother batter and creamier filling.
- Don’t Overmix: Overmixing the cupcake batter develops the gluten, resulting in tough cupcakes. Mix until just combined.
- Quality Cocoa and Chocolate: The flavor of your cupcakes hinges on the quality of your cocoa powder and chocolate. Use Dutch-processed cocoa for a darker color and milder chocolate flavor.
- Cool Completely: Do not attempt to fill or glaze warm cupcakes. They will crumble, and the ganache will melt and run. Patience is key!
- Piping Practice: If you’re new to piping, practice on a piece of parchment paper first to get a feel for the pressure and movement required for the filling and the squiggle.
- The Right Consistency for Ganache: The ganache should be thick enough to cling to the cupcake but still pourable. If it’s too thin, let it cool longer; if too thick, gently warm it over a double boiler or in the microwave for a few seconds.
Variations to Explore
While the classic is undeniably delicious, feel free to put your own spin on these homemade treats:
- Mint Chocolate Hostess: Add a few drops of peppermint extract to the cupcake batter or the filling for a refreshing twist.
- Peanut Butter Dream: Incorporate 1-2 tablespoons of creamy peanut butter into the filling for a rich, nutty flavor.
- Espresso Kick: Enhance the chocolate flavor by adding a teaspoon of espresso powder to the cupcake batter.
- Caramel Swirl: Drizzle a bit of homemade caramel over the ganache before the white squiggle for an extra layer of decadence.
- Different Fillings: Experiment with a raspberry jam filling, a cream cheese frosting filling, or even a custard filling for different flavor profiles.
Storing Your Homemade Treats
These homemade Hostess Cupcakes are best enjoyed fresh, but they can be stored to savor later:
- Room Temperature: Store in an airtight container at room temperature for up to 2-3 days.
- Refrigerator: For longer storage, place them in an airtight container in the refrigerator for up to 5 days. Bring to room temperature before serving for the best texture and flavor.
- Freezing: Unfrosted cupcakes can be frozen for up to 3 months. Wrap them individually in plastic wrap and then place them in an airtight freezer-safe bag or container. Thaw at room temperature before filling and frosting. Finished cupcakes can also be frozen, though the ganache and filling texture might change slightly upon thawing.
Conclusion: A New Chapter for a Classic Delight
Reinventing the Hostess Cupcake at home is more than just baking; it’s an act of culinary nostalgia, a journey to recapture a beloved taste with superior ingredients and craftsmanship. This recipe provides you with all the tools to create a dessert that will not only bring back fond memories but also establish itself as a new favorite in your baking repertoire. From the first bite of the moist chocolate cake to the burst of creamy filling and the rich embrace of ganache, you’ll discover a homemade treat that truly outshines its inspiration.
So, gather your ingredients, preheat your oven, and prepare to create a batch of homemade Hostess Cupcakes that are truly unforgettable. Happy baking!