
The Ultimate Homemade Hostess Cupcakes: Recreating a Beloved Classic
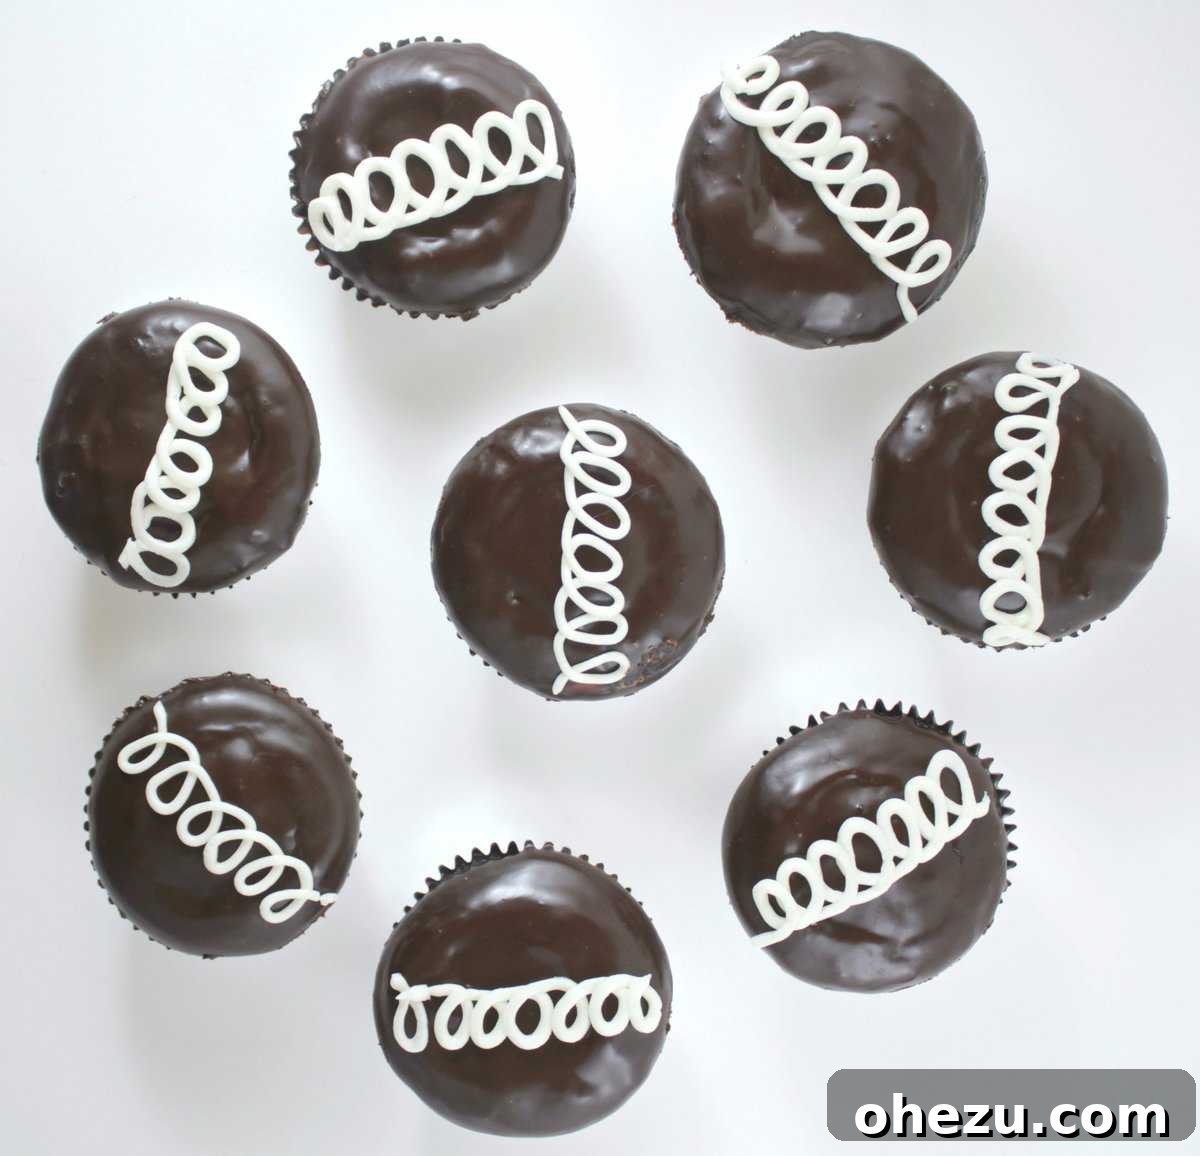
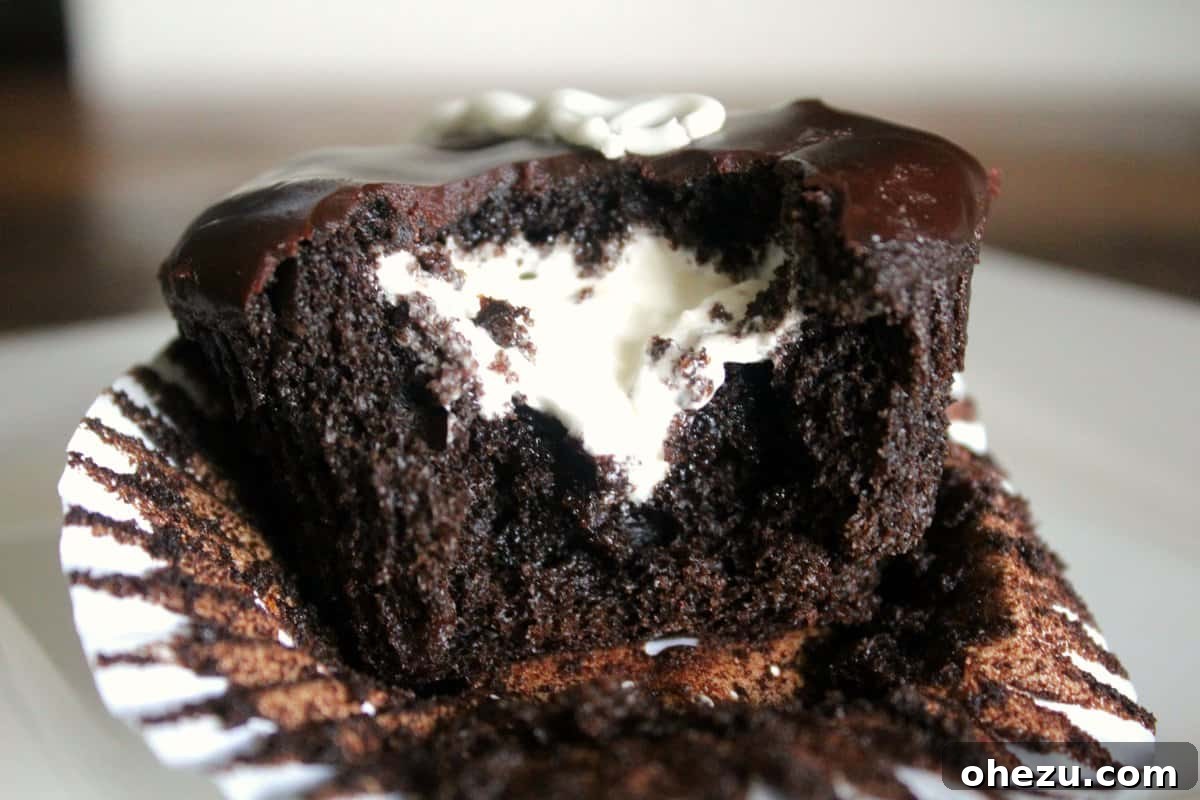
Prepare to embark on a delightful baking journey that culminates in the most decadent, nostalgic treat you’ve ever experienced: the homemade Hostess-style cupcake. This isn’t just any ordinary cupcake; it’s a meticulously crafted masterpiece, boasting a remarkably moist and rich chocolate cake, a luscious, perfectly oozing creamy center, a luxurious fudge ganache topping, and the unmistakable, slightly crunchy vanilla swirl. It’s a delightful challenge that promises immense rewards, transforming a cherished classic into an elevated homemade indulgence that will impress even the most discerning palates.
While the creation of these iconic cupcakes involves several distinct, delicious elements, making it a recipe that requires attention to detail, it is entirely manageable for bakers of all skill levels. We’ve meticulously broken down each component with clear, concise instructions and included invaluable make-ahead shortcuts to significantly simplify the overall process. Forget generic store-bought imitations; once you taste these homemade beauties, bursting with authentic flavor and texture, you’ll unequivocally understand why every minute spent in the kitchen is truly worth the effort.
Streamline Your Baking: Essential Make-Ahead Options for Hostess Cupcakes
To ensure a smooth, enjoyable, and stress-free baking experience, utilizing smart make-ahead strategies can dramatically reduce your workload and assembly time on the day of serving. Preparing certain components in advance allows you to efficiently break down this multi-step recipe into manageable stages, making it an ideal choice for busy individuals or when planning for special occasions and entertaining guests.
- Cream Filling and Swirl Icing: These delicate, creamy components are perfect for advance preparation. You can whip them up to 5 days before you plan to assemble your cupcakes. Store each in a separate, airtight container in the refrigerator. On baking day, simply allow them to come to room temperature for about 30 minutes, then give them a quick, vigorous whip with a hand mixer or stand mixer to restore their light, fluffy, and pipeable texture. This strategic step alone can save a considerable amount of active kitchen time.
- Pre-Chopped Chocolate for Ganache: For the silkiest chocolate ganache, uniform melting is crucial. Finely chop your bittersweet chocolate ahead of time and store it in a sealed ziplock bag or an airtight container at room temperature. Having your chocolate precisely chopped and ready ensures it will melt evenly and quickly when combined with the hot cream, leading to a perfectly smooth and glossy glaze without any last-minute hassle.
- Dry Ingredients for Chocolate Cake: Optimize your cake batter preparation by pre-measuring and combining all the dry ingredients. This includes the all-purpose flour, granulated sugar, cocoa powder, baking powder, baking soda, and salt. Store this well-mixed blend in an airtight container, labeled clearly. This simple pre-mix guarantees consistency in your cake and significantly speeds up the initial steps of creating your rich chocolate cake batter. Remember to add the espresso powder separately when mixing with the wet ingredients.
Mastering the Art of Cupcake Filling for that Signature Surprise
The hallmark of a true Hostess cupcake is its delightful creamy center. Filling cupcakes might seem like a specialized skill, but it’s a surprisingly straightforward process that instantly elevates your homemade treats from simple cupcakes to extraordinary confections. There are primarily two highly effective methods to achieve that delightful creamy surprise inside each cupcake. Choose the one that you find most comfortable, efficient, and best suits your available tools.
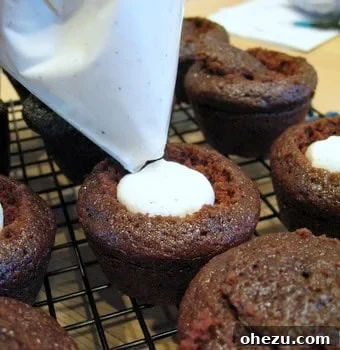
- Direct Injection Method: For a quick and remarkably simple approach, leave the cupcake whole. Fit a piping bag with a long, plain round metal tip (such as a Bismarck tip, Wilton 230, or a large plain round tip like Wilton 1A). Gently insert the tip directly into the center of the cooled cupcake, aiming about halfway down into the cake. Squeeze the piping bag steadily to fill the cupcake with your prepared cream filling. You’ll feel a slight resistance as the cupcake fills, or you may observe a gentle puffing up of the cupcake top. Stop before the filling overflows. This method is incredibly fast, creates minimal mess, and leaves a beautifully clean exterior.
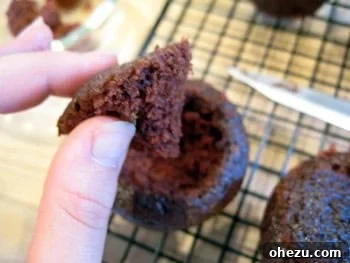
- Cone Removal Method: This method (as vividly illustrated in the images above) allows for a more generous and visible cavity for the filling, creating a truly substantial creamy core. Using a small, sharp paring knife or a specialized cupcake corer tool, carefully cut a cone shape from the top center of each cooled cupcake. Angle your knife inwards as you cut to create a neat cone. Gently lift and remove the cone of cake. Pipe a substantial amount of the dreamy cream filling into the cavity, ensuring it’s well-filled but not overflowing. Then, take the removed cake cone and, if necessary, trim a small amount of cake from its wider base (the part that faces the filling) to create a flatter bottom. This ensures it will fit back snugly over the mounded filling. Gently place the cake top back over the filling, pressing lightly to secure it in place. This technique guarantees a perfectly filled cupcake with a substantial creamy surprise in every bite.
Essential Baking Tips for Unforgettable Results
Before you even think about cracking an egg or preheating your oven, take a crucial moment to read through the entire recipe from start to finish, thoroughly understanding each step and ingredient. This critical preliminary step helps you visualize the entire process, anticipate each stage, and allows you to gather and organize all your ingredients and necessary equipment well in advance. By doing so, you can minimize potential surprises, prevent last-minute rushes, and ensure a seamless, enjoyable, and ultimately successful baking process. This thoughtful preparation allows you to truly immerse yourself in the creative joy of making these magnificent homemade Hostess-style cupcakes. Do not be daunted by the recipe’s comprehensive nature or apparent length; each detailed step is meticulously designed to guide you to baking perfection, and the resulting incomparable flavor and texture will undoubtedly justify every ounce of effort invested.
The Best Homemade Hostess-Style Cupcakes Recipe
| Yields | 24 delicious cupcakes |
| Prep time | 1 hour |
| Cook time | 12-15 minutes |
| Total time | Approx. 1 hour, 15 minutes (active time, excluding cooling and setting) |
Ingredients for the Ultimate Hostess Cupcakes
For optimal results, it is highly recommended to ensure all cold ingredients (such as milk, eggs, and butter for the swirl icing) are brought to room temperature before you begin mixing. This crucial step aids in better emulsification, leading to a smoother, more uniform batter and a perfectly textured frosting. Sifting dry ingredients like powdered sugar and cocoa powder will also prevent lumps.
For the Rich and Moist Chocolate Cake
This chocolate cake base is specifically formulated for maximum moistness, a tender crumb, and a profound, decadent chocolate flavor. The inclusion of espresso powder is a secret weapon, enhancing the cocoa’s depth without imparting a coffee taste.
- 2 cups (240g) all-purpose flour, spooned and leveled
- 2 cups (400g) granulated sugar
- 1 cup (85g) unsweetened cocoa powder (Dutch-processed cocoa is highly recommended for a darker color and milder, less acidic chocolate flavor)
- 2 teaspoons baking powder
- 1 teaspoon baking soda
- 1 teaspoon fine sea salt
- 2 heaped teaspoons instant espresso powder or instant coffee granules (crucial for deepening the chocolate flavor)
- 1 cup (240ml) whole milk, at room temperature
- 1/2 cup (120ml) vegetable oil (or any other neutral-flavored oil like canola or grapeseed)
- 2 large eggs, at room temperature
- 2 teaspoons pure vanilla extract
- 1 cup (240ml) boiling filtered water
For the Dreamy Marshmallow Cream Filling
The signature marshmallow creme filling is surprisingly simple to create and delivers that iconic, sweet, and wonderfully fluffy center that makes Hostess cupcakes so uniquely irresistible. Its light texture perfectly complements the rich cake.
- 2 cups (approx. 14 oz/400g) marshmallow creme (e.g., Fluff or similar brand)
- 1 stick (1/2 cup or 113g) unsalted butter, softened to true room temperature
- 1 cup (120g) powdered sugar (confectioners’ sugar), meticulously sifted
- A splash (1-2 tablespoons) heavy cream or whole milk, added gradually as needed
For the Velvety Chocolate Ganache Glaze
This intensely rich, bittersweet chocolate ganache provides the perfect glossy, slightly firm shell, offering a delightful textural contrast to the soft cake and creamy filling. Using high-quality chocolate will significantly enhance the flavor.
- 5 oz (140g) bittersweet chocolate (high-quality, 60-70% cacao), finely chopped
- 1/2 cup (120ml) heavy cream (ensure it has a minimum of 36% milk fat for best results)
For the Classic Vanilla Swirl Icing
The instantly recognizable white swirl is a simple yet absolutely essential decorative detail. It not only provides a slight textural variation but also adds a delicate, sweet vanilla note that completes the authentic Hostess cupcake experience.
- 1/4 cup (56g) unsalted butter, softened completely to room temperature
- 1 cup (120g) powdered sugar (confectioners’ sugar), thoroughly sifted
- 1 tablespoon heavy cream
- 1/2 teaspoon pure vanilla extract
Step-by-Step Directions to Assemble Your Masterpiece
Part 1: Preparing the Incredibly Moist Chocolate Cake
- Begin by preheating your oven to 325º F (160º C). Carefully line a standard 12-cup muffin tin with paper cupcake liners. If you are baking all 24 cupcakes at once, prepare a second tin; otherwise, plan to bake in two separate batches.
- In the generously sized bowl of a stand mixer fitted with the paddle attachment, or a large mixing bowl suitable for a hand mixer, combine all the dry ingredients: the measured all-purpose flour, granulated sugar, cocoa powder, baking powder, baking soda, and fine sea salt. Mix on the lowest speed for approximately 30 seconds until all ingredients are thoroughly combined and there are no visible lumps. This ensures the leavening agents are evenly distributed throughout the mixture.
- Now, add the wet ingredients directly to the dry mixture: the room temperature whole milk, vegetable oil, large eggs, and pure vanilla extract. Beat the mixture on medium speed for a full 2 minutes, making sure to stop and scrape down the sides of the bowl once or twice with a rubber spatula. Continue until the batter is completely smooth and all ingredients are well incorporated.
- In a microwave-safe glass measuring cup or a small saucepan, heat 1 cup of filtered water until it reaches a vigorous rolling boil. Immediately remove from heat and stir in the instant espresso powder (or coffee granules) until it is completely dissolved. The hot water is crucial as it “blooms” the cocoa powder, significantly intensifying the deep chocolate flavor of the cake.
- With your mixer running on the very lowest speed, carefully and slowly pour the hot, espresso-infused water into the cake batter. Exercise caution to avoid any splashes. Once all the water has been added, increase the mixer speed to high and beat for exactly 1 minute. This crucial aeration step incorporates air into the batter, contributing to an incredibly light and tender crumb. Do not be alarmed if the batter appears quite thin at this stage; this is the intended consistency for this recipe.
- Evenly distribute the now-liquid cake batter among the prepared cupcake liners. Each liner should be filled about three-quarters full. This ensures consistent baking, prevents unsightly overflow, and allows for the signature domed top.
- Bake in the preheated oven for 12-15 minutes, or until a wooden toothpick inserted directly into the center of a cupcake emerges clean, with no wet batter or moist crumbs attached. It is vital to avoid overbaking, as this is a common cause of dry cupcakes.
- Once baked, remove the muffin tin from the oven and allow the cupcakes to cool in the tin for a brief 5 minutes. After this initial cooling, carefully transfer the cupcakes to a wire cooling rack to cool completely. Ensuring they are fully cooled is paramount before proceeding to the filling and glazing steps, as any residual warmth will cause the filling and ganache to melt or slide off.
Part 2: Crafting the Dreamy Marshmallow Cream Filling
- In a large mixing bowl, combine the marshmallow creme and the completely softened unsalted butter. Using either a hand mixer or a stand mixer fitted with the paddle attachment, beat the mixture on medium speed for 2-3 minutes. Continue beating until the mixture becomes exceptionally light, fluffy, and noticeably airy. Remember to scrape down the sides of the bowl periodically to ensure even mixing. This crucial aeration is the secret to the filling’s signature cloud-like texture.
- Reduce the mixer speed to low. Gradually add the meticulously sifted powdered sugar, incorporating it about half a cup at a time. Allow each addition to be fully absorbed into the mixture before adding the next. Once all the sugar has been incorporated, the mixture might appear quite stiff.
- Increase the mixer speed to medium-high and continue to beat for an additional 1 to 2 minutes. If at any point the filling seems too thick or too stiff to pipe easily, add a small splash (1-2 tablespoons) of heavy cream or milk, one teaspoon at a time, until it reaches a wonderfully light, fluffy, and pipeable consistency. Be very careful not to add too much liquid, as this can make the filling too runny.
- Transfer the perfectly prepared cream filling to a piping bag fitted with a large, plain round tip (such as a Wilton 1A or a Bismarck tip if you have one). Refrigerate the filling for at least 30 minutes, or longer if made ahead, until it is firm enough to pipe cleanly and easily into the cupcakes.
Part 3: Preparing the Silky Chocolate Ganache Glaze
- Place the finely chopped bittersweet chocolate into a heatproof, round mixing bowl. It is imperative that the chocolate is indeed finely chopped, as this promotes even melting and prevents lumps in your finished ganache.
- In a small microwave-safe measuring cup or a small saucepan, gently heat the heavy cream until it just begins to simmer. Look for small, delicate bubbles forming around the edges of the cream (this usually takes approximately 1 to 1 1/2 minutes in a microwave, but always watch it carefully to prevent boiling over).
- Immediately pour the hot cream directly over the finely chopped chocolate in the bowl. Let it stand undisturbed for 1-2 minutes. This crucial waiting period allows the residual heat from the cream to gently melt the chocolate, initiating the tempering process which ensures a perfectly smooth ganache.
- After resting, gently whisk the mixture. Begin whisking from the center of the bowl and slowly spiral outwards until a completely smooth, lustrous, and homogenous ganache forms. Be patient and avoid aggressive whisking, which can incorporate too much air and result in a dull finish.
- Allow the ganache to cool and thicken at room temperature for about 5-10 minutes. It should reach a consistency that is thick enough to generously cling to the cupcakes without dripping excessively, yet still fluid enough to create a beautifully smooth and even coating. Stir the ganache occasionally during this cooling period to maintain its creamy texture.
Part 4: Mixing the Classic Vanilla Swirl Icing
- In a small mixing bowl, combine the completely softened unsalted butter, thoroughly sifted powdered sugar, heavy cream, and pure vanilla extract.
- Beat all icing ingredients with a hand mixer on medium speed until they are completely blended and the icing achieves a smooth, creamy, and lump-free texture. This process should typically take about 1-2 minutes. If the icing appears too thick, add a tiny splash more cream; conversely, if it seems too thin, incorporate a pinch more sifted powdered sugar.
- Transfer this pristine white swirl icing to a small piping bag fitted with a very small writing tip (such as Wilton tips 1, 2, or 3). Set it aside at room temperature, keeping it ready for the final, iconic decorative touch on your assembled cupcakes.
Part 5: Assembling Your Perfect Hostess Cupcakes
- Once your chocolate cupcakes are completely cool to the touch, it’s time to begin the exciting process of filling them. Using a small, sharp paring knife or a specialized cupcake corer, carefully cut a cone shape from the top center of each cupcake, angling your cut inwards (refer closely to the provided images above for precise guidance). Gently lift and remove the cake cone.
- Retrieve your prepared piping bag containing the chilled cream filling. Pipe a generous amount of this luscious filling into the hollowed-out center of each cupcake. Fill it until the filling is slightly mounded, but ensure there is still adequate room to neatly replace the cake top.
- Take each removed cake cone and, if necessary, trim a small amount of cake from its wider base. This simple adjustment creates a flatter bottom, ensuring it will fit back snugly and seamlessly over the mounded filling. Gently press the cake top back into the crème-filled center. Use a clean, gloved hand or the flat side of an offset spatula to gently press down and effectively seal the cupcake, ensuring the delectable filling is fully enclosed and the top surface is relatively flat and even. Promptly scrape off any excess filling that may have seeped out during this process.
- Before proceeding to the glazing step, meticulously use a clean pastry brush or your fingers to gently brush off any loose cake crumbs from the top surface of the filled cupcakes. This crucial step prevents crumbs from mixing into and interfering with the smooth, pristine finish of the ganache coating.
- Give your chocolate ganache another quick, thorough stir to ensure it is perfectly smooth and maintains a desirable dipping consistency. If it has thickened too much during cooling, gently warm it in the microwave for precise 5-10 second intervals, stirring diligently after each interval, until it returns to the ideal fluid state.
- Take each cupcake, one at a time, holding it by its base. Dip the entire top of the cupcake completely into the warm ganache, ensuring it is fully coated. Lift the cupcake, allowing any excess ganache to drip off naturally back into the bowl. You can gently tap the cupcake against the rim of the bowl to expedite this process. For a truly flawless and even finish, gently hold the cupcake and shake it side to side a few times.
- Carefully place each ganache-dipped cupcake back onto the wire cooling rack, right-side up, allowing the ganache to begin setting.
- Once all cupcakes have been elegantly topped with ganache, transfer the entire cooling rack to the refrigerator for a critical 15-20 minutes. This chilling period is absolutely crucial for the ganache to firm up properly and create that perfect, slightly crackable, glossy shell characteristic of a Hostess cupcake.
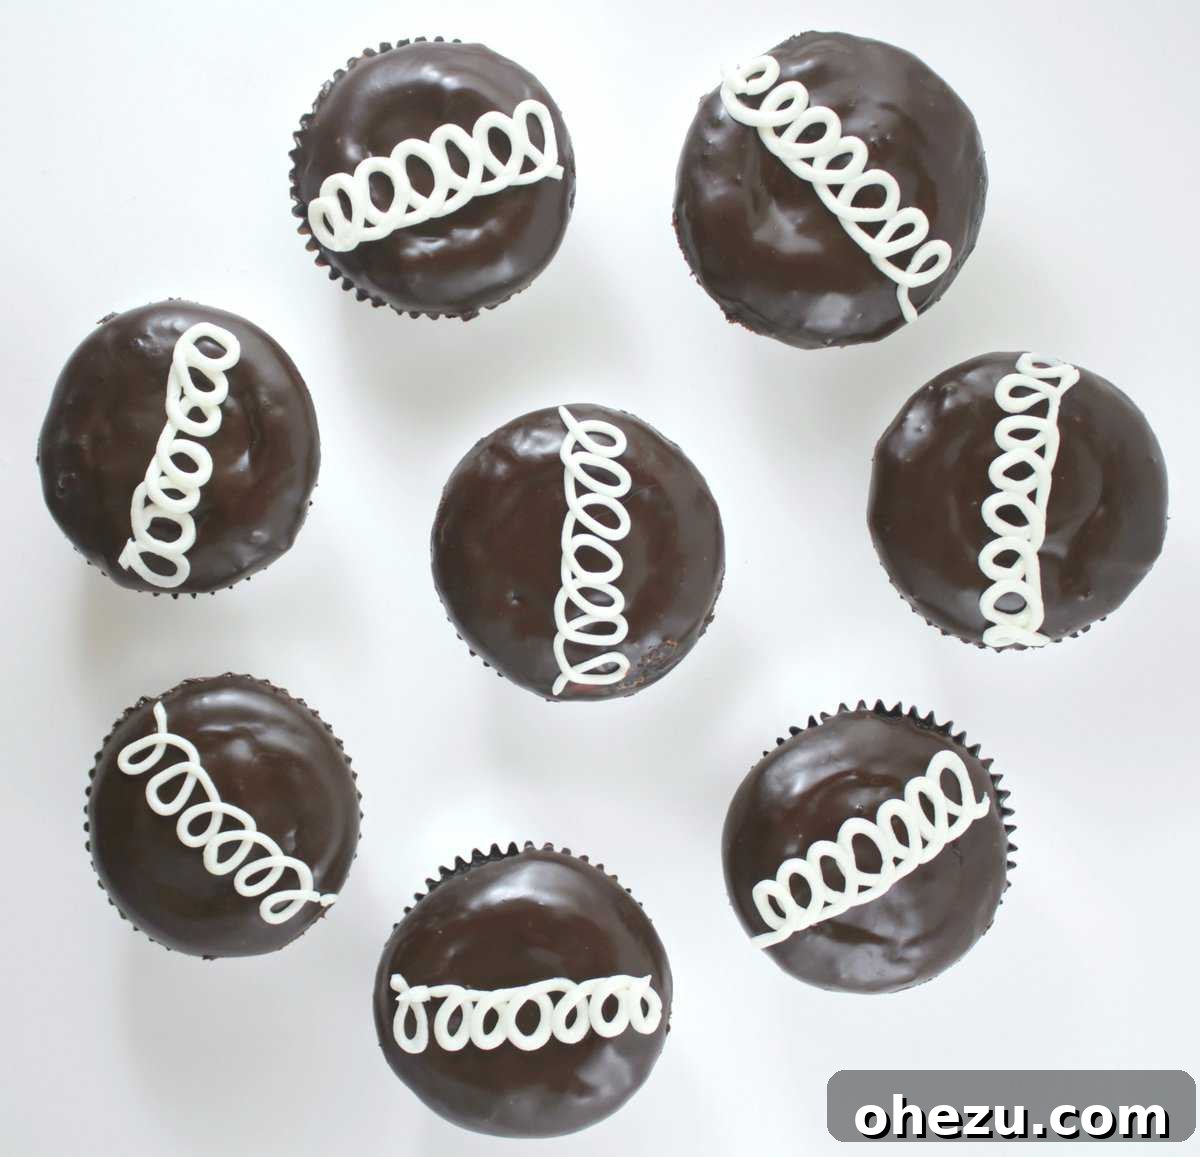
- When the ganache is firm to the touch and perfectly set, retrieve your piping bag containing the classic swirl icing. Pipe the signature looping, squiggly swirls gracefully across the top of each cupcake. If you’re feeling unsure, you can practice on a piece of parchment paper first to perfect your motion and design.
- Allow the swirl icing to set for a few minutes at room temperature, or briefly in the refrigerator, until it is firm and stable. Serve these magnificent homemade Hostess-style cupcakes immediately for the absolute best experience, enjoying their fresh textures and vibrant flavors.
Storage and Serving Suggestions for Your Homemade Hostess Cupcakes
These exquisite homemade Hostess-style cupcakes are at their peak flavor and texture when enjoyed within 3 days of preparation. To maintain their superior freshness, moistness, and to keep the ganache and creamy filling stable, always store them in an airtight container in the refrigerator. Before serving, for the most optimal tasting experience, we recommend allowing them to come to room temperature for approximately 15-20 minutes. This allows the ganache to soften slightly and the cake and filling to achieve their ideal textures and full flavor profile. These impressive cupcakes make a truly fantastic and memorable addition to any party, potluck, special gathering, or simply as a well-deserved, indulgent treat for yourself and your cherished loved ones.
Troubleshooting Common Cupcake Issues
Even experienced bakers can encounter minor challenges. Here are some common issues and how to resolve them for perfect cupcakes every time:
- Dry Cupcakes: The most frequent culprit for dry cupcakes is overbaking. Always ensure you test for doneness at the minimum recommended bake time by inserting a toothpick. An uncalibrated oven can also contribute; consider using an oven thermometer for accurate temperature readings.
- Runny Cream Filling: If your cream filling turns out too soft or lacks structure, it might not have been beaten sufficiently, or too much liquid (cream/milk) was inadvertently added. Refrigerating it for a longer period (an hour or more) or carefully incorporating a tiny bit more sifted powdered sugar can help firm it up to the desired consistency.
- Ganache Too Thin or Too Thick: If your ganache is too thin and drips excessively, simply let it cool longer at room temperature, stirring occasionally, until it reaches a thicker, more viscous state. Conversely, if it becomes too thick and hard to dip, gently warm it in 5-second intervals in the microwave, stirring thoroughly after each interval, until it achieves the perfect smooth, dipping consistency.
- Lopsided Cupcakes: Uneven distribution of batter into the liners or an unlevel oven can cause cupcakes to bake lopsided. Always ensure your muffin tin is placed on a flat, even surface within the oven, and use a disher or ice cream scoop for consistent batter portions.
We sincerely hope you thoroughly enjoy the rewarding process of creating and savoring these ultimate homemade Hostess-style cupcakes. They are truly a labor of love that promises to deliver immense satisfaction and delight with every single, exquisite bite!