

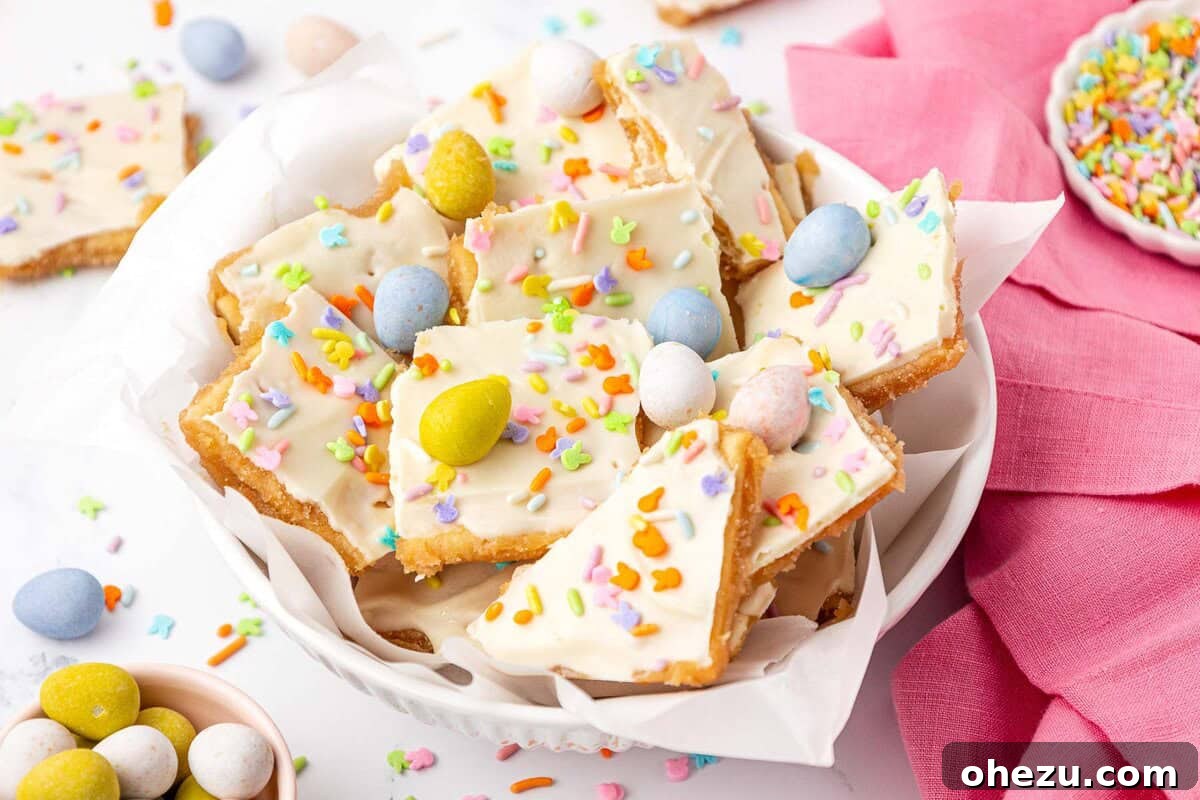
Discover the ultimate easy Easter dessert with this irresistible Easter Crack recipe. A festive twist on the beloved classic saltine toffee, this treat is adorned with vibrant Cadbury Mini Eggs and colorful sprinkles, making it a perfect addition to your holiday celebration. Prepare for a sweet-and-salty sensation that’s impossible to resist!
The Magic of Easter Saltine Toffee: A Holiday Favorite Transformed
There’s a widespread love for saltine toffee, a delightful confection often affectionately known as “Christmas Crack.” Its uncanny ability to blend the savory crunch of crackers with the luscious sweetness of buttery toffee creates an addictive treat that disappears quickly at any gathering. This year, we’re taking that beloved concept and infusing it with the vibrant spirit of spring, transforming it into a truly special Easter Saltine Toffee. This recipe proves that you can enjoy the classic flavors you adore, dressed up in a colorful, holiday-appropriate package.
Envision a sheet of crisp saltine crackers, lovingly coated and baked beneath a shimmering layer of rich, homemade toffee. Once out of the oven, this base is generously topped with creamy, melted white chocolate, providing a smooth canvas for a cascade of cheerful Easter candies. Each bite offers an intricate dance of textures and tastes: the satisfying snap of the cracker, the chewy resistance of the golden toffee, the velvety smoothness of the white chocolate, and the delightful crunch of Cadbury Mini Eggs. It’s a symphony for the senses, capturing the essence of Easter joy and making it an unparalleled dessert for family feasts, springtime potlucks, or simply a fun baking project to share with children.
This “Easter Crack” transcends the typical dessert; it’s an experience that fosters connection and joy. Its straightforward preparation belies its profound deliciousness, demonstrating that the most impressive treats often stem from simple ingredients and techniques. Adorned with charming pastel sprinkles and those unmistakable Cadbury Mini Eggs, this dessert is not only a feast for the palate but also a visual delight. Consider this your friendly warning: this sweet-and-salty masterpiece is so utterly captivating, you might find yourself reaching for “just one more piece” time and time again! It’s the perfect way to bring a touch of seasonal festivity to a year-round favorite.

Essential Ingredients for Your Easy Easter Crack
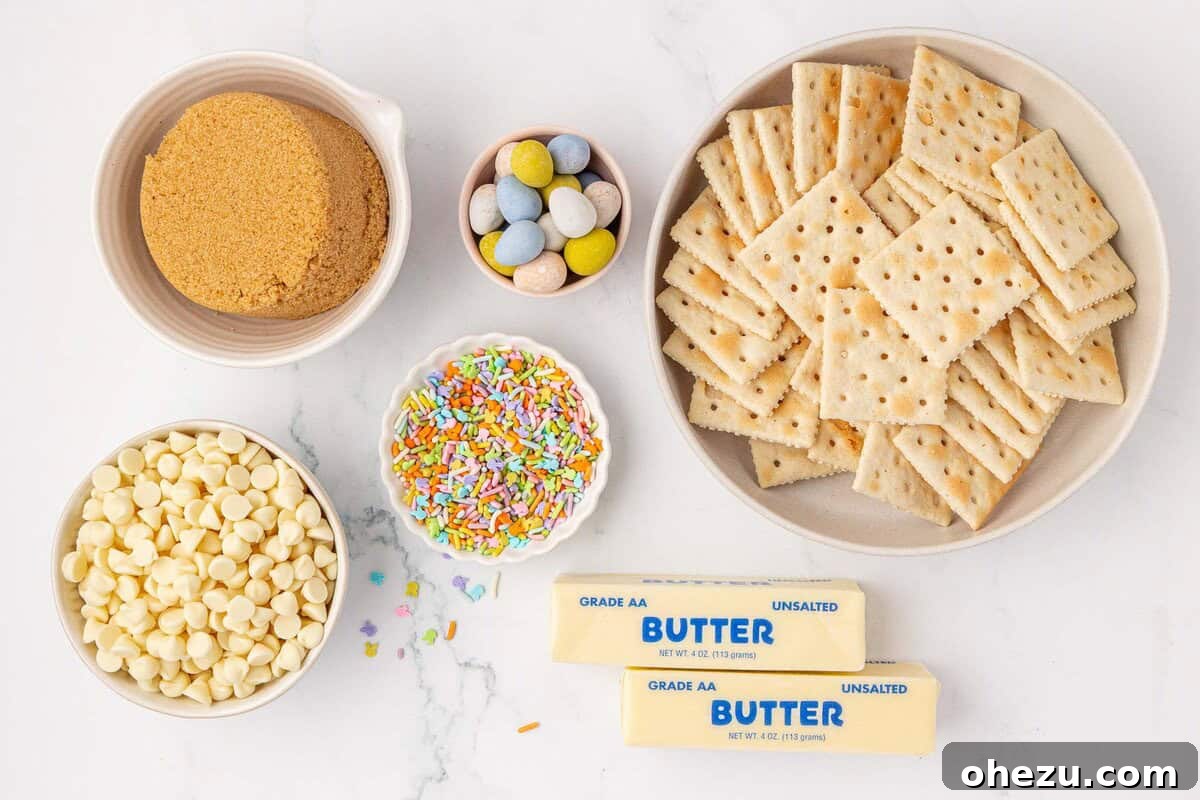
Creating a batch of perfect Easter Crack requires only a handful of common pantry staples. The real magic unfolds as these simple components combine to deliver an exquisite balance of sweet and salty, crunchy and smooth. Here’s a detailed look at the ingredients you’ll need to assemble:
- Saltine Crackers: The humble saltine cracker forms the foundational layer of this extraordinary toffee. Their distinct salty profile provides a brilliant counterpoint to the rich, sweet toffee and chocolate. When baked, their crisp texture transforms into a sturdy yet pleasantly tender base, ensuring each bite delivers that satisfying crunch. A standard sleeve, typically containing about 35 crackers, is usually sufficient to cover a large baking sheet. Arranging them in neat rows, with minimal gaps, sets the stage for a uniform toffee coating.
- Butter and Brown Sugar: These two powerhouse ingredients are the heart of the luscious, golden toffee layer.
- Unsalted Butter: We recommend using unsalted butter to give you precise control over the overall saltiness of your finished Easter Crack. Since saltine crackers are already inherently salty, unsalted butter allows you to fine-tune the flavor balance. If only salted butter is available, you can still use it, but consider slightly reducing the salt content elsewhere in your recipe, or opting for crackers with a milder salt level.
- Light Brown Sugar: Light brown sugar is crucial for achieving that classic caramel flavor and beautiful amber hue in your toffee. Its natural molasses content adds a wonderful depth and complexity that regular granulated sugar simply cannot replicate. For those who desire an even deeper, more intense molasses flavor and a darker toffee, dark brown sugar makes an excellent substitute.
- White Chocolate Chips: This creamy, sweet layer acts as the perfect binder for our festive toppings and provides a smooth, indulgent finish. High-quality white chocolate chips, such as Ghirardelli, are recommended as they melt effortlessly and deliver a superior creamy texture. Alternatively, white chocolate melting wafers or a block of white chocolate, finely chopped, can be used for an even silkier melt. For a playful and vibrant touch that further enhances the Easter theme, consider using pastel-colored candy melts.
- Festive Toppings: This is where your Easter Crack truly comes alive with color and seasonal cheer!
- Cadbury Mini Eggs: These iconic, pastel-shelled chocolate eggs are an absolute must-have for an authentic Easter Crack experience. Their satisfying crunch and rich chocolatey center offer a delightful textural contrast and burst of flavor that pairs perfectly with the tender toffee. You can gently crush some for smaller, more evenly distributed pieces, or leave them whole for maximum visual impact.
- Easter Colored Sprinkles: A generous scattering of pastel-hued sprinkles instantly adds a festive flair and a playful aesthetic. You can choose from various types, including nonpareils, jimmies, or shimmering sugar crystals, all in beautiful spring shades.
To further customize your treat, consider incorporating other delightful toppings such as chopped pastel M&M’s, finely shredded coconut (which can be tinted green with food coloring to resemble grass), or a sprinkle of finely chopped nuts like pecans or walnuts for an additional layer of crunch and flavor.
By gathering these straightforward ingredients, you’re well on your way to creating a truly unforgettable and wonderfully addictive Easter dessert that will be cherished by everyone who tastes it.
How to Make Irresistible Easter Crack: A Detailed Step-by-Step Guide
Creating your own batch of Easter Crack is a surprisingly straightforward process, yielding impressive results with minimal effort. By following these clear, step-by-step instructions, you can ensure a perfect, delicious, and beautifully festive treat every single time, from the initial golden toffee base to the final vibrant decorations.
Pro Tips for Achieving Perfect Toffee Consistency Every Time
The foundation of an outstanding saltine toffee lies in the precise caramelization of your butter and brown sugar mixture. Mastering this step ensures a smooth, rich, and perfectly consistent toffee layer that won’t separate or crystalize. Here are some invaluable tips to guide you:
- Embrace Slow and Steady Heat: This is arguably the most crucial tip. Always begin by melting the butter and brown sugar together over medium-low heat. Resisting the temptation to rush the process with high heat is key. Rapid heating can cause the butter and sugar to separate into an oily, grainy mess, rather than forming a cohesive, smooth caramel. Allow the mixture to come to a gentle simmer gradually, giving the sugar ample time to dissolve properly.
- Maintain Constant Stirring: Once your butter and brown sugar mixture begins to simmer and then boil, it’s imperative to stir it constantly. This diligent stirring prevents the sugar from sticking and scorching at the bottom of the saucepan, which can impart a burnt flavor to your toffee. Consistent agitation also ensures even heat distribution throughout the mixture, leading to a uniformly delicious caramel. A heat-proof silicone spatula or a sturdy wooden spoon are ideal tools for this task.
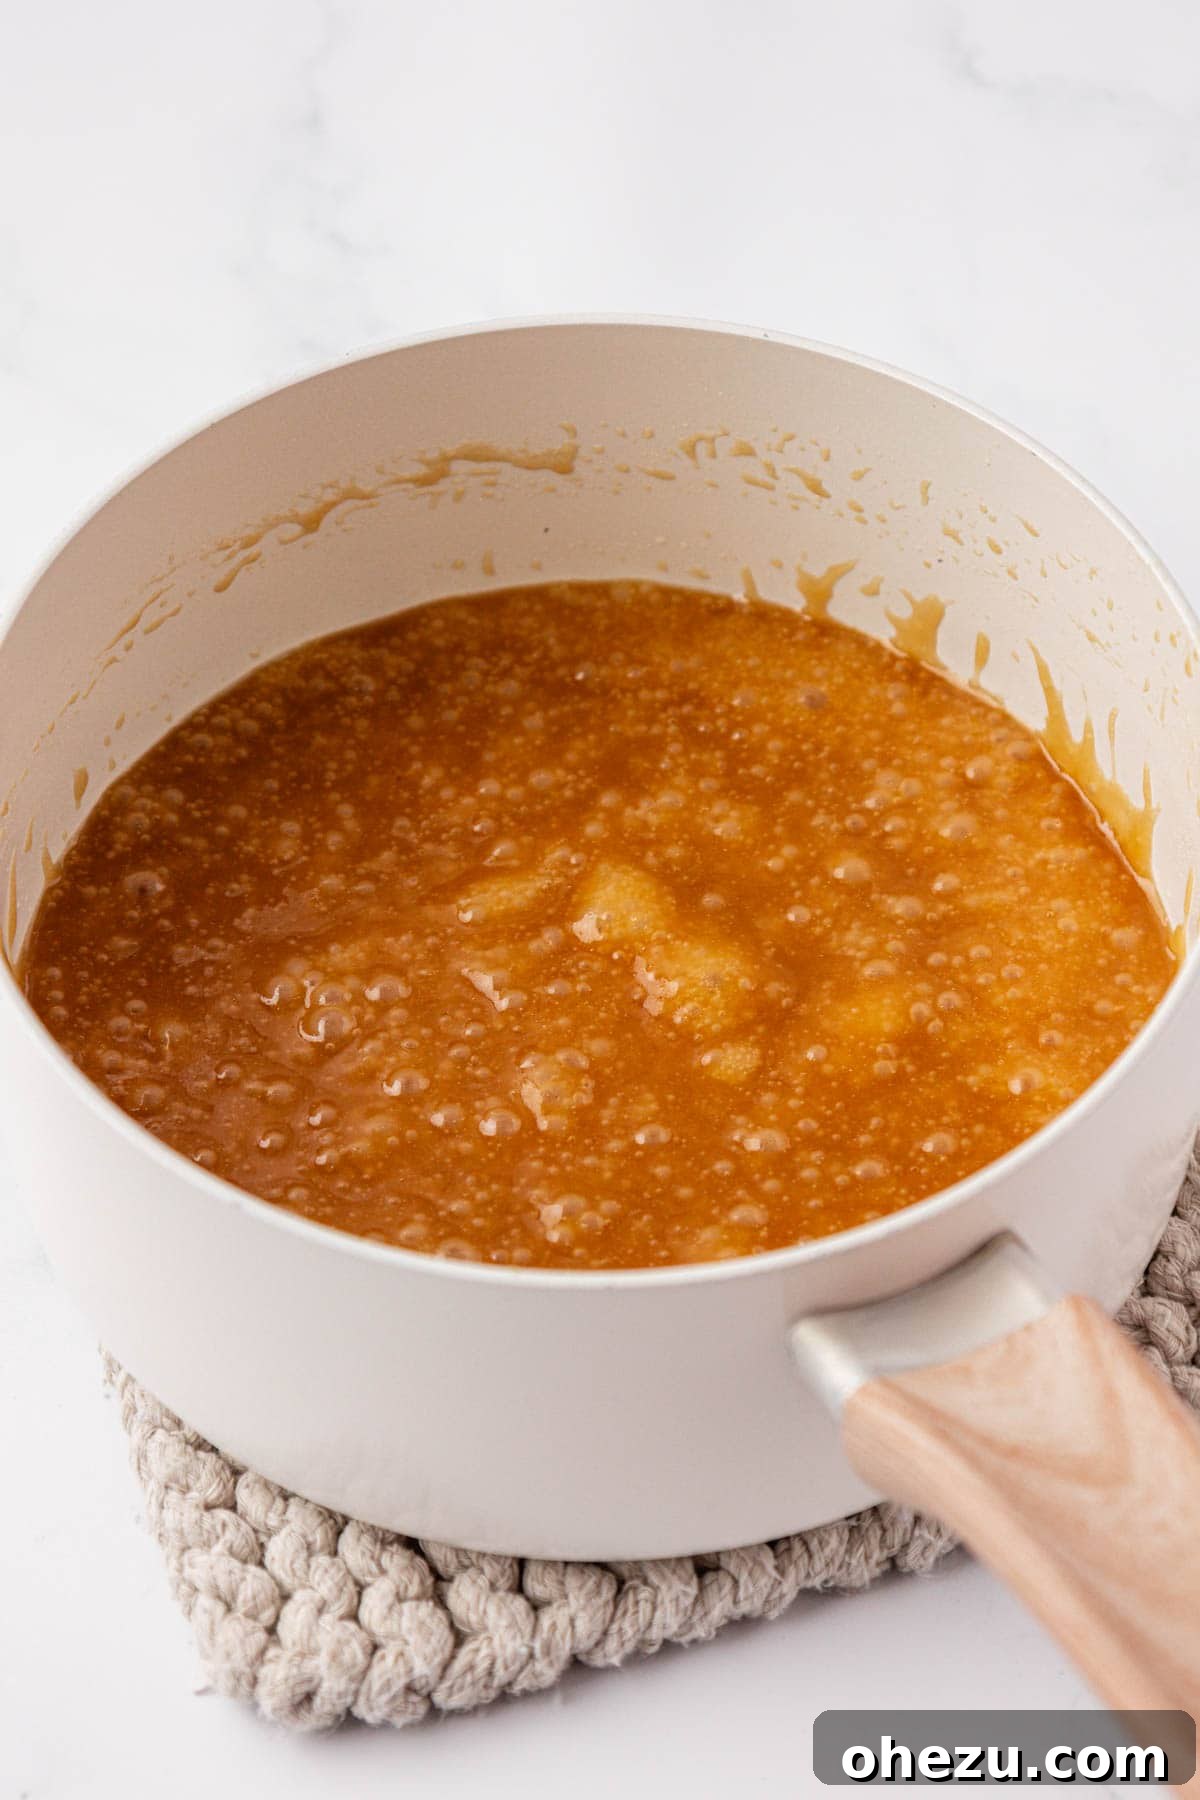
- Precise Boiling Time is Essential: After the mixture reaches a full, rolling boil, continue to boil it for exactly 2-3 minutes, maintaining that constant stirring. This specific boiling window is critical for the sugar molecules to achieve the correct stage of caramelization. It allows the mixture to thicken into that ideal toffee consistency – not too soft and sticky, nor overly hard and brittle. You’ll notice the mixture becoming visibly bubbly and developing a slightly deeper, richer amber color, signaling it’s nearing completion.
- Look for Visual Cues of Perfection: Pay close attention to the transformation of your toffee. It should evolve from a thinner, lighter brown liquid into a noticeably thicker, more viscous, and richly amber-colored syrup. When you lift your spoon, the toffee should coat the back of it, indicating it has sufficiently reduced and achieved the desired thickness.
- Invest in a Heavy-Bottomed Saucepan: The type of saucepan you use can significantly impact your toffee’s success. A sturdy, heavy-bottomed saucepan is superior because it distributes heat much more evenly across its surface. This even heat distribution is vital for preventing hot spots that can lead to scorching, further supporting the gradual heating process for a flawless toffee. A non-stick interior also makes cleanup considerably easier.
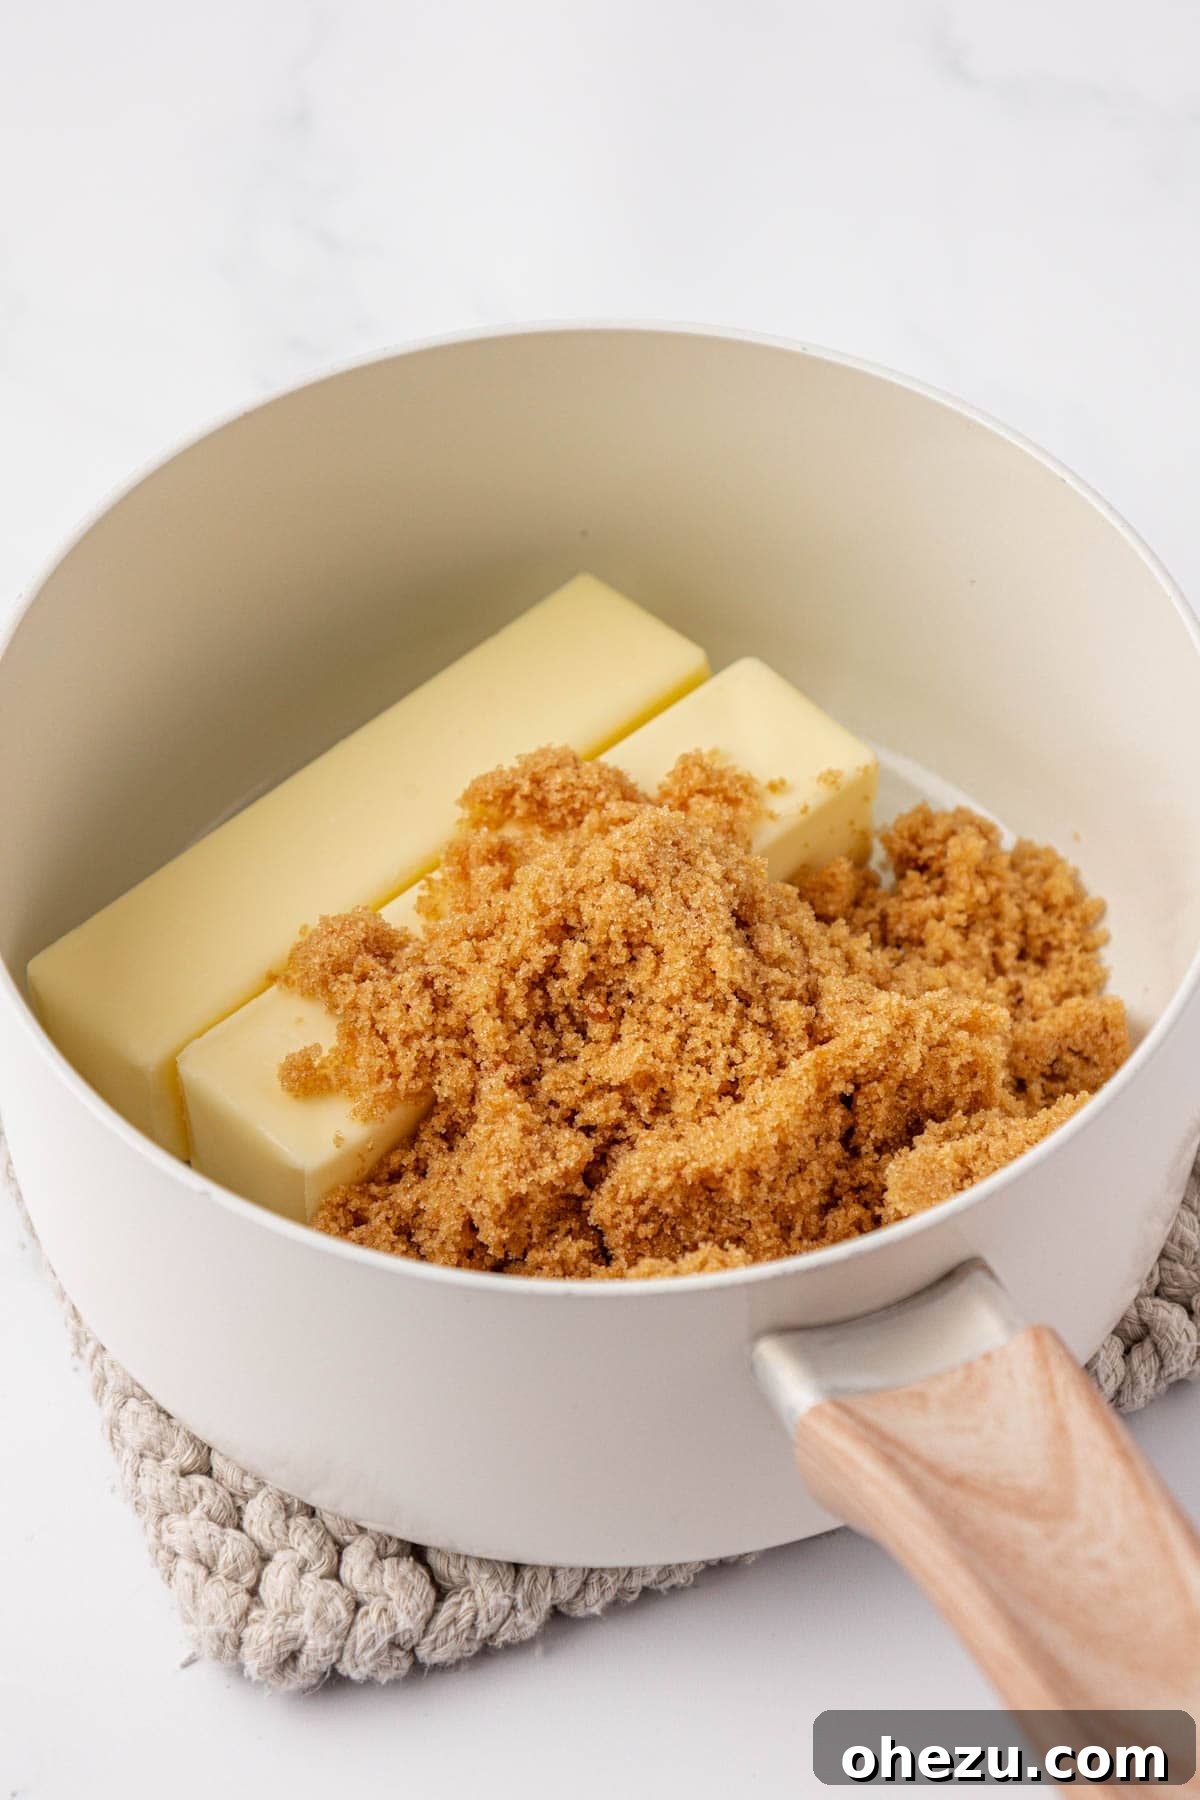
Step 1: Prepare Your Toffee Base. Begin by combining the butter and brown sugar in a medium, heavy-bottomed saucepan. Place the saucepan over medium-low heat. Stir continuously as the butter slowly melts and the brown sugar dissolves, integrating fully. Allow the mixture to gradually come to a gentle, rolling boil. Once it’s boiling steadily, reduce the heat slightly to maintain a consistent simmer, and continue stirring constantly for precisely 2-3 minutes. During this crucial period, the mixture will visibly thicken and transform into a rich, fragrant, caramel-like toffee, developing a beautiful amber hue. Ensure it coats the back of your spoon effectively before immediately removing it from the heat.
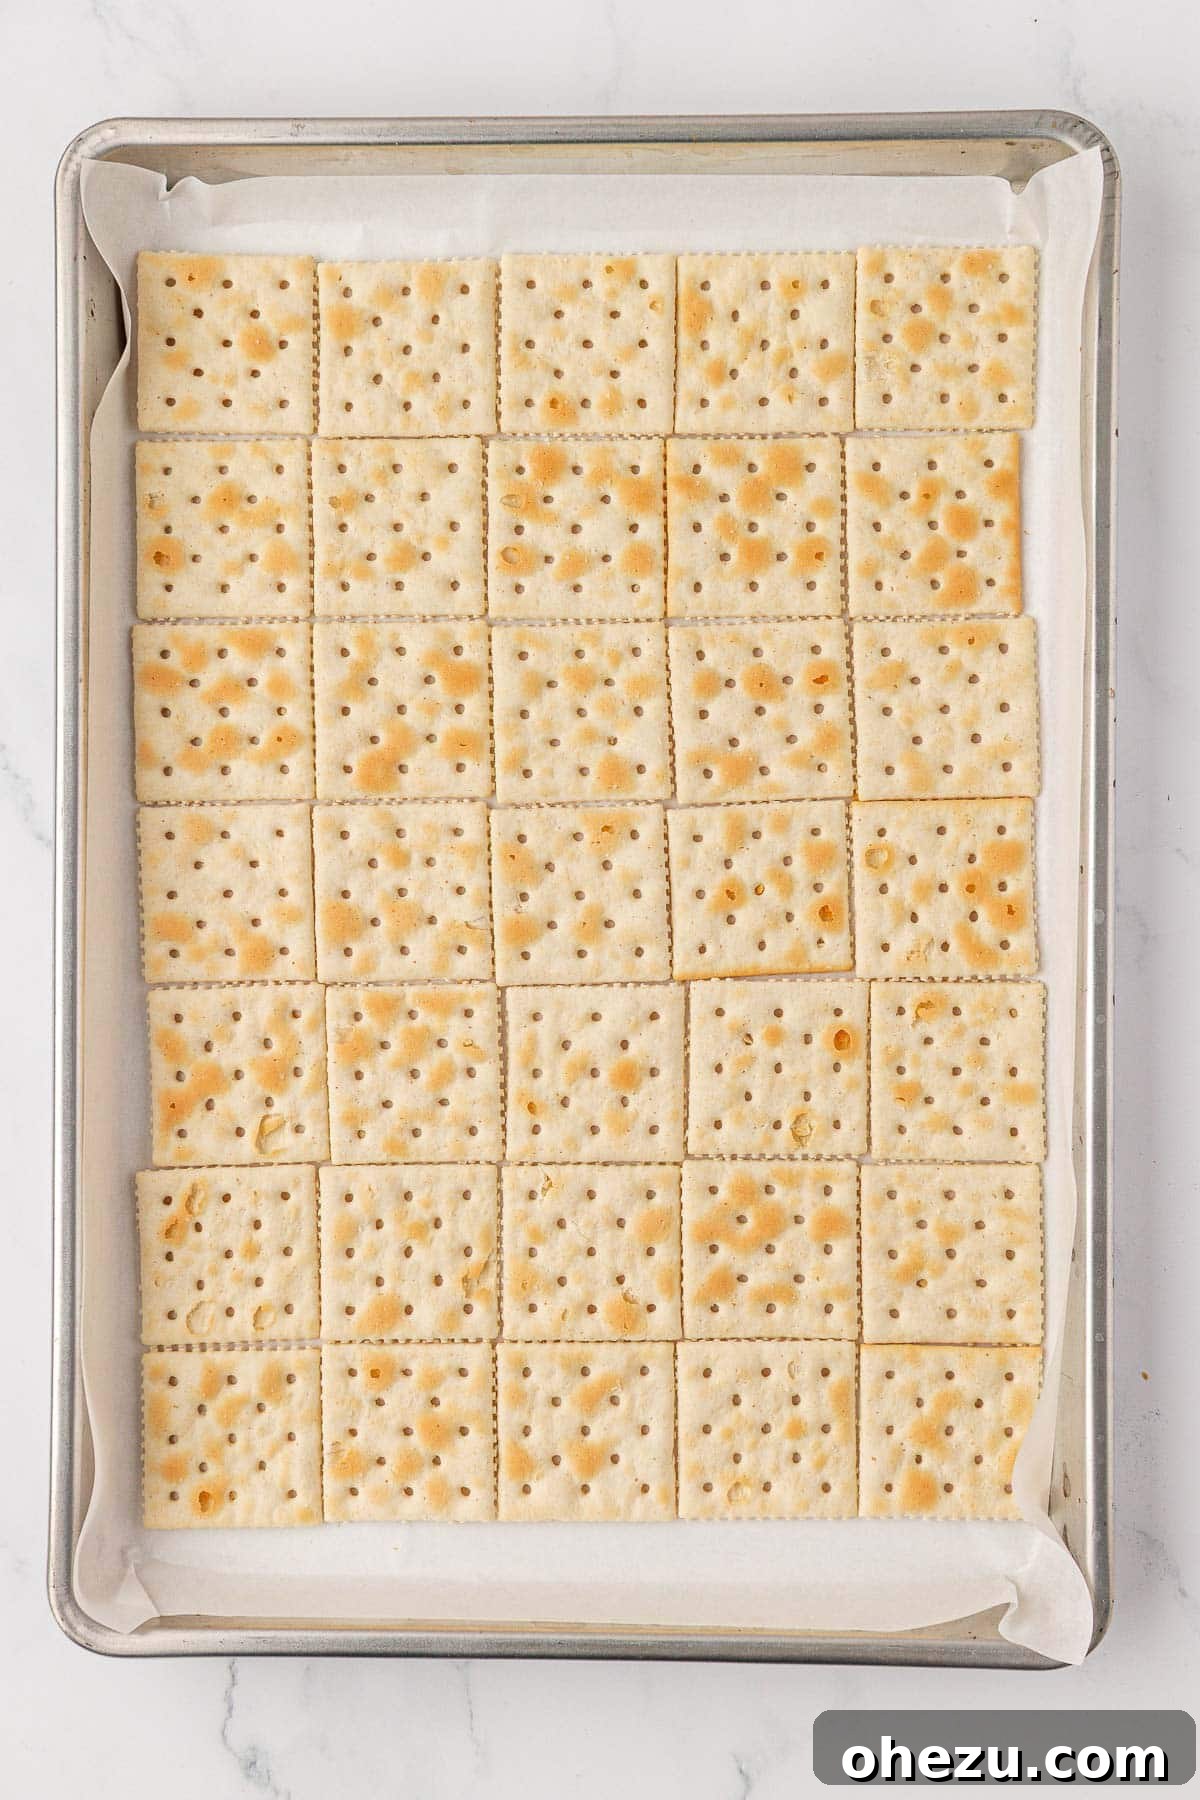
Step 2: Arrange the Cracker Foundation. While your toffee is coming together, preheat your oven to 350°F (175°C). Line a large baking sheet, ideally one measuring approximately 13×18 inches, with a sheet of parchment paper. This parchment paper layer is absolutely essential, not only for effortless removal of the finished crack but also for making cleanup a breeze. Arrange a single layer of saltine crackers tightly in neat rows across the entire prepared baking sheet. It’s acceptable if there are very small gaps between the crackers, but strive to create a layer that is as uniform and continuous as possible, ensuring even coverage when the toffee is poured.
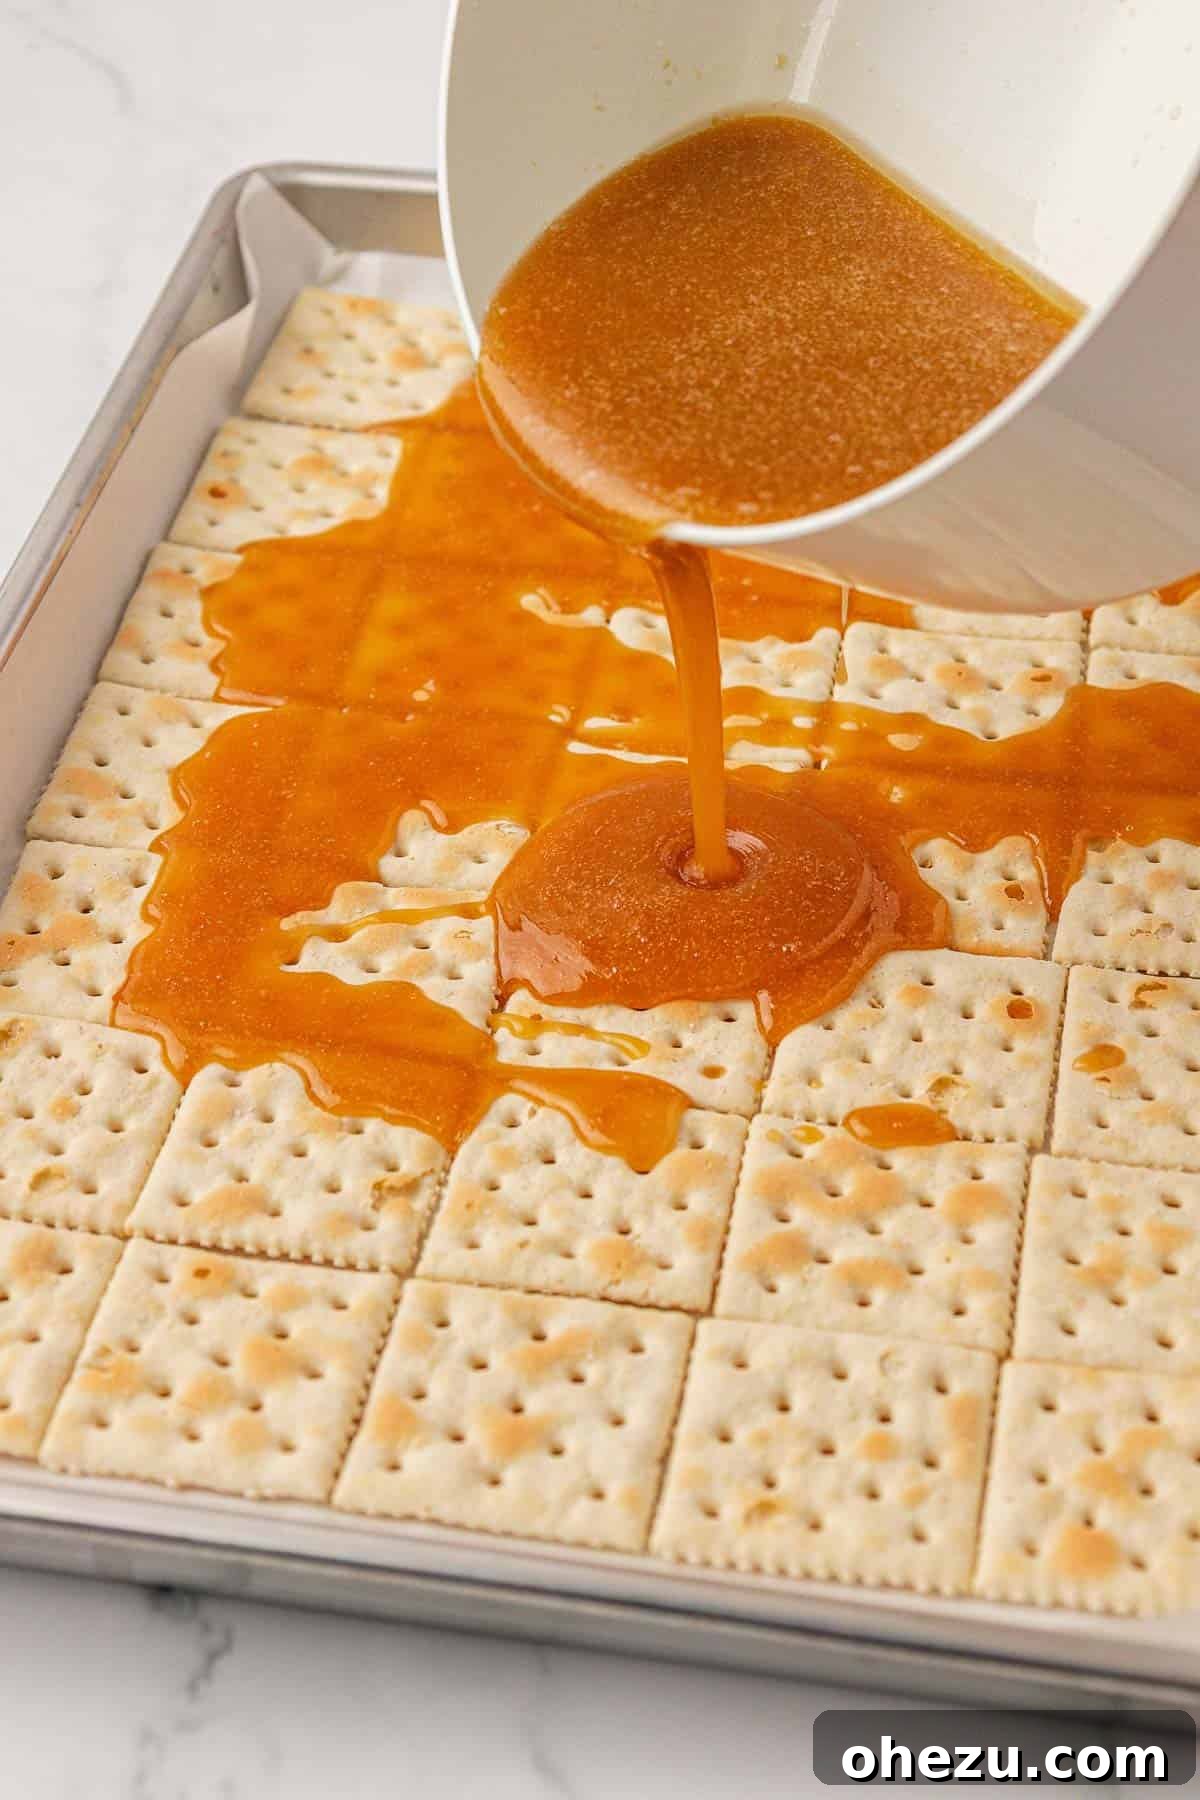
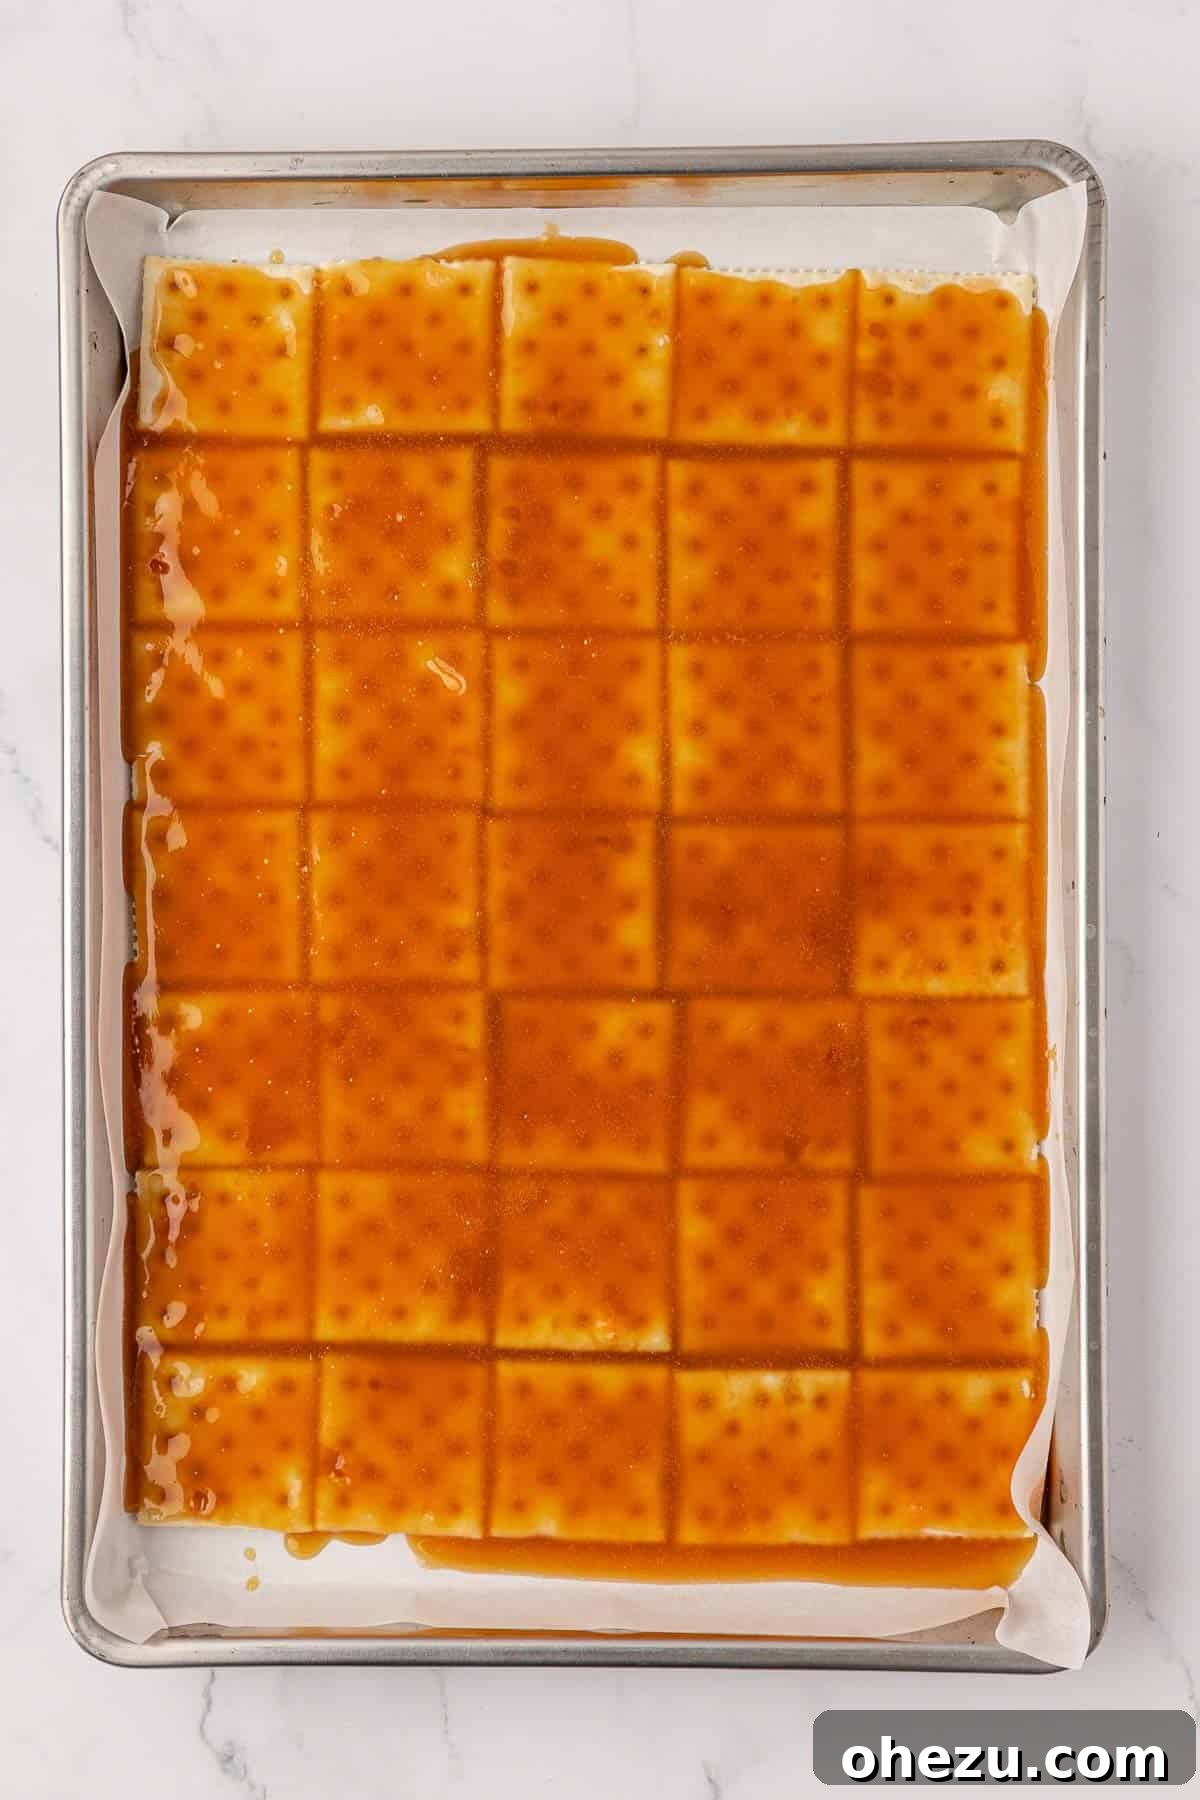
Step 3: Pour and Spread the Toffee. With extreme care, pour the hot, freshly thickened toffee mixture evenly over the entire layer of saltine crackers. Work swiftly but gently, employing a heat-resistant rubber spatula or an offset spatula to spread the toffee, making sure that every single cracker is thoroughly coated. Be cautious not to disrupt the orderly arrangement of the crackers as you spread. The objective here is to achieve a smooth, consistent layer of rich toffee over all the crackers, creating a solid base for your Easter Crack.
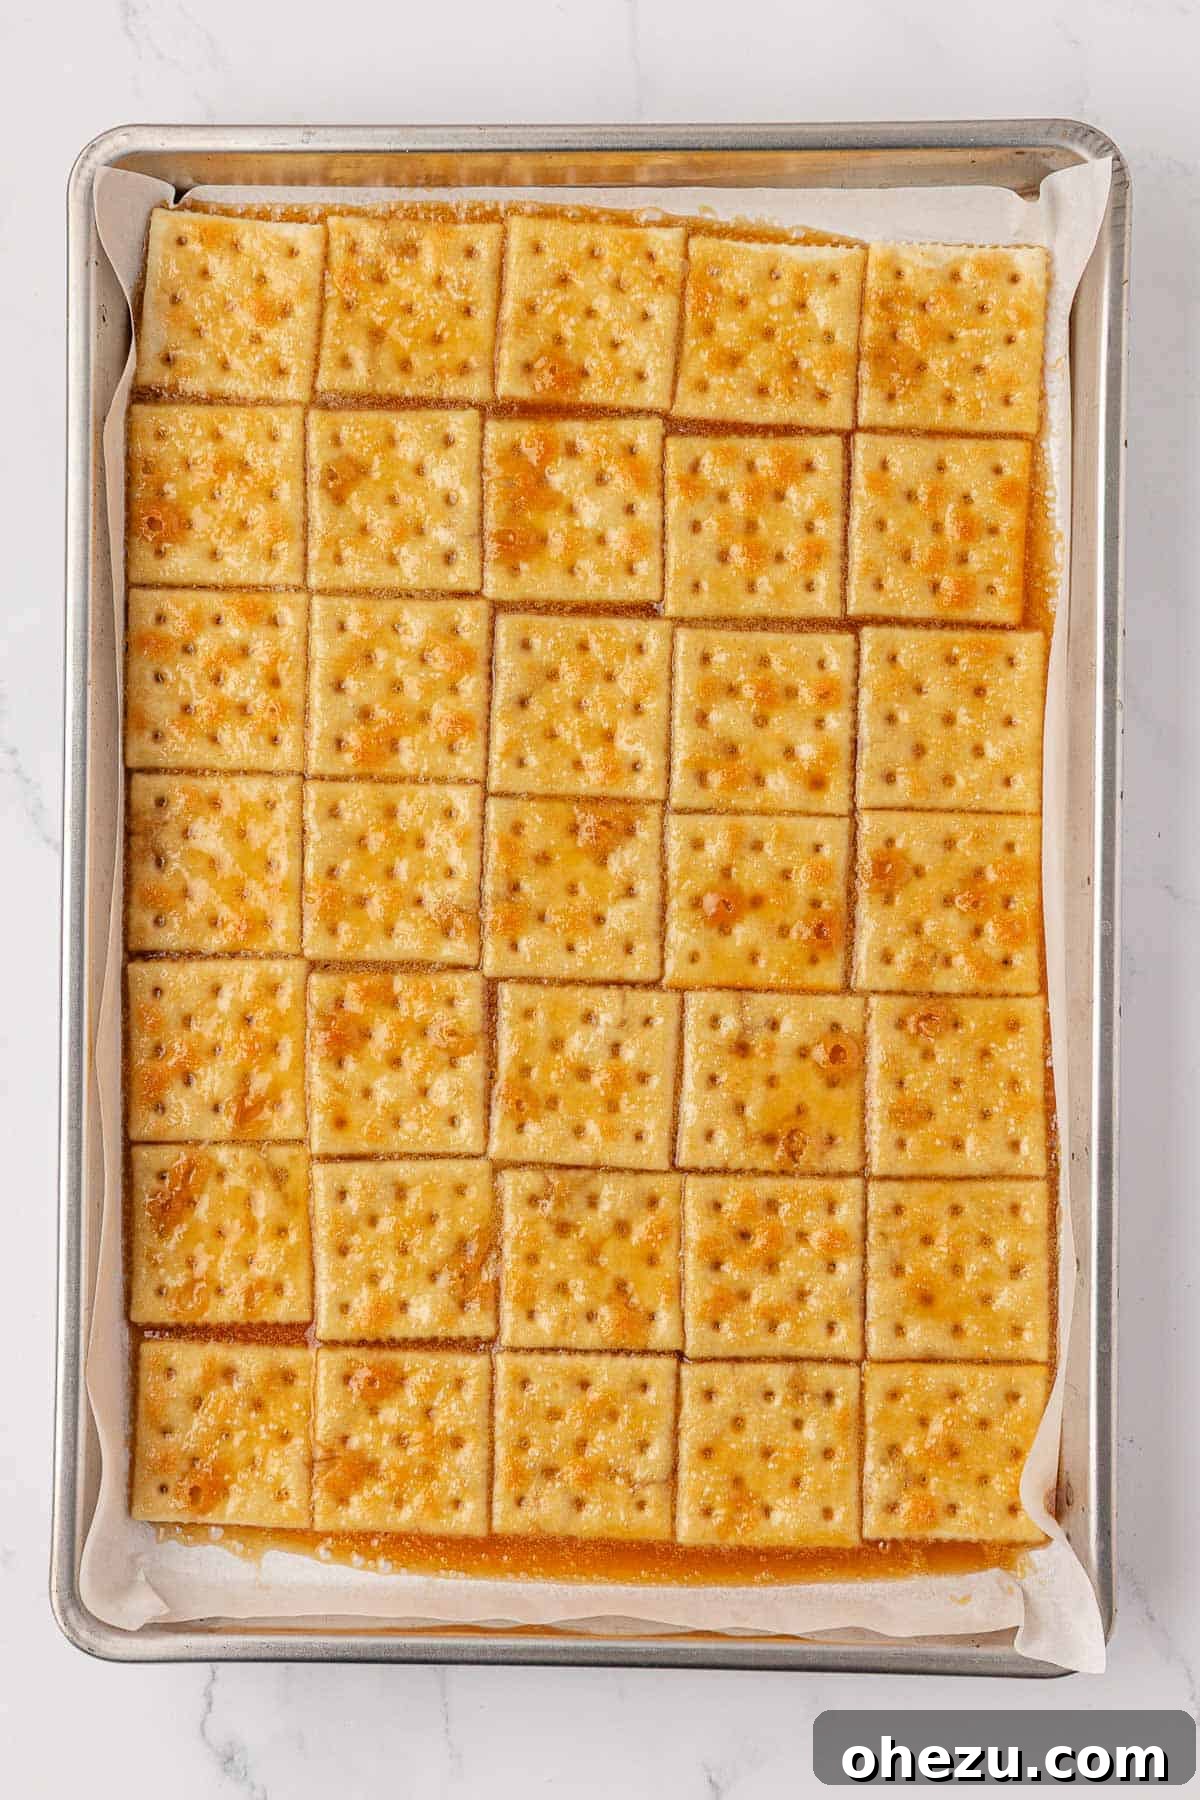
Step 4: Bake to Perfection. Gently transfer the baking sheet, now laden with the toffee-covered saltines, into your preheated oven. Allow it to bake for a brief period of 4-5 minutes. During this crucial baking stage, it’s important to keep a watchful eye; the toffee should become visibly bubbly across the surface and begin to show a slight browning around the edges of the crackers. This baking step is vital as it helps the toffee meld harmoniously with the crackers, intensifying its flavor and developing that signature crispy, yet delightfully chewy, texture. Prevent overbaking at all costs, as toffee can transition from perfectly golden to burnt very rapidly.
Step 5: Introduce the White Chocolate Chips. Once the baking time is complete, carefully remove the hot pan from the oven. Without delay, generously sprinkle the white chocolate chips evenly over the entire hot, bubbly toffee layer. The residual heat radiating from the freshly baked toffee and crackers will initiate the melting process of the chocolate. This passive method of melting is ideal, as it helps create a beautifully smooth and glossy chocolate layer without the common risk of scorching or seizing the chocolate from direct heat.
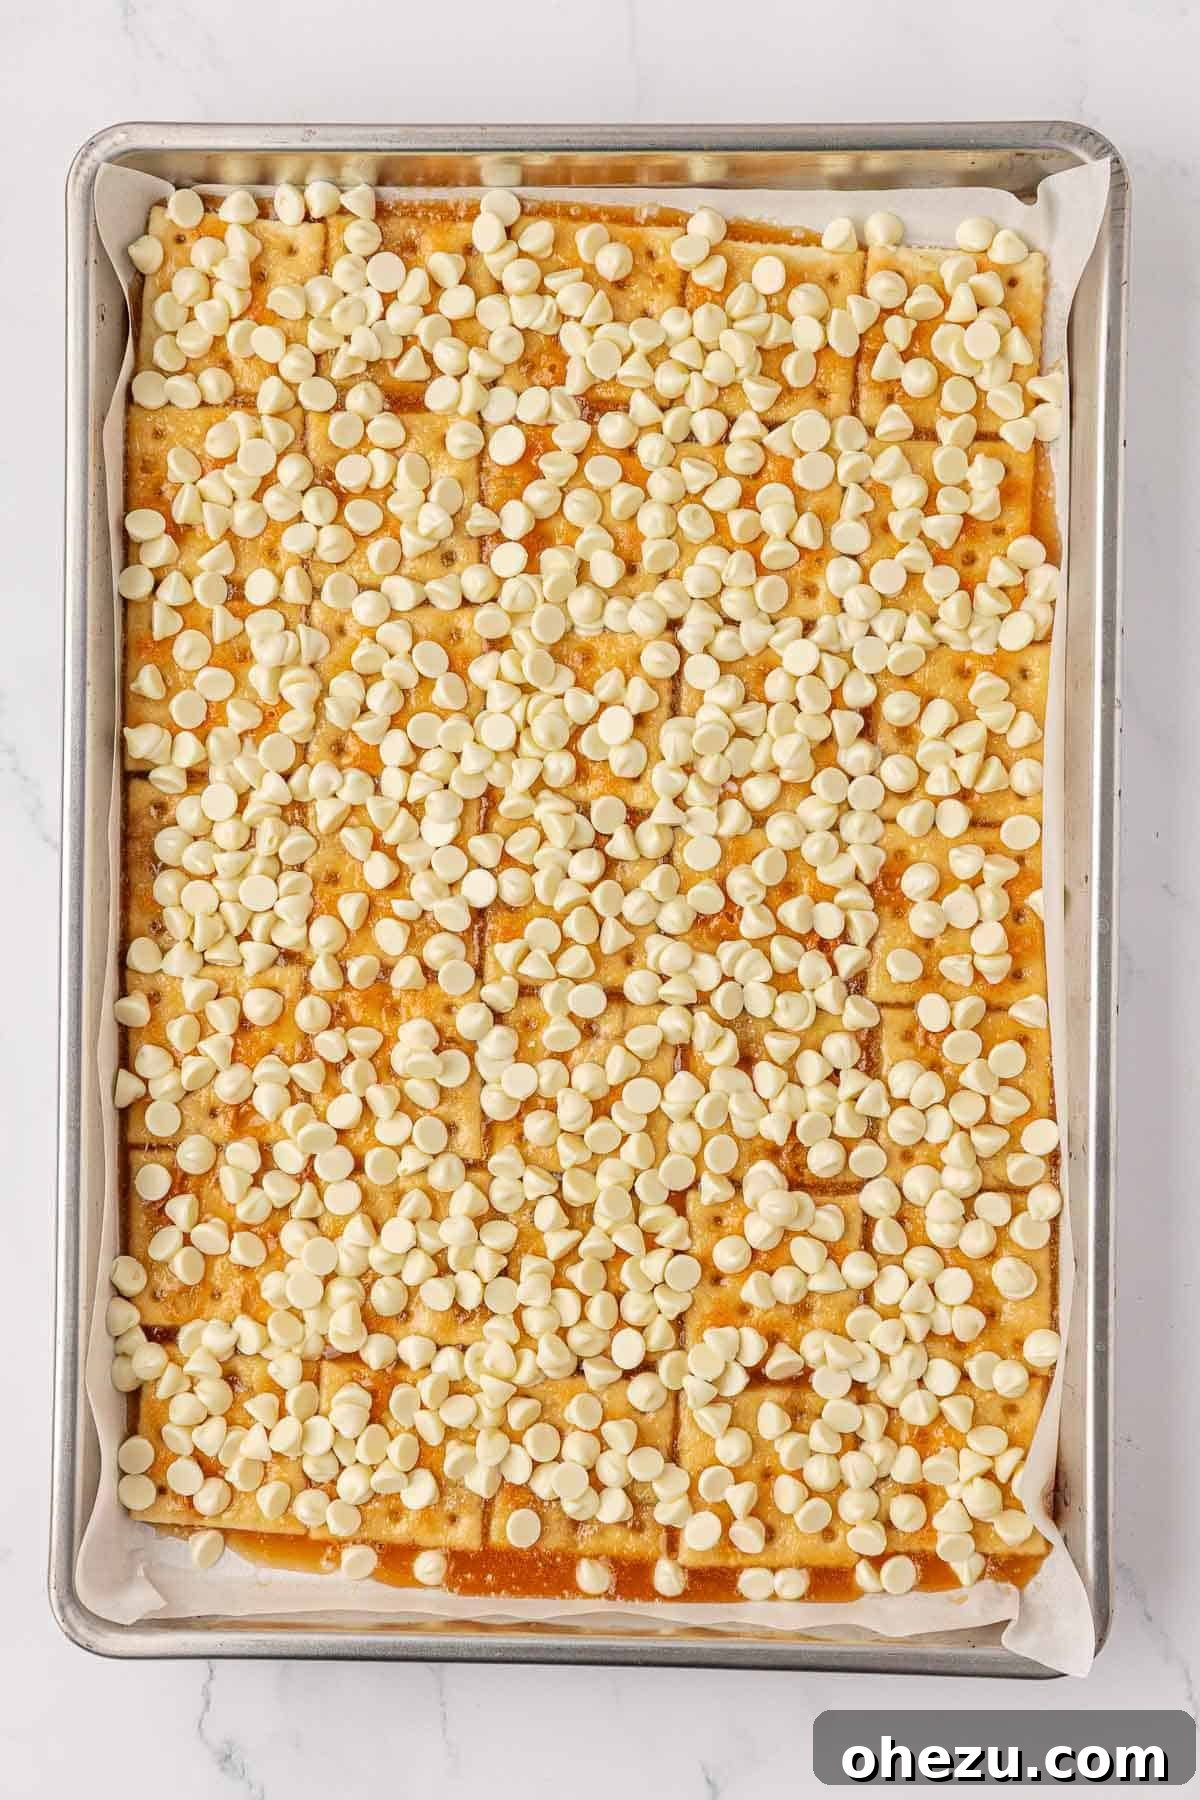
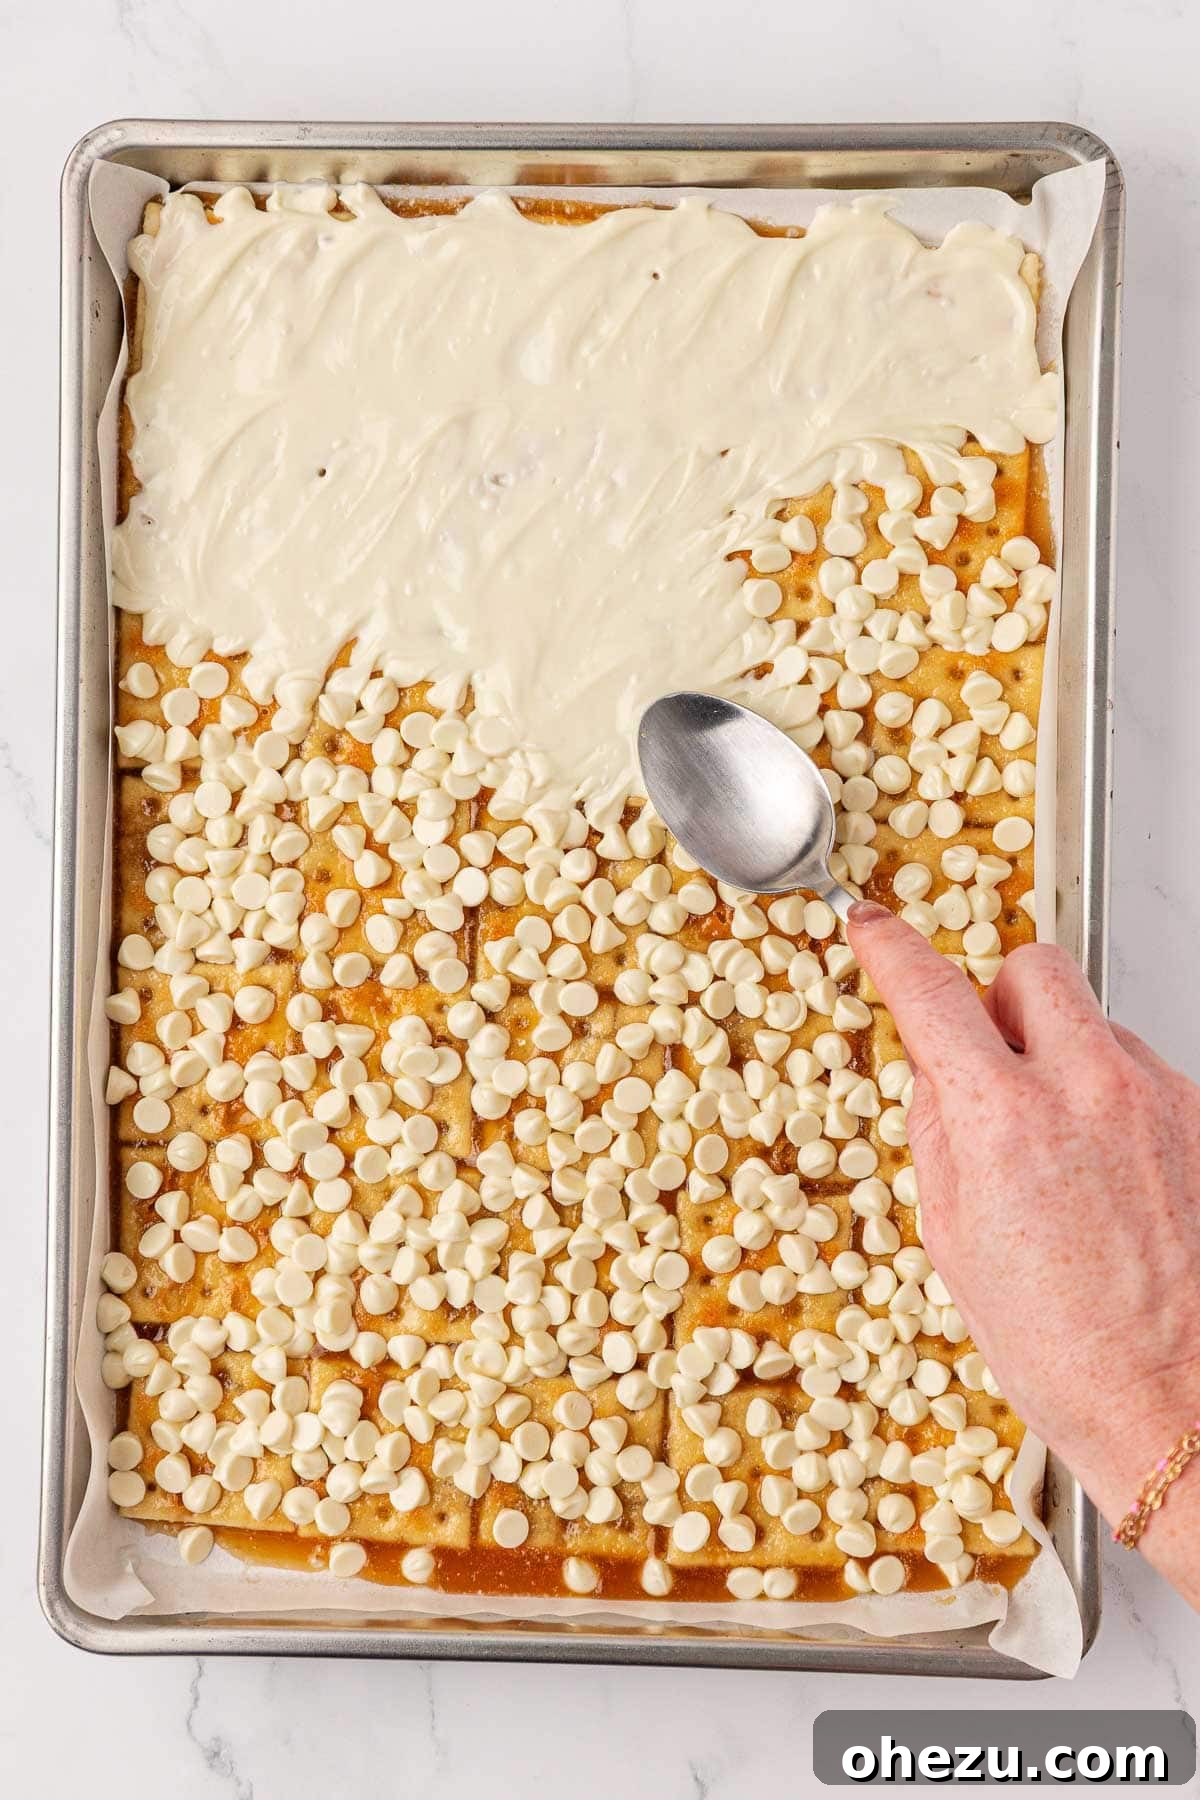
Step 6: Spread the Melted Chocolate Evenly. Allow the white chocolate chips to rest on the warm toffee for approximately 5 minutes, or until they appear mostly melted and have developed a soft, glossy sheen. Once adequately melted, use the back of a spoon or a small offset spatula to gently and evenly spread the melted white chocolate across the entire surface of the crackers. Work with care to avoid disturbing the underlying toffee layer. Your aim is to achieve a smooth, consistent, and beautiful coating of chocolate that covers the whole sheet.
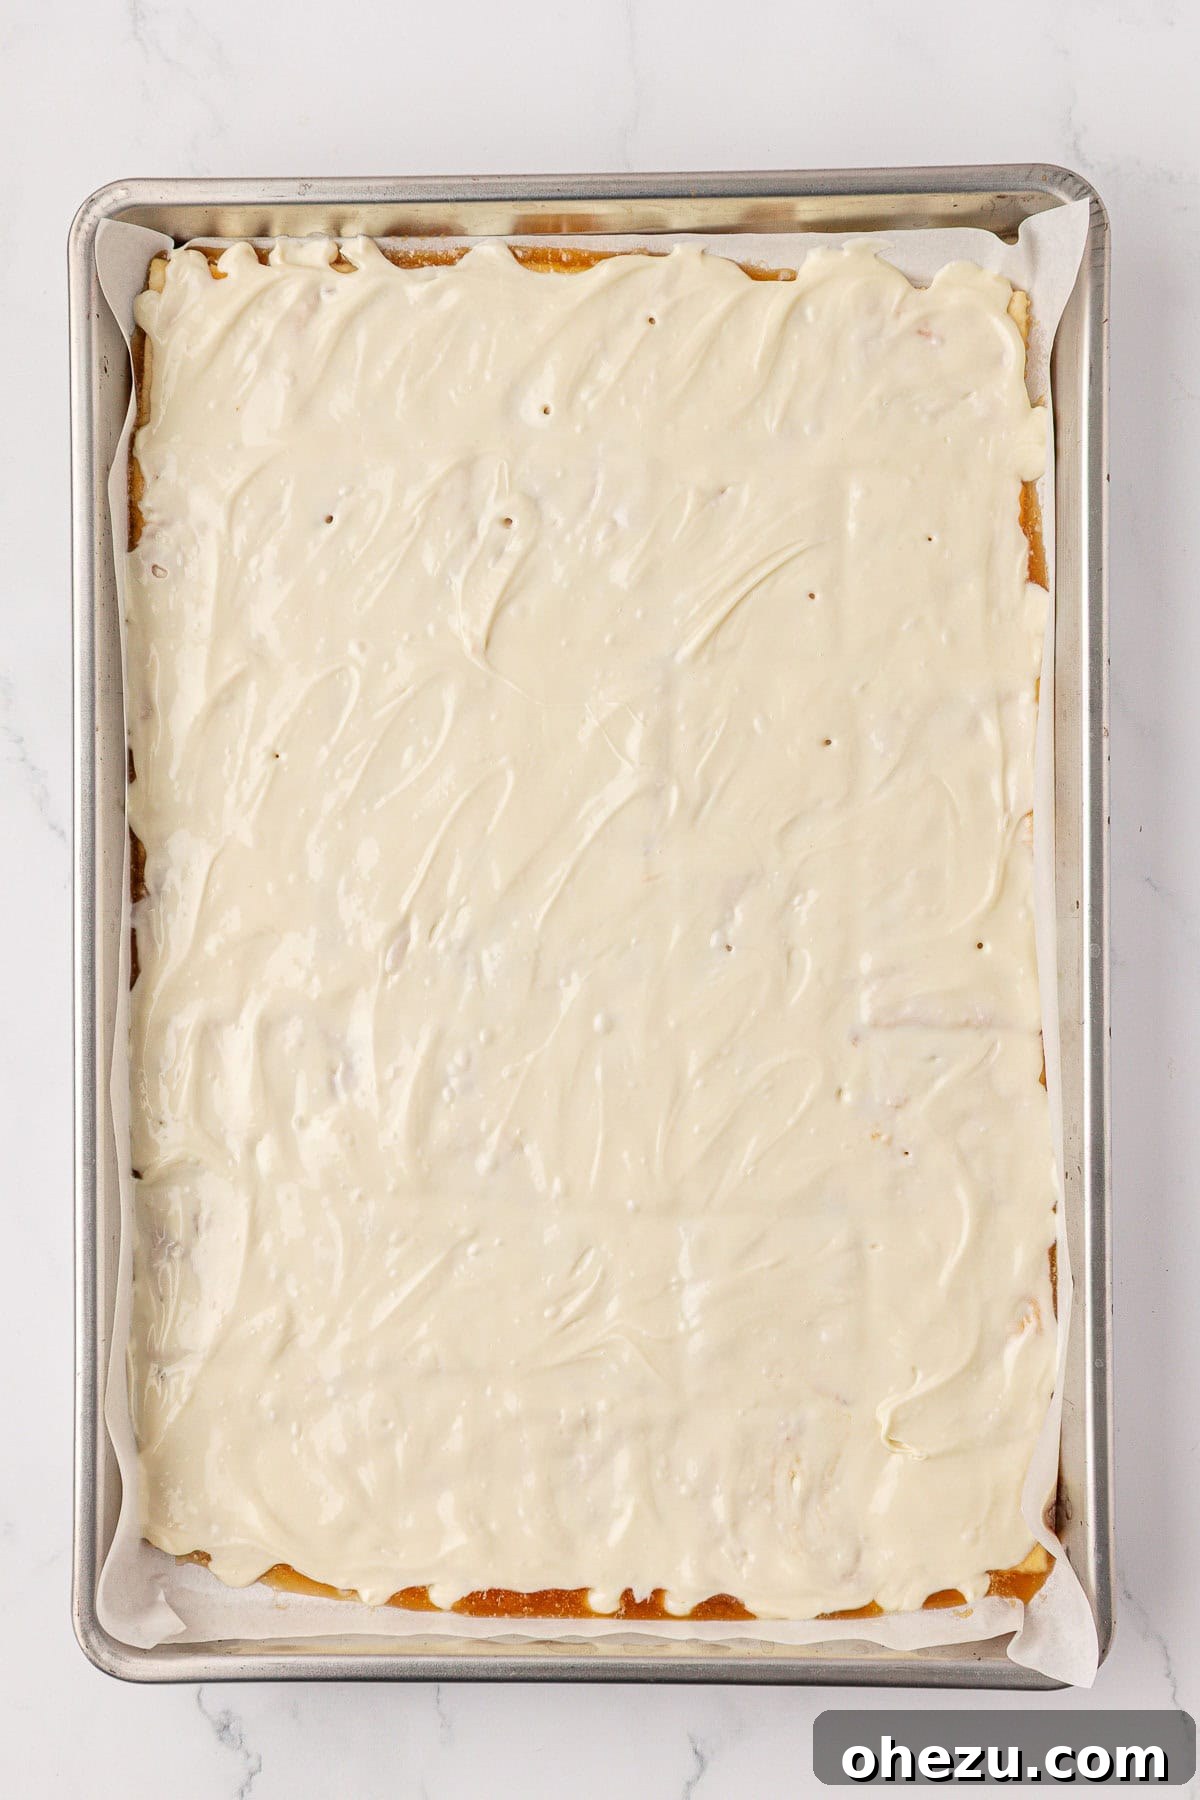
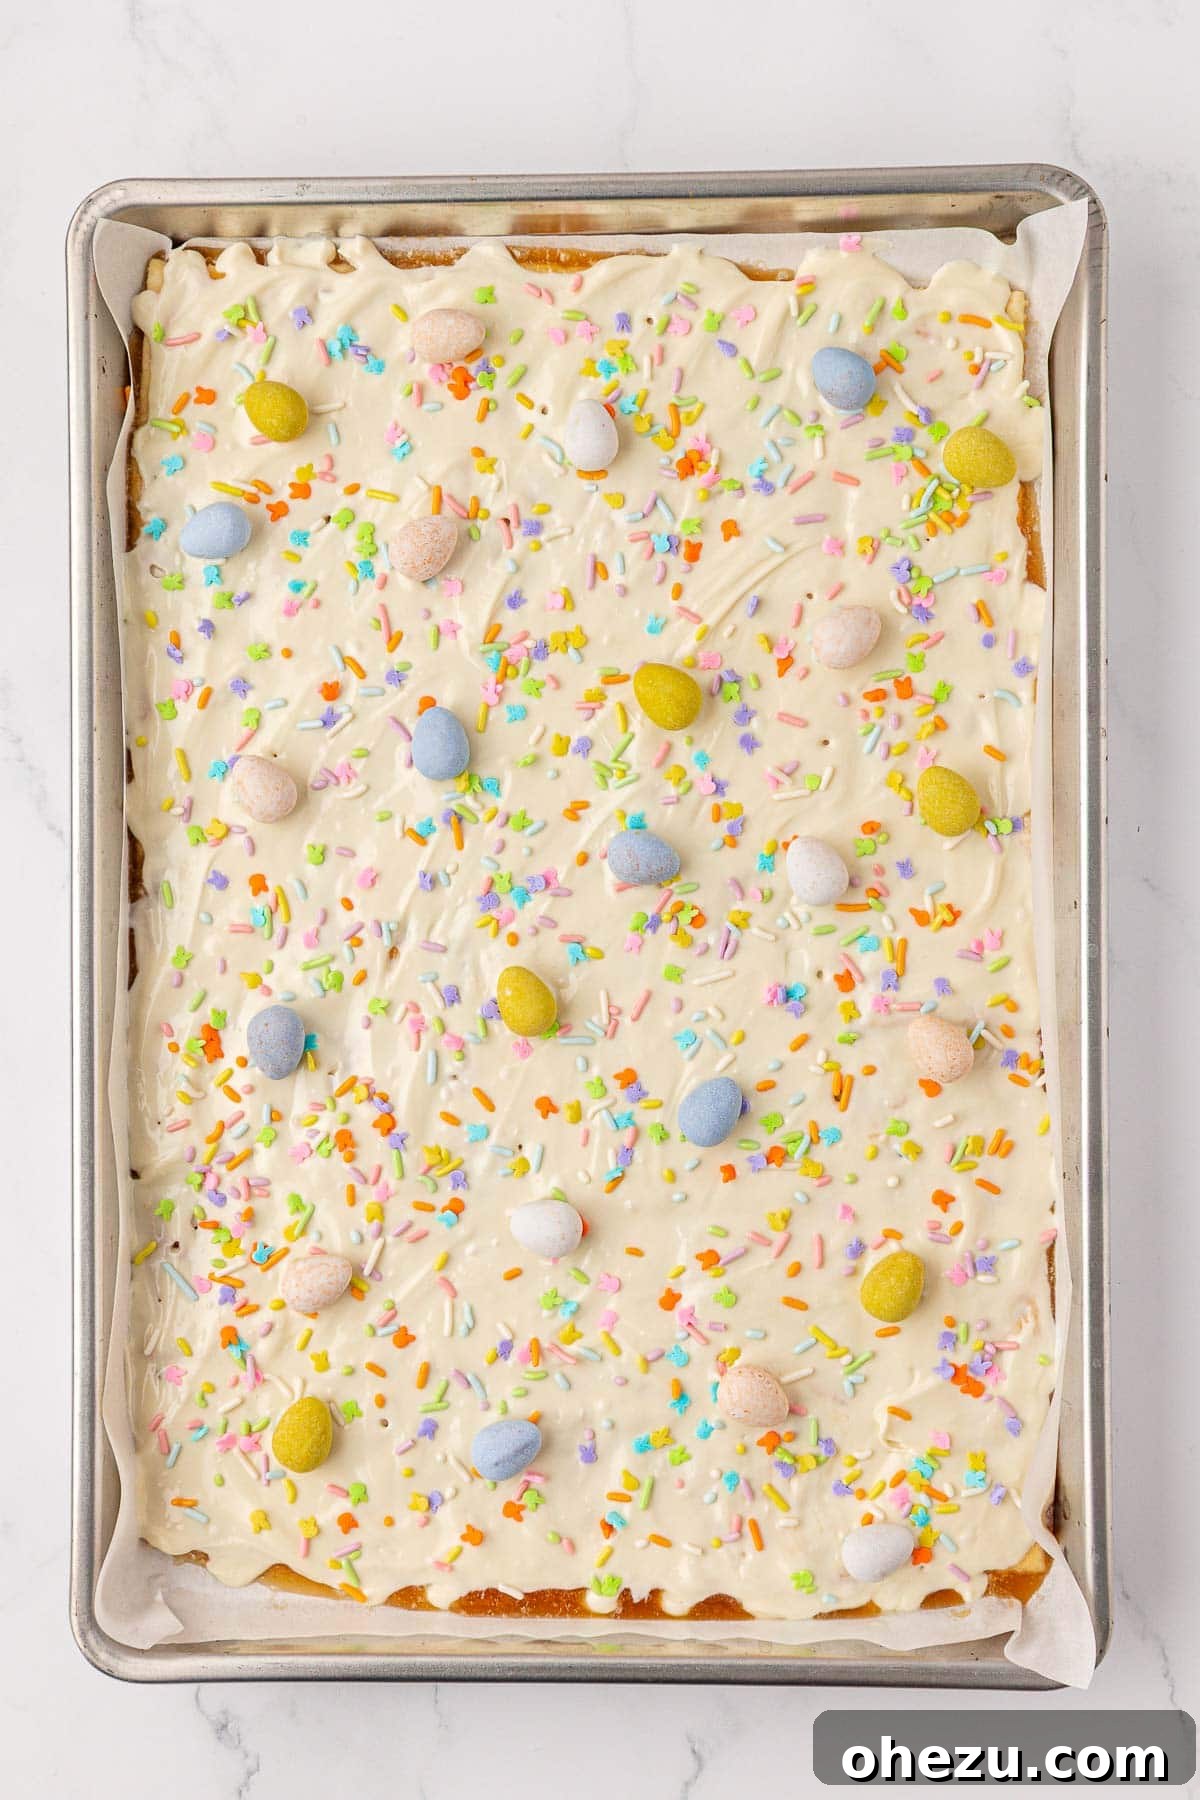
Step 7: Deck with Festive Toppings. Immediately after you have finished spreading the melted chocolate, generously sprinkle your Cadbury Mini Eggs and pastel-colored sprinkles over the entire surface. If necessary, gently press them into the soft chocolate to ensure they adhere firmly before the chocolate begins to set. This step not only adds an extra layer of delicious texture but also creates a vibrant, visually appealing top layer that perfectly encapsulates the joyful and colorful spirit of Easter.
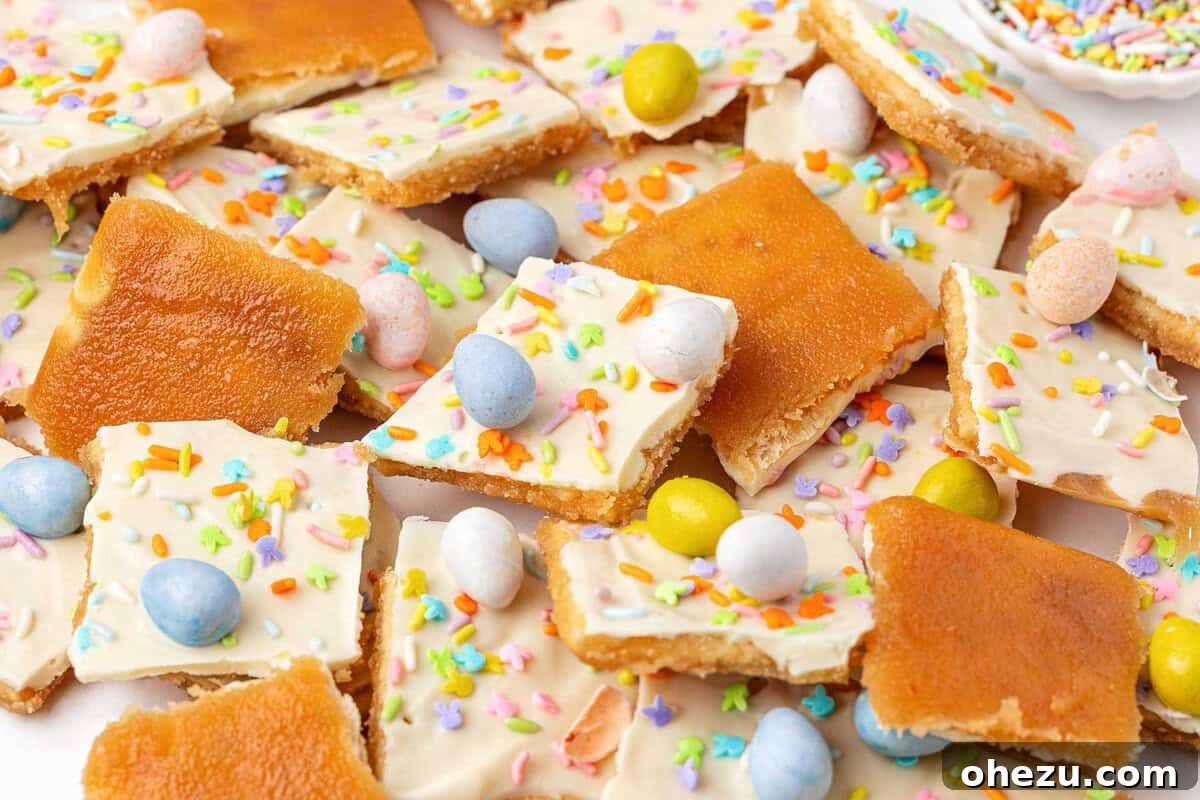
Step 8: Chill, Set, and Serve. To ensure that the toffee and chocolate layers solidify quickly and effectively, transfer the baking sheet to the freezer for a minimum of 30 minutes. Alternatively, you can place it in the refrigerator for 1-2 hours until the entire slab is completely firm to the touch. Once fully set, carefully lift the parchment paper-lined slab of Easter Crack from the baking sheet. You can then effortlessly break it into charmingly irregular pieces using your hands, or if you prefer more uniform servings, score it with a sharp knife before it fully hardens. Now, your homemade, delightful Easter Crack is ready to be savored and shared!

Storing Your Easter Crack for Optimal Freshness
Proper storage is paramount to preserving the delightful crispness, vibrant flavors, and overall deliciousness of your homemade Easter Crack for as long as possible. Once the toffee has fully set and you’ve broken it into individual pieces, transfer them into an airtight container. For best results and to prevent the pieces from sticking together, we highly recommend layering them with sheets of parchment paper. Store this container in the refrigerator, where your Easter Crack will maintain its peak quality and freshness for 1 to 2 weeks. For extended enjoyment, Easter Crack freezes exceptionally well. Place the pieces in a freezer-safe, airtight container – again, layering with parchment paper is advisable – and store it in the freezer for up to 2 months. When you’re ready to indulge, simply remove the desired amount a few minutes before serving to allow it to soften slightly, or enjoy it directly from the freezer for a wonderfully firm and chilly bite!
Delicious Variations and Creative Substitutions to Try
While saltine crackers deliver that iconic salty crunch that defines this recipe, the beauty of this versatile toffee lies in its adaptability. You can effortlessly swap out the base crackers to introduce a myriad of different flavor and texture profiles, allowing for endless customization and new culinary adventures:
- Graham Crackers: If your preference leans towards a sweeter, less salty foundation, graham crackers are an outstanding alternative. They absorb the rich toffee wonderfully, resulting in a dessert that evokes the comforting, nostalgic flavors of traditional s’mores, perfect for a cozy treat.
- Pretzels: For those who crave an intensely salty and even crunchier experience, consider using pretzel snaps or mini pretzel twists as your base. This substitution significantly amplifies the already popular sweet-and-salty dynamic, creating an undeniably addictive snack that’s hard to put down.
- Ritz Crackers: These famously buttery and flaky crackers offer a rich, melt-in-your-mouth quality and delicate texture that complements the sweet toffee beautifully. They result in a more tender and indulgent version of the classic, with a subtle buttery undertone.
- Other Exciting Topping Ideas: Why limit yourself to just Cadbury Mini Eggs and sprinkles? Let your creativity shine! Consider incorporating finely chopped nuts such as pecans, walnuts, or almonds for an added layer of crunch and earthy flavor. Shredded coconut, especially if tinted green with a touch of food coloring, can create a charming “grass” effect. Other colorful candies like M&M’s in spring-themed hues, crushed Oreo cookies, or even a sophisticated drizzle of dark chocolate over the white chocolate can create a stunning marbled effect.
- Chocolate Alternatives: If white chocolate isn’t your preference, or you simply want to explore different flavors, try using milk chocolate chips or dark chocolate chips for a richer, more intense chocolate experience. You can also experiment with flavored candy melts to perfectly match a specific party theme or to introduce unique color combinations.
These simple yet impactful substitutions and additions provide a fantastic opportunity to transform your Easter Crack into a truly personalized treat, perfectly suited for any occasion, palate, or festive celebration!

This Easter Crack recipe is much more than just a fantastic dessert; it’s a delightful activity that encourages bonding and creates cherished memories with loved ones. In my household, my three boys enthusiastically dive into the most enjoyable part – adding all the vibrant and colorful toppings! It’s a simple joy that consistently brings smiles to everyone’s faces, leading to both heartwarming moments and an undeniably delicious treat that the whole family can be proud of.
With its irresistible combination of salty, sweet, and wonderfully crunchy textures, this remarkably easy Easter dessert is undoubtedly destined to become a beloved and anticipated tradition in your family’s annual holiday celebrations. Prepare yourself to effortlessly impress your guests and fully satisfy every sweet tooth with this homemade masterpiece that truly captures the essence of spring and festivity!

More Delightful Dessert Ideas to Explore
If you’ve thoroughly enjoyed the simplicity, vibrant appeal, and sheer deliciousness of making Easter Crack, you’re in for a treat with these additional easy and crowd-pleasing dessert recipes. Perfect for any occasion, they promise to satisfy your sweet cravings and expand your baking repertoire:
- Easter Cookie Bars: Chewy, delightful cookie bars infused with cheerful spring colors and flavors, making them ideal for any festive gathering.
- Ritz Cracker Toffee: An incredibly rich and buttery variation of this classic toffee, using flaky Ritz crackers for an even more indulgent and melt-in-your-mouth experience.
- Graham Cracker Toffee: A distinctly sweeter take on the toffee, offering flavors reminiscent of everyone’s favorite campfire treat, s’mores.
- Leprechaun Crack: A festive and fun green-themed version of this addictive treat, perfectly tailored for St. Patrick’s Day celebrations.
- Pretzel Christmas Crack: The ultimate blend of salty and sweet, this version incorporates pretzels for an extra crunchy texture, making it an undeniable hit for holiday parties.
- Cake Mix Chocolate Chip Cookies: Achieve irresistibly soft and chewy cookies with minimal effort, thanks to a simple cake mix base.
- No Bake Cheesecake Bars: Creamy, refreshing, and incredibly effortless dessert bars that are perfect for warmer weather or when you need a quick, elegant treat.
- Cake Mix Brownies: Whip up rich, fudgy brownies with just a few ingredients and almost no fuss, using a convenient cake mix.
Each of these recipes offers unique flavors, delightful textures, and the promise of being a wonderful addition to your baking collection, whether you’re seeking another quick snack or a truly show-stopping dessert for your next special occasion.


Easter Crack Recipe
Joy Shull
10 minutes
10 minutes
24
Pin Recipe
Rate Recipe
Print Recipe
Ingredients
- 1 sleeve saltine crackers, approximately 35 crackers
- 1 cup unsalted butter
- 1 cup light brown sugar (packed)
- 11 oz white chocolate chips (Ghirardelli or other quality brand)
- Cadbury mini eggs, for topping
- Easter colored sprinkles, for topping
Instructions
-
Preheat oven to 350°F (175°C). Line a large baking sheet with parchment paper and arrange saltine crackers in a single, tight layer.
-
In a medium, heavy-bottomed saucepan, combine butter and brown sugar. Melt over medium-low heat, stirring constantly, until the mixture slowly comes to a rolling boil.
-
Once boiling, continue to boil the toffee mixture for 2-3 minutes, stirring constantly, until it thickens and achieves a rich amber color. Immediately remove from heat.
-
Carefully pour the hot, thickened toffee evenly over the arranged saltine crackers and spread it out gently with a rubber spatula to coat all crackers thoroughly.
-
Bake the toffee-covered saltine crackers in the preheated oven for 4-5 minutes, until the toffee is visibly bubbly and slightly browned around the edges.
-
Remove the pan from the oven and immediately sprinkle the white chocolate chips evenly over the hot toffee layer.
-
Allow the chocolate chips to sit for about 5 minutes to fully melt, then use the back of a spoon to gently spread the melted white chocolate evenly across the crackers.
-
Generously top your Easter Crack with Cadbury mini eggs and pastel-colored sprinkles, pressing lightly to ensure they adhere to the melted chocolate before it sets.
-
Place the baking sheet in the freezer for at least 30 minutes (or refrigerator for 1-2 hours) until the toffee and chocolate are completely firm and set.
-
Once fully set, break the Easter Crack into irregular pieces using your hands. Store any leftover Easter crack in an airtight container in the refrigerator or freezer.
Nutrition Information (per serving)
Carbohydrates: 21g,
Protein: 1g,
Fat: 13g,
Saturated Fat: 8g,
Polyunsaturated Fat: 0.5g,
Monounsaturated Fat: 3g,
Trans Fat: 0.3g,
Cholesterol: 24mg,
Sodium: 93mg,
Potassium: 54mg,
Fiber: 0.1g,
Sugar: 19g,
Vitamin A: 253IU,
Vitamin C: 0.2mg,
Calcium: 46mg,
Iron: 0.2mg
Like this recipe? Rate and comment below!